Australien | Sydney
11.11.2012 | New South Wales - Sydney 1: Von oben
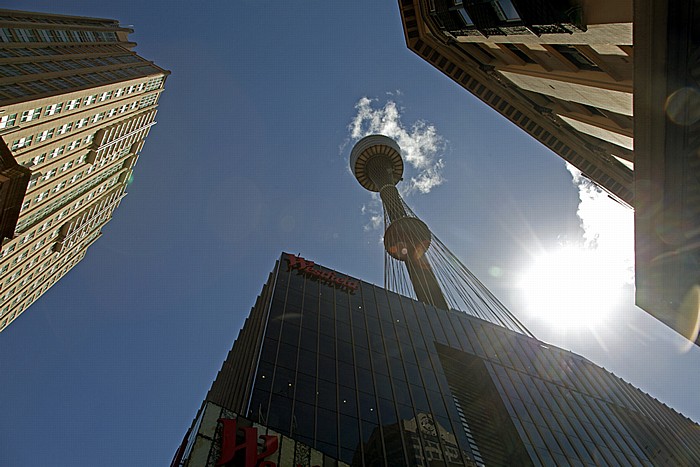
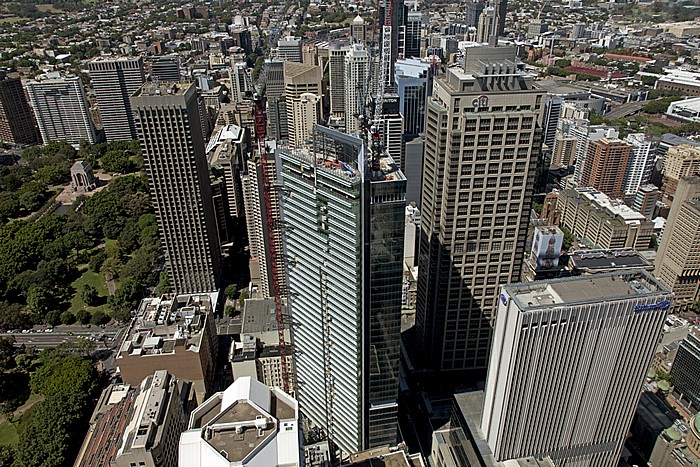
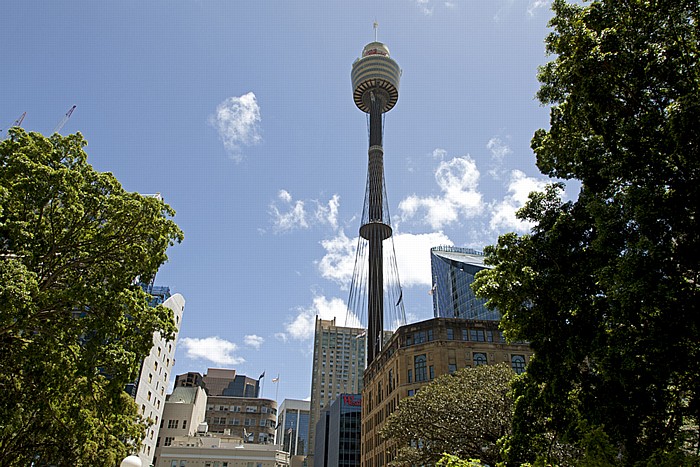
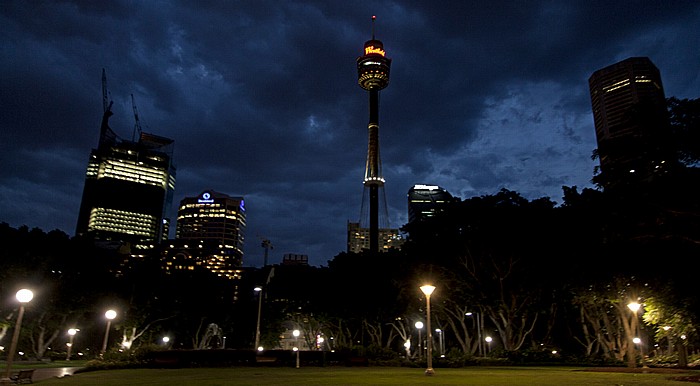
Central Business District (CBD): Sydney Tower
11.11.2012 | New South Wales - Sydney 1: Von oben
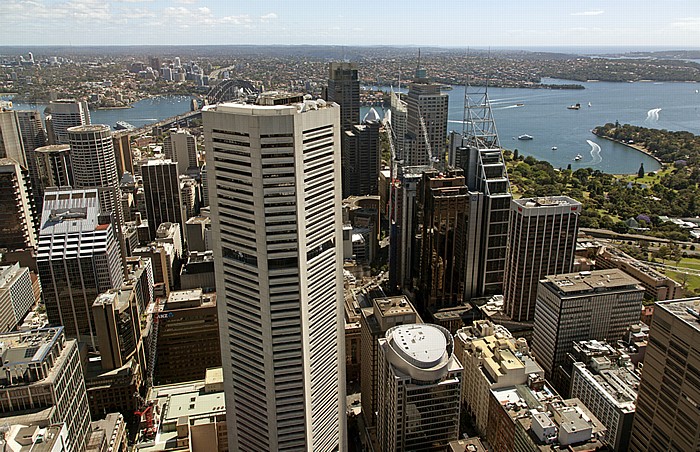
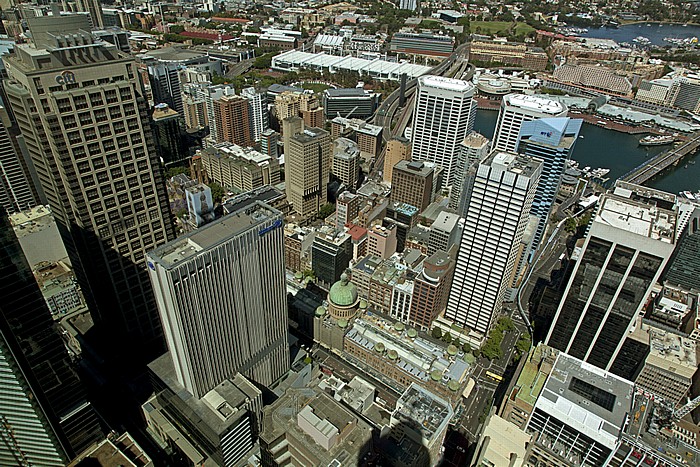
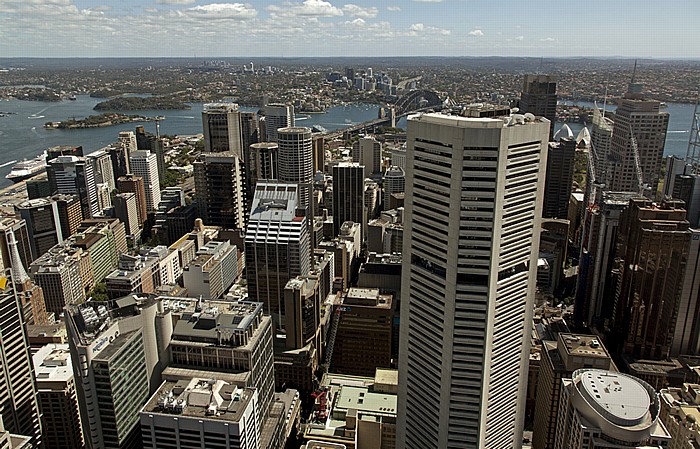
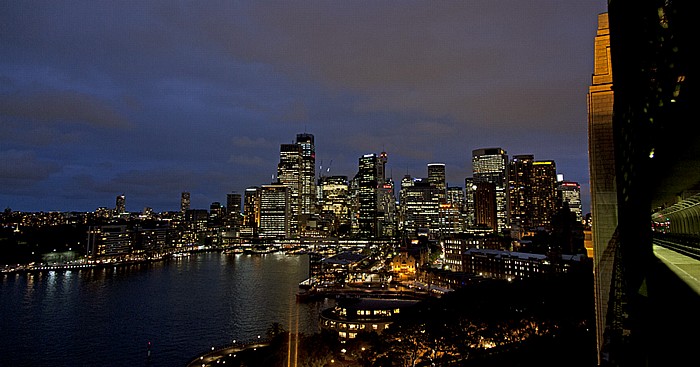
Blick vom Sydney Tower: Central Business District (CBD), Port Jackson (Sydney Harbour), North Shore
In der Bildmitte das MLC Centre, darüber die Sydney Harbour Bridge. Rechts die Royal Botanic Gardens.
| Central Business District | MLC Centre | North Shore | Port Jackson | Royal Botanic Gardens | Sydney Harbour Bridge | Sydney Tower |
11.11.2012 | New South Wales - Sydney 1: Von oben
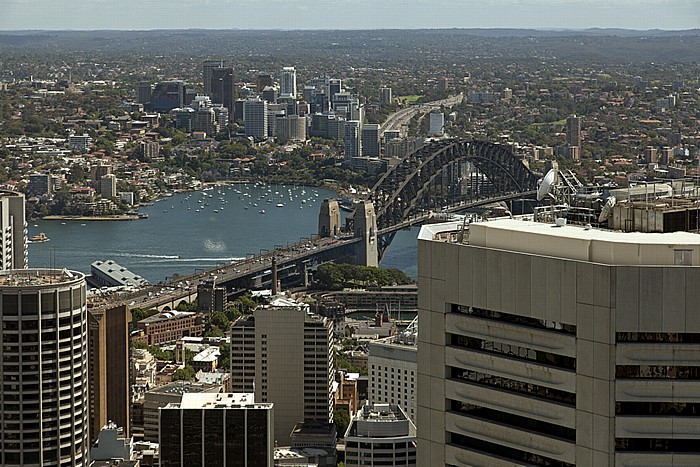
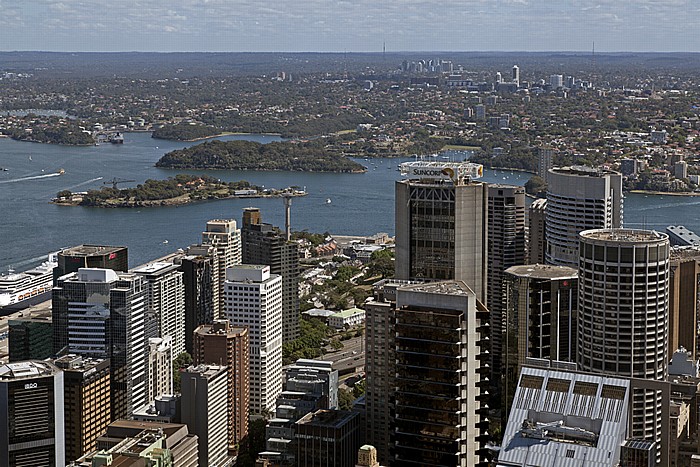
Blick vom Sydney Tower: Central Business District (CBD), Port Jackson (Sydney Harbour), North Shore
In der Bildmitte die Sydney Harbour Bridge, links davon die Lavender Bay und North Sydney Council in North Shore. Rechts das MLC Centre. Links der Australia Square Tower.
| Australia Square Tower | Central Business District | Lavender Bay | MLC Centre | North Shore | North Sydney Council | Port Jackson | Sydney Harbour Bridge | Sydney Tower |
11.11.2012 | New South Wales - Sydney 1: Von oben
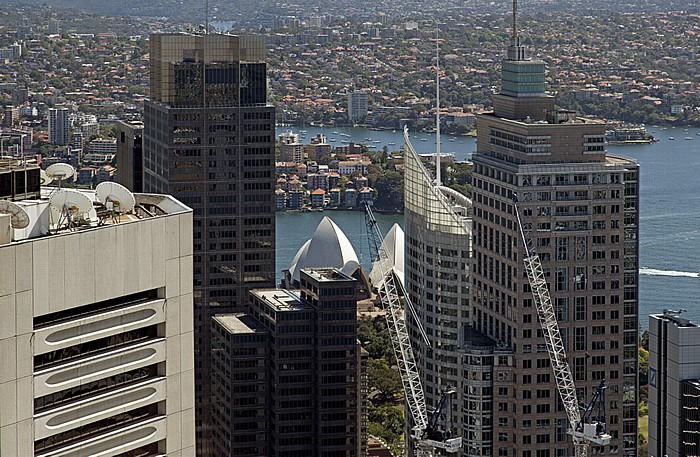
Blick vom Sydney Tower: Central Business District (CBD), Port Jackson (Sydney Harbour), North Shore
In der Bildmitte das Dach des Sydney Opera House, links davon der Governor Phillip Tower und Governor Macquarie Tower (vorne), rechts davon Aurora Place (RBS Tower) und Chifley Tower (vorne). Links das MLC Centre.
| Aurora Place | Central Business District | Chifley Tower | Governor Macquarie Tower | Governor Phillip Tower | MLC Centre | North Shore | Port Jackson | Sydney Opera House | Sydney Tower |

11.11.2012 | New South Wales - Sydney 1: Von oben
Blick vom Sydney Tower: Central Business District (CBD)
Links das MLC Centre, rechts davon das BNP Paribas Centre. Rechts oben The Domain. Rechts unten die St James' Church.
| BNP Paribas Centre | Central Business District | MLC Centre | St James' Church | Sydney Tower | The Domain |
11.11.2012 | New South Wales - Sydney 1: Von oben
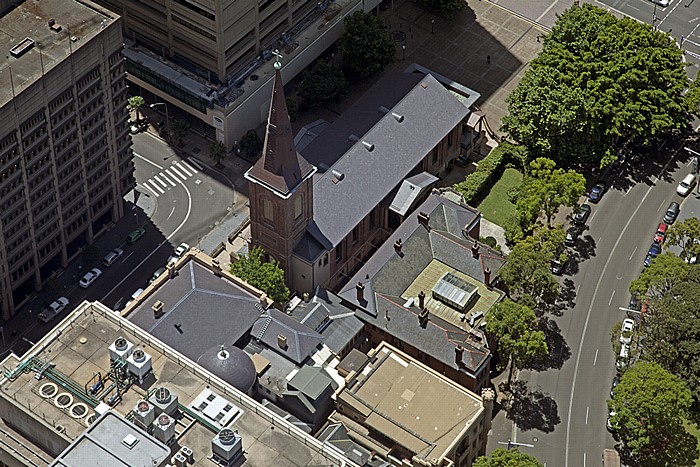
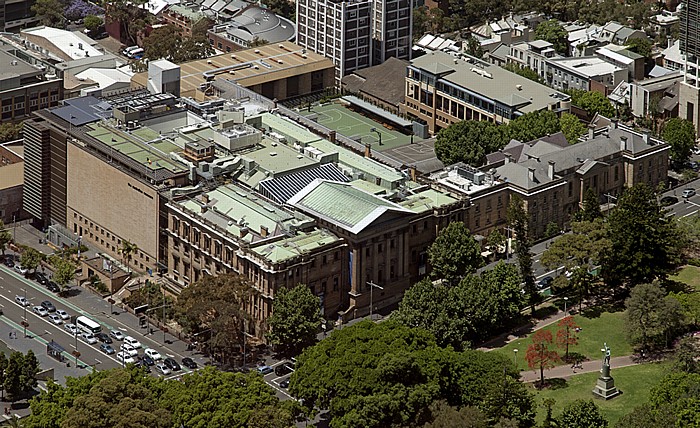
Blick vom Sydney Tower: Central Business District (CBD) - St James' Church
Unterhalb der Kirche die Dächer des Old Supreme Court Building.
| Central Business District | Old Supreme Court Building | St James' Church | Sydney Tower |
11.11.2012 | New South Wales - Sydney 1: Von oben
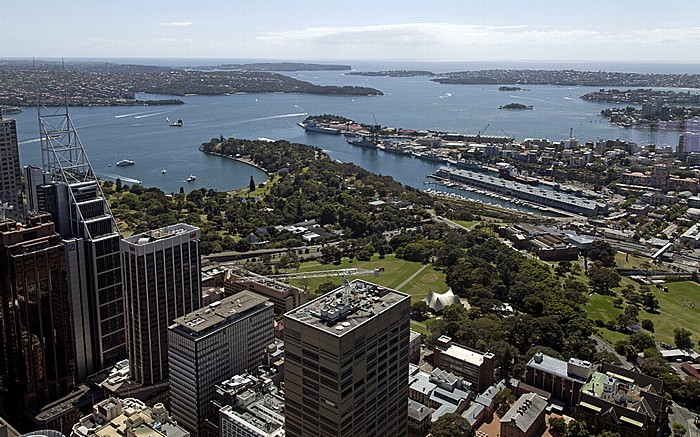
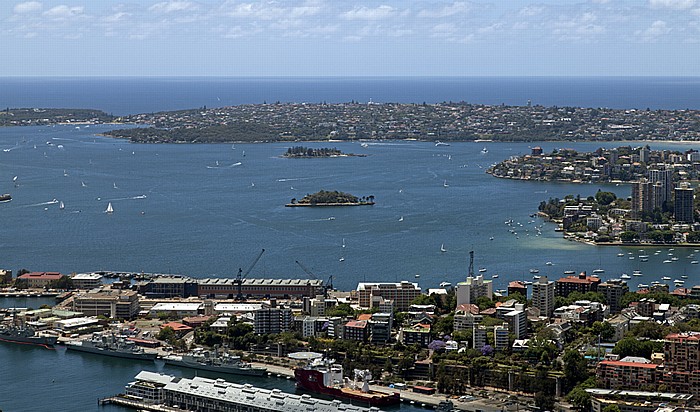
Blick vom Sydney Tower: Central Business District (CBD), Port Jackson (Sydney Harbour), North Shore, Pazifischer Ozean
In der Bildmitte (v.l.) Farm Cove, Royal Botanic Gardens, Woolloomooloo Bay (mit der Finger Wharf), Garden Island (mit Marinestützpunkt), Elizabeth Bay. Rechts unten The Domain. Links das Deutsche Bank Place. Oben die South Head Peninsula.
| Central Business District | Deutsche Bank Place | Elizabeth Bay | Farm Cove | Finger Wharf | Garden Island | North Shore | Port Jackson | Royal Botanic Gardens | South Head Peninsula | Sydney Tower | The Domain | Woolloomooloo Bay |
11.11.2012 | New South Wales - Sydney 1: Von oben
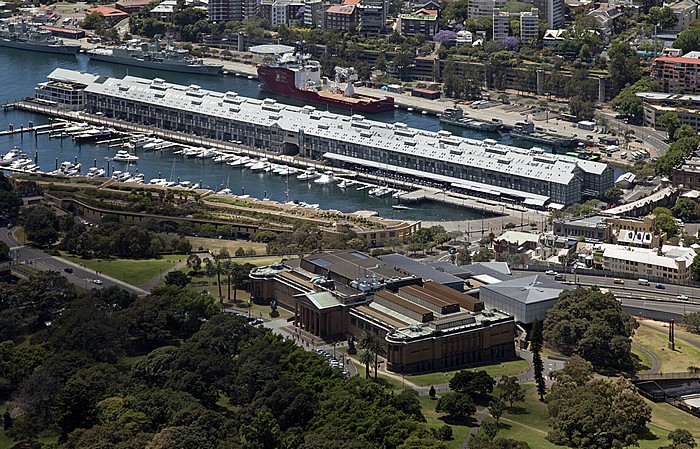
Blick vom Sydney Tower: Woolloomooloo Bay (mit der Finger Wharf)
Oben Garden Island (mit Marinestützpunkt). Unten The Domain mit der Art Gallery of New South Wales.
| Art Gallery of New South Wales | Finger Wharf | Garden Island | Sydney Tower | The Domain | Woolloomooloo Bay |
11.11.2012 | New South Wales - Sydney 1: Von oben
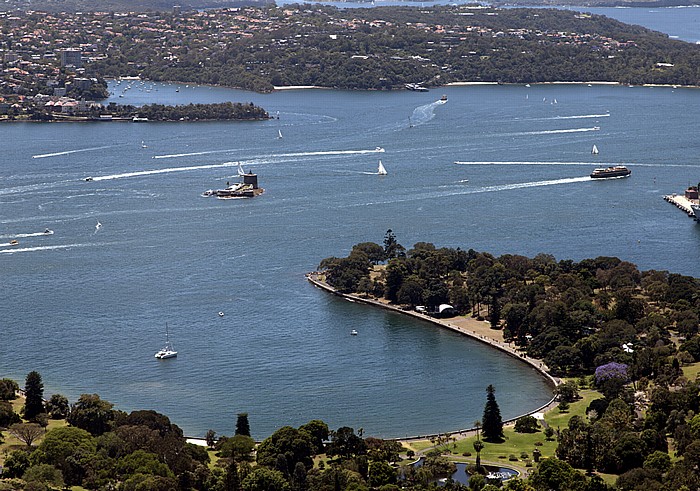
Blick vom Sydney Tower: Port Jackson (Sydney Harbour)
Unten Farm Cove und die Royal Botanic Gardens. Links von der Bildmitte Fort Denison (mit einem Martello-Turm), darüber North Shore.
| Farm Cove | Fort Denison | North Shore | Port Jackson | Royal Botanic Gardens | Sydney Tower |
11.11.2012 | New South Wales - Sydney 1: Von oben
Blick vom Sydney Tower: Port Jackson (Sydney Harbour)
Unten Garden Island (mit Marinestützpunkt) und Elizabeth Bay, darüber Clark Island und Shark Island. Oben Vaucluse (South Head Peninsula) und der Pazifische Ozean.
| Clark Island | Elizabeth Bay | Garden Island | Port Jackson | Shark Island | South Head Peninsula | Sydney Tower | Vaucluse |
11.11.2012 | New South Wales - Sydney 1: Von oben
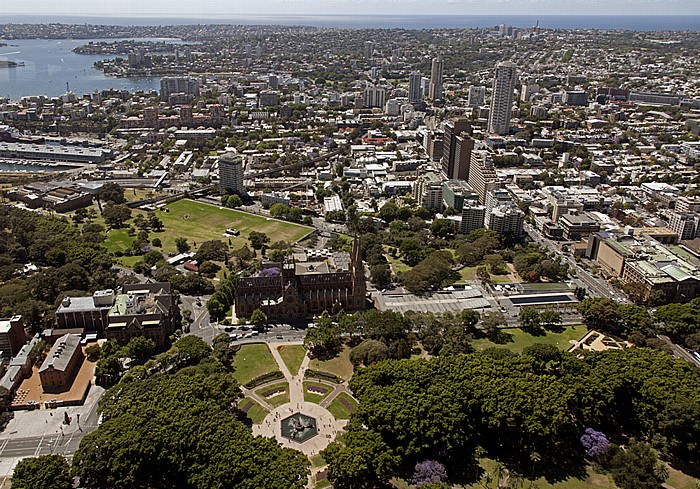
Blick vom Sydney Tower: Central Business District (CBD), Eastern Suburbs, Pazifischer Ozean
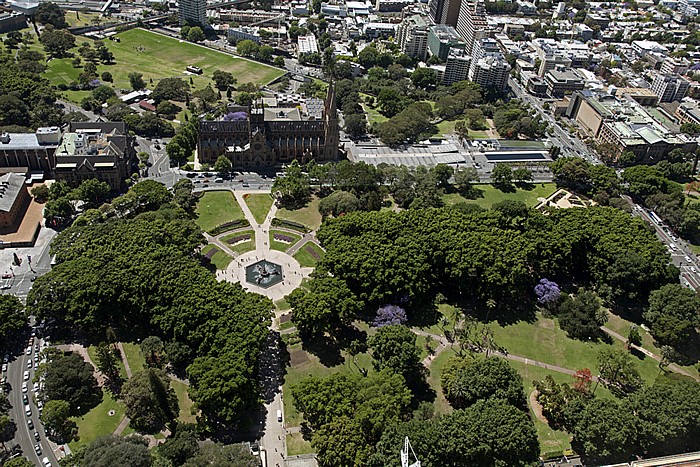
Unten der Hyde Park und die Saint Mary's Cathedral, links davon Queen's Square mit den Hyde Park Barracks und dem Land Titles Office. Oberhalb der Kathedrale The Domain (links) und der Cook and Phillip Park, dahinter Woolloomooloo. Links oben Port Jackson (Sydney Harbour).
| Central Business District | Cook and Phillip Park | Eastern Suburbs | Hyde Park | Hyde Park Barracks | Land Titles Office | Port Jackson | Queen's Square | Saint Mary's Cathedral | Sydney Tower | The Domain | Woolloomooloo |
11.11.2012 | New South Wales - Sydney 1: Von oben
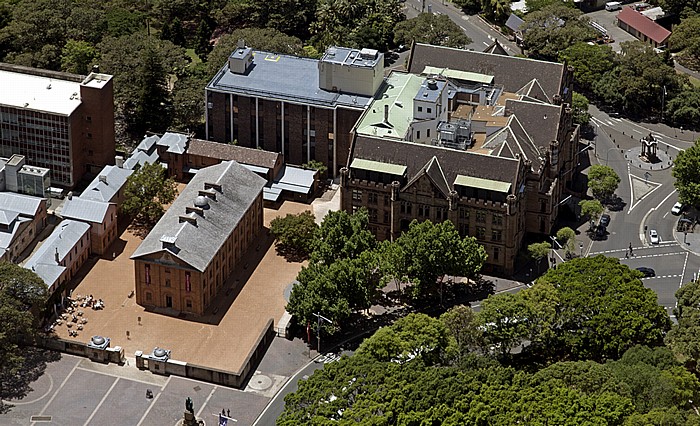
Blick vom Sydney Tower: Central Business District (CBD)
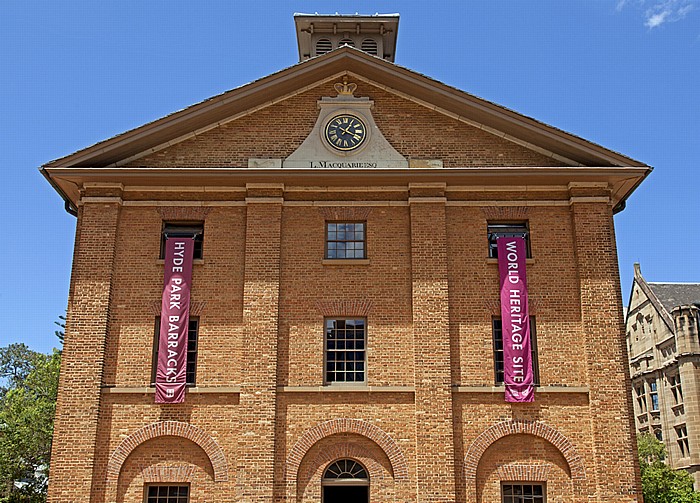
V.l.: Queen's Square, Hyde Park Barracks und Land Titles Office.
| Central Business District | Hyde Park Barracks | Land Titles Office | Queen's Square | Sydney Tower |
11.11.2012 | New South Wales - Sydney 1: Von oben
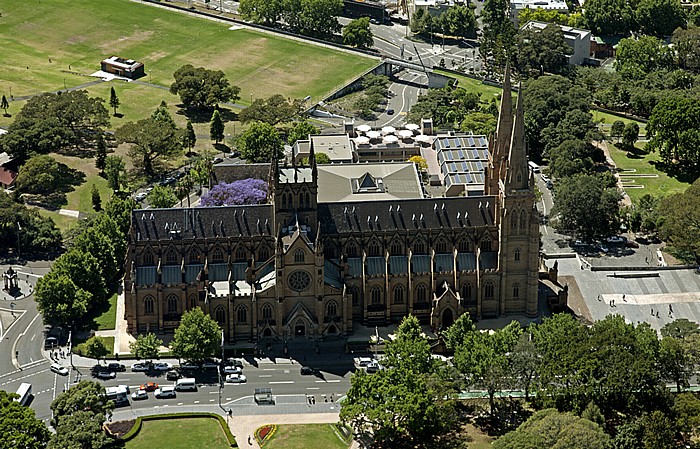
Blick vom Sydney Tower: Saint Mary's Cathedral
Unten der Hyde Park, oben The Domain (links) und der Cook and Phillip Park.
| Cook and Phillip Park | Hyde Park | Saint Mary's Cathedral | Sydney Tower | The Domain |
11.11.2012 | New South Wales - Sydney 1: Von oben
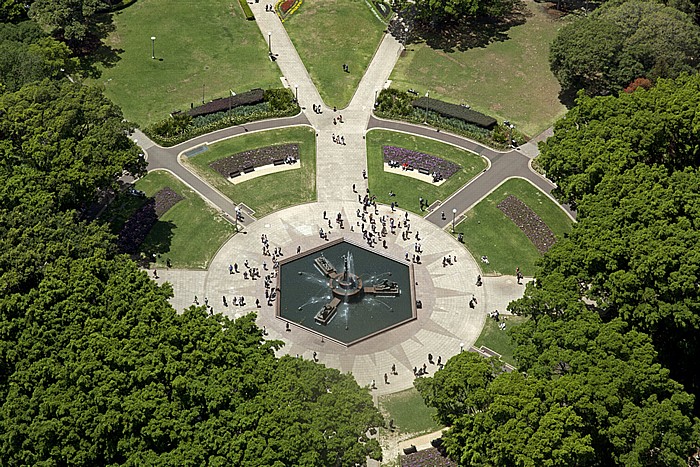
Blick vom Sydney Tower: Hyde Park
Oben Saint Mary's Cathedral, links davon Queen's Square mit den Hyde Park Barracks und dem Land Titles Office. Oberhalb der Kathedrale The Domain (links) und der Cook and Phillip Park.
| Cook and Phillip Park | Hyde Park | Hyde Park Barracks | Land Titles Office | Queen's Square | Saint Mary's Cathedral | Sydney Tower | The Domain |
11.11.2012 | New South Wales - Sydney 1: Von oben
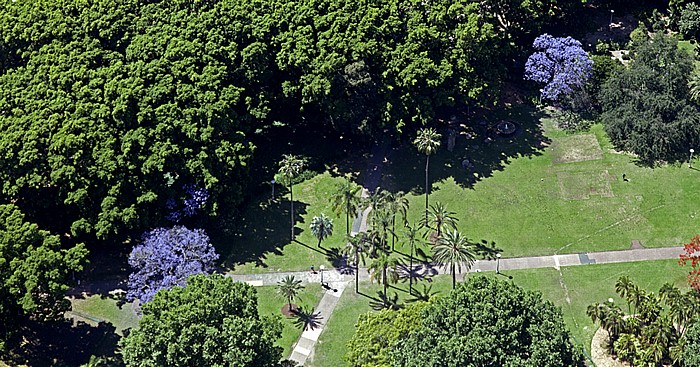
Blick vom Sydney Tower: Hyde Park
| Hyde Park | Sydney Tower |
11.11.2012 | New South Wales - Sydney 1: Von oben
Blick vom Sydney Tower: Hyde Park
| Hyde Park | Sydney Tower |
11.11.2012 | New South Wales - Sydney 1: Von oben
Blick vom Sydney Tower: Hyde Park und Australian Museum
| Australian Museum | Hyde Park | Sydney Tower |
11.11.2012 | New South Wales - Sydney 1: Von oben
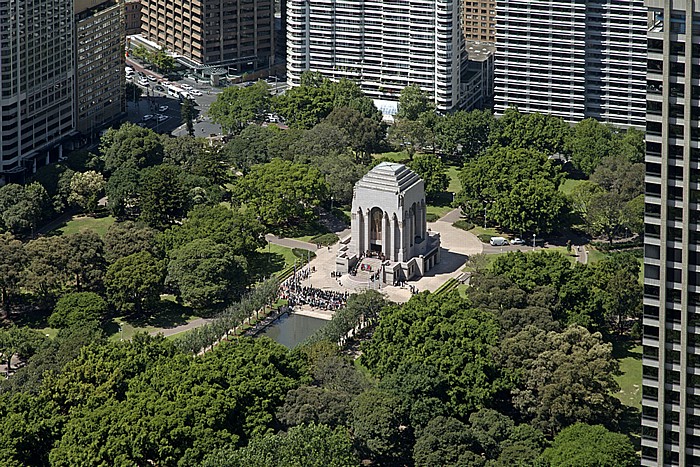
Blick vom Sydney Tower: Hyde Park mit dem ANZAC War Memorial
| ANZAC War Memorial | Hyde Park | Sydney Tower |
11.11.2012 | New South Wales - Sydney 1: Von oben
Blick vom Sydney Tower: Central Business District (CBD) - Hyde Park mit dem ANZAC War Memorial
Australian Museum
11.11.2012 | New South Wales - Sydney 1: Von oben
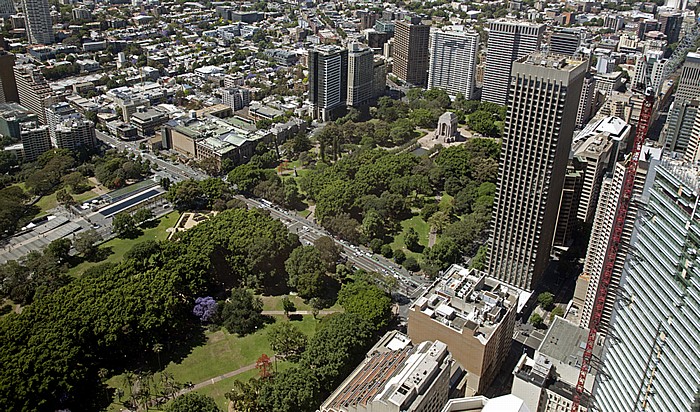
Blick vom Sydney Tower: Central Business District (CBD), Eastern Suburbs, Pazifischer Ozean
Unten rechts das Australian Museum und der Hyde Park.
| Australian Museum | Central Business District | Eastern Suburbs | Hyde Park | Sydney Tower |
11.11.2012 | New South Wales - Sydney 1: Von oben
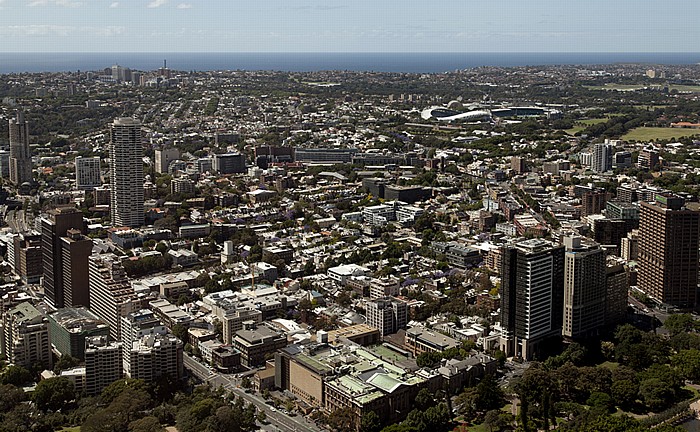
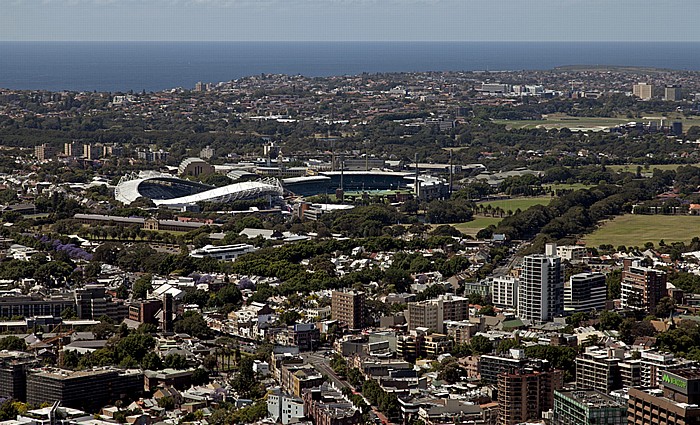
Blick vom Sydney Tower: Eastern Suburbs, Pazifischer Ozean
In der Bildmitte der Moore Park mit Sydney Football Stadium (Allianz Stadium, links) und Sydney Cricket Ground.
| Eastern Suburbs | Moore Park | Sydney Cricket Ground | Sydney Football Stadium | Sydney Tower |
11.11.2012 | New South Wales - Sydney 1: Von oben
Blick vom Sydney Tower: Central Business District (CBD)
Links der Hyde Park mit dem ANZAC War Memorial. Unten rechts das Citigroup Centre und das Hilton Sydney.
| ANZAC War Memorial | Central Business District | Citigroup Centre | Hilton Sydney | Hyde Park | Sydney Tower |
11.11.2012 | New South Wales - Sydney 1: Von oben
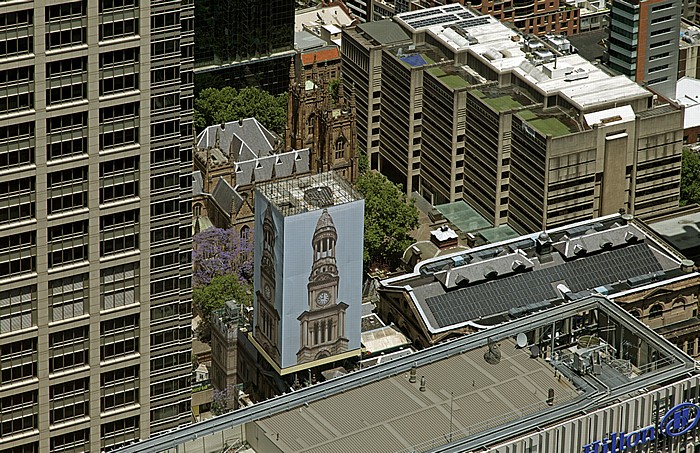
Blick vom Sydney Tower: Central Business District (CBD)
Sydney Town Hall und St Andrew's Cathedral. Rechts die St Andrew's Cathedral School. Unten das Hilton Sydney.
| Central Business District | Hilton Sydney | St Andrew's Cathedral | St Andrew's Cathedral School | Sydney Tower | Sydney Town Hall |
11.11.2012 | New South Wales - Sydney 1: Von oben
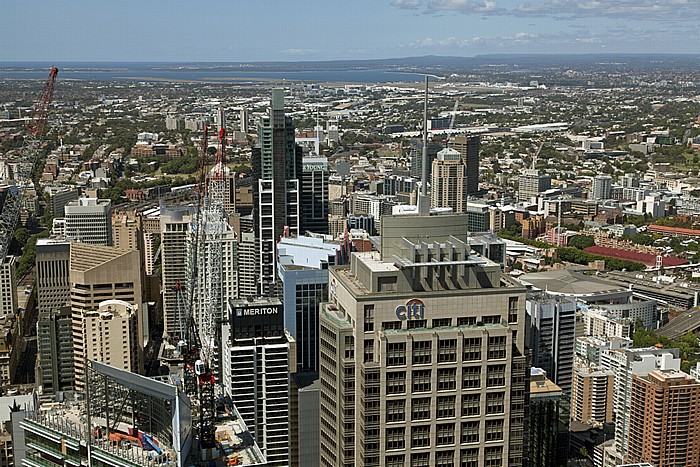
Blick vom Sydney Tower: Central Business District (CBD), Eastern Suburbs, Botany Bay
Vorne das Citigroup Centre. Oben in der Bildmitte der Kingsford Smith International Airport.
| Botany Bay | Central Business District | Citigroup Centre | Eastern Suburbs | Kingsford Smith International Airport | Sydney Tower |
11.11.2012 | New South Wales - Sydney 1: Von oben
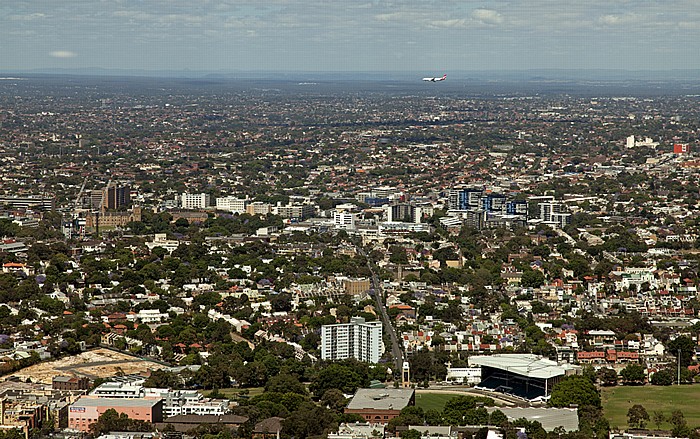
Blick vom Sydney Tower: Inner West
| Inner West | Sydney Tower |
11.11.2012 | New South Wales - Sydney 1: Von oben
Blick vom Sydney Tower: Central Business District (CBD)
Unten (v.l.) Citigroup Centre, Hilton Sydney, Queen Victoria Building, St Martins Tower, Market Street (mit der Metro Monorail), National Mutual Centre. Oben rechts Darling Harbour mit der Cockle Bay, darüber die Johnstons Bay.
| Central Business District | Citigroup Centre | Cockle Bay | Darling Harbour | Hilton Sydney | Johnstons Bay | Market Street | Metro Monorail | National Mutual Centre | Queen Victoria Building | St Martins Tower | Sydney Tower |
11.11.2012 | New South Wales - Sydney 1: Von oben
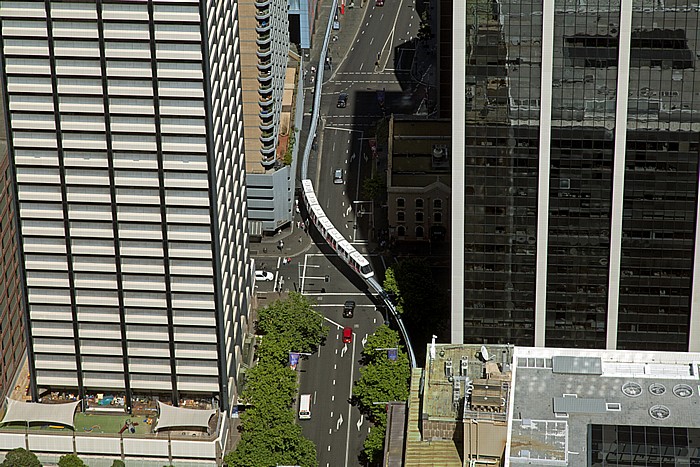
Blick vom Sydney Tower: Central Business District (CBD) - Market Street mit der Metro Monorail
Links der St Martins Tower, rechts das National Mutual Centre.
| Central Business District | Market Street | Metro Monorail | National Mutual Centre | St Martins Tower | Sydney Tower |
11.11.2012 | New South Wales - Sydney 1: Von oben
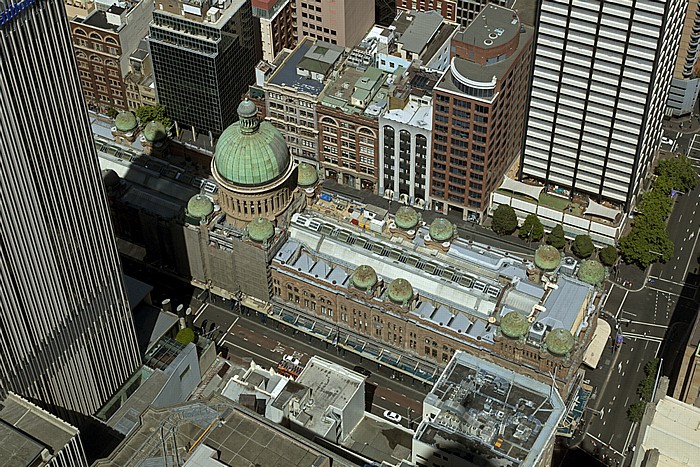
Blick vom Sydney Tower: Central Business District (CBD) - Queen Victoria Building
Links das Hilton Sydney, rechts die Market Street.
| Central Business District | Hilton Sydney | Market Street | Queen Victoria Building | Sydney Tower |
11.11.2012 | New South Wales - Sydney 1: Von oben
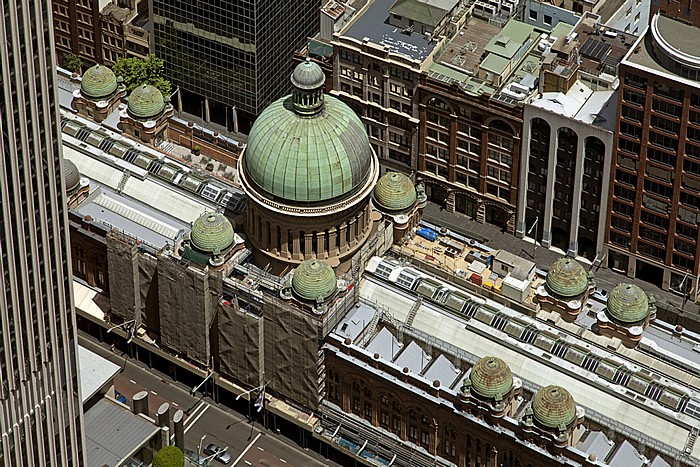
Blick vom Sydney Tower: Central Business District (CBD) - Queen Victoria Building
| Central Business District | Queen Victoria Building | Sydney Tower |
11.11.2012 | New South Wales - Sydney 1: Von oben
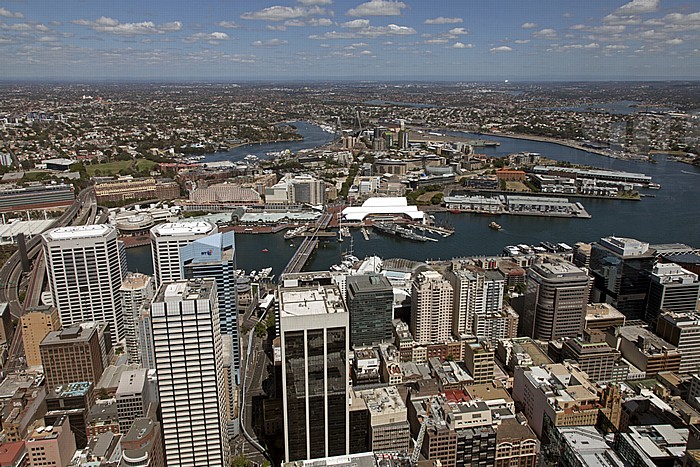
Blick vom Sydney Tower: Central Business District (CBD), Darling Harbour, Port Jackson (Sydney Harbour)
Links unten St Martins Tower, Market Street (mit der Metro Monorail), National Mutual Centre. In der Bildmitte (v.l.) der Western Distributor Freeway (mit dem Turm der Tunnelbelüftung), Cockle Bay, Pyrmont Bridge, darüber Pyrmont.
| Central Business District | Cockle Bay | Darling Harbour | Market Street | Metro Monorail | National Mutual Centre | Port Jackson | Pyrmont | Pyrmont Bridge | St Martins Tower | Sydney Tower | Western Distributor Freeway |
11.11.2012 | New South Wales - Sydney 1: Von oben
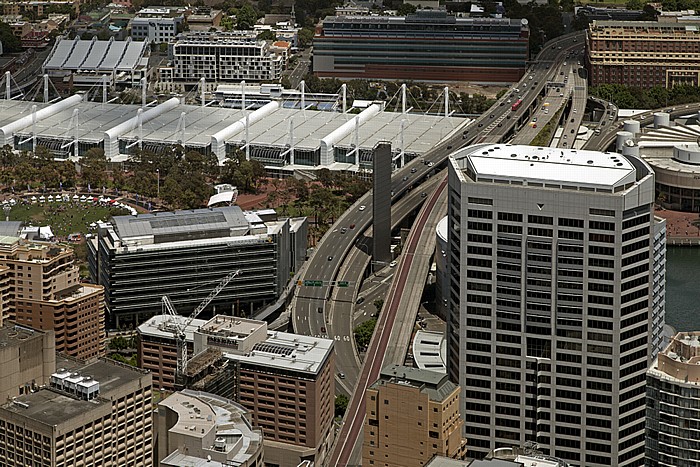
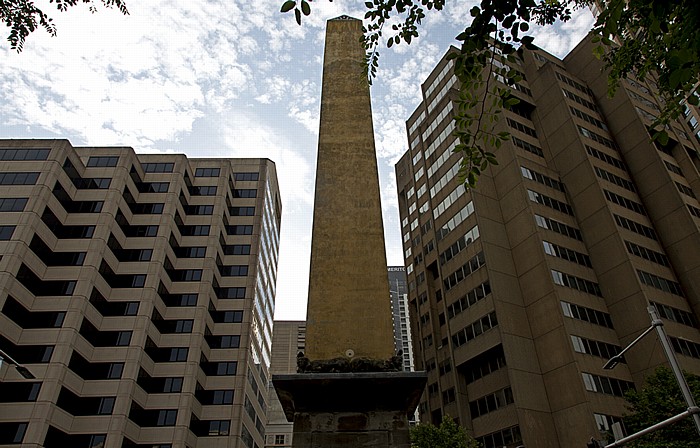
Blick vom Sydney Tower: Central Business District (CBD)
Western Distributor Freeway (mit dem Turm der Tunnelbelüftung), links oben das Sydney Convention and Exhibition Centre.
| Central Business District | Sydney Convention and Exhibition Centre | Sydney Tower | Western Distributor Freeway |
11.11.2012 | New South Wales - Sydney 1: Von oben
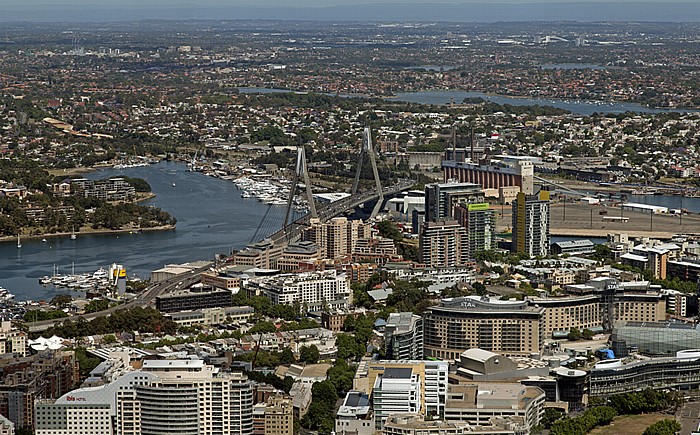
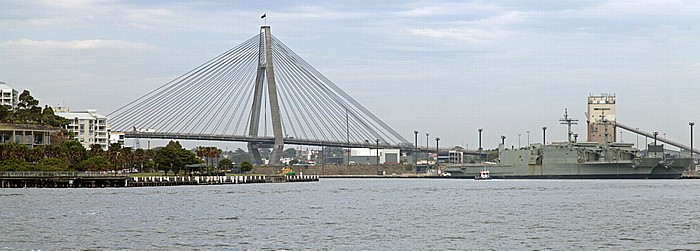
Blick vom Sydney Tower: Pyrmont
In der Bildmitte die ANZAC Bridge über der Johnstons Bay zwischen Pyrmont und Glebe Island.
| ANZAC Bridge | Glebe Island | Johnstons Bay | Pyrmont | Sydney Tower |
11.11.2012 | New South Wales - Sydney 1: Von oben
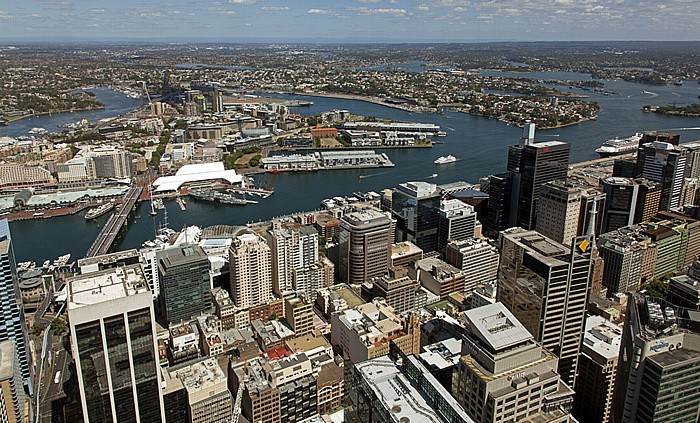
Blick vom Sydney Tower: Central Business District (CBD), Port Jackson (Sydney Harbour) - Darling Harbour mit Cockle Bay
Links die Pyrmont Bridge, darüber Pyrmont. Oben die Northern Suburbs.
| Central Business District | Cockle Bay | Darling Harbour | Northern Suburbs | Port Jackson | Pyrmont | Pyrmont Bridge | Sydney Tower |
11.11.2012 | New South Wales - Sydney 1: Von oben
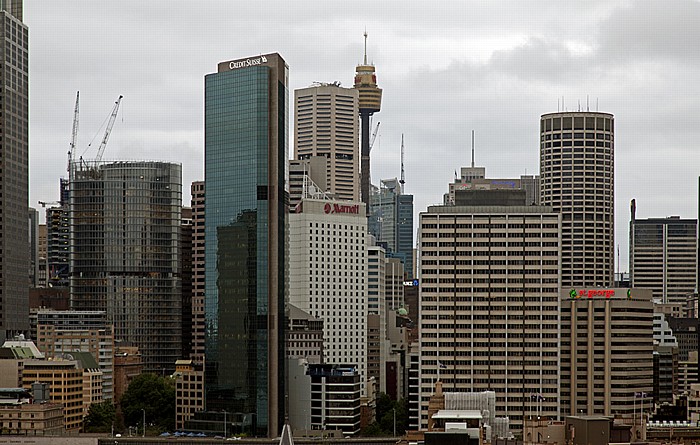
Blick vom Sydney Tower: Central Business District (CBD)
11.11.2012 | New South Wales - Sydney 1: Von oben
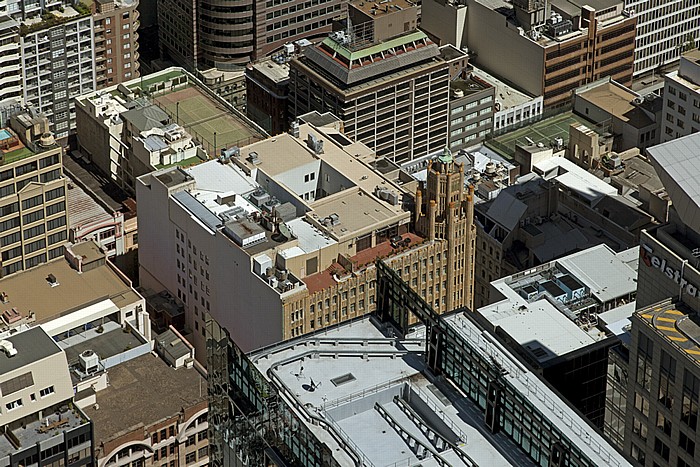
Blick vom Sydney Tower: Central Business District (CBD)
In der Bildmitte der AWA Tower (mit einem in Stahlfachwerkbauweise ausgeführter Sendeturm auf dem Dach). Links unten der Commsec Tower.
| AWA Tower | Central Business District | Commsec Tower | Sydney Tower |
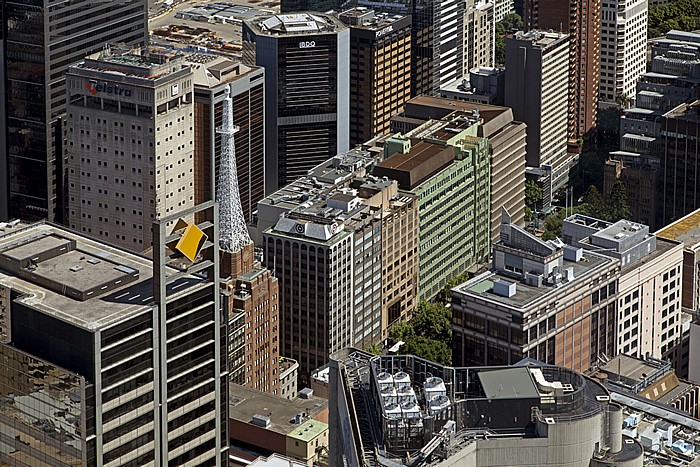
11.11.2012 | New South Wales - Sydney 1: Von oben
Blick vom Sydney Tower: Central Business District (CBD), Port Jackson (Sydney Harbour), Northern Suburbs
Links oben Goat Island.
| Central Business District | Goat Island | Northern Suburbs | Port Jackson | Sydney Tower |
11.11.2012 | New South Wales - Sydney 1: Von oben
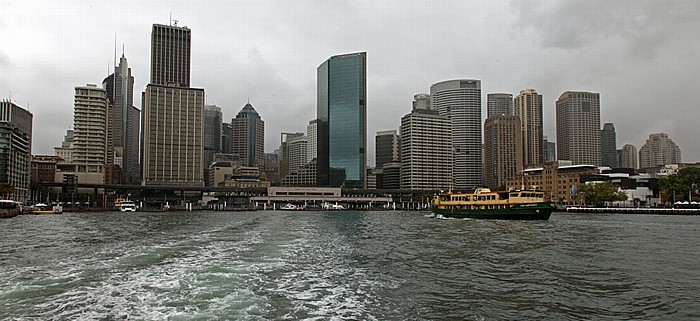
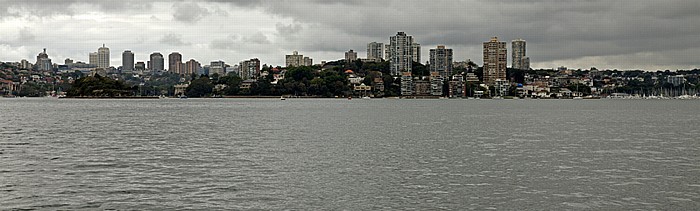
Blick vom Sydney Tower: Central Business District (CBD), Port Jackson (Sydney Harbour), North Shore
Rechts das MLC Centre, darüber die Sydney Harbour Bridge.
| Central Business District | MLC Centre | North Shore | Port Jackson | Sydney Harbour Bridge | Sydney Tower |
11.11.2012 | New South Wales - Sydney 1: Von oben
Central Business District (CBD): Sydney Tower
01.12.2012 | New South Wales - Sydney 15: Olympic Park
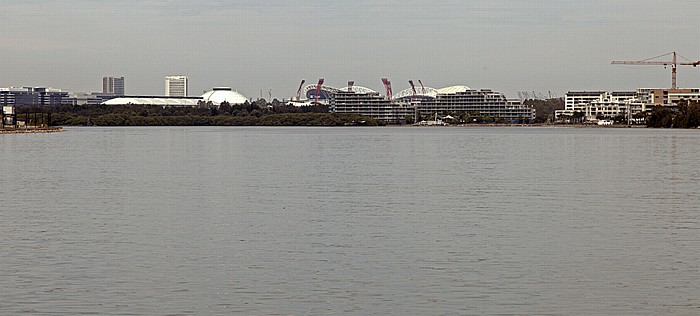
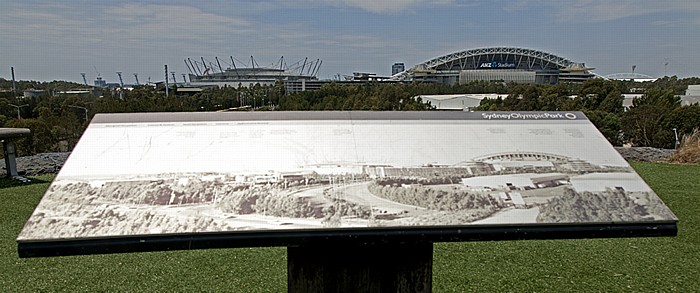
Port Jackson (Parramatta River): Homebush Bay mit dem Sydney Olympic Park
In der Bildmitte das Olympiastadion (ANZ Stadium), links davon der Sydney Showground mit The Dome (The Dome and Exhibition Complex).
| ANZ Stadium | Homebush Bay | Parramatta River | Port Jackson | Sydney Olympic Park | The Dome |
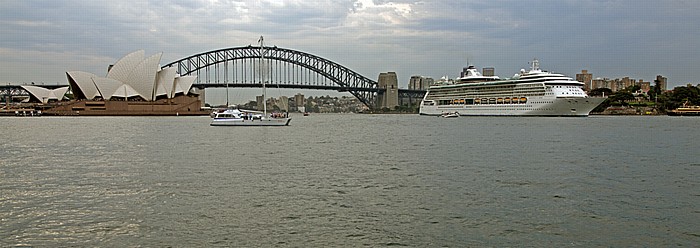
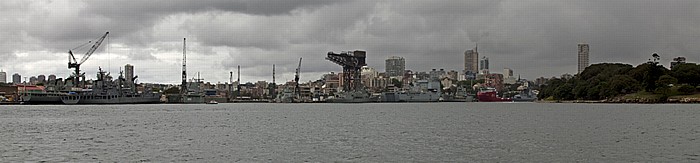
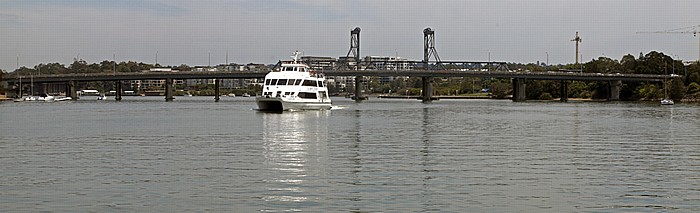
01.12.2012 | New South Wales - Sydney 12: Port Jackson (Sydney Harbour)
Port Jackson (Parramatta River): Homebush Bay mit dem Sydney Olympic Park
In der Bildmitte das Olympiastadion (ANZ Stadium), links davon der Sydney Showground mit The Dome (The Dome and Exhibition Complex).
| ANZ Stadium | Homebush Bay | Parramatta River | Port Jackson | Sydney Olympic Park | The Dome |
01.12.2012 | New South Wales - Sydney 15: Olympic Park
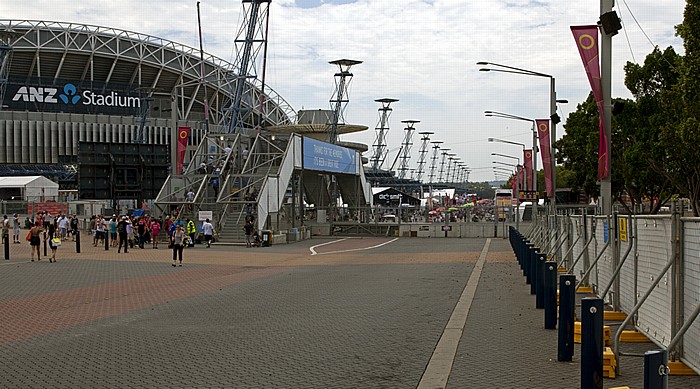
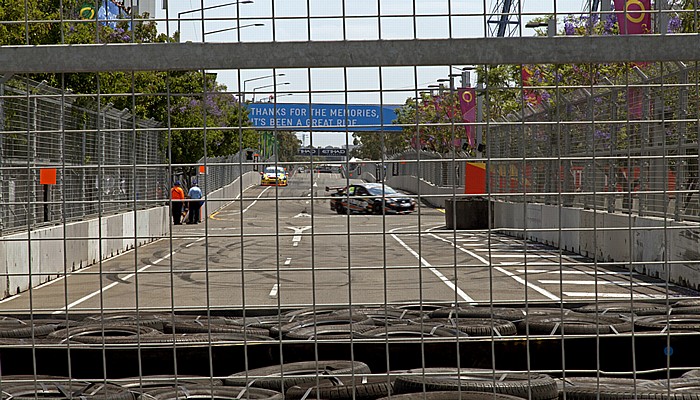
Sydney Olympic Park: Olympiastadion (ANZ Stadium) und Homebush Street Circuit (Sydney 500)
| ANZ Stadium | Homebush Street Circuit | Sydney Olympic Park |

01.12.2012 | New South Wales - Sydney 15: Olympic Park
Sydney Olympic Park: Olympiastadion (ANZ Stadium)
01.12.2012 | New South Wales - Sydney 15: Olympic Park
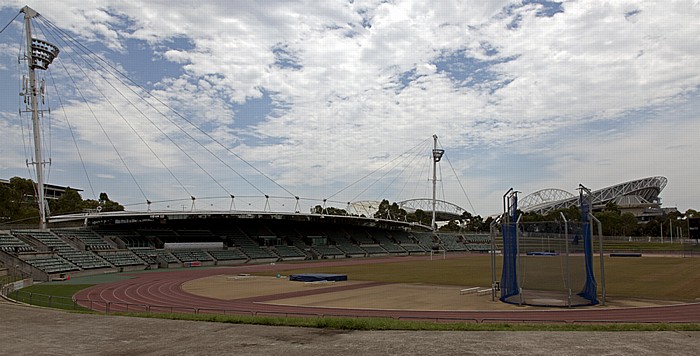
Sydney Olympic Park: Athletic Centre
Im Hintergrund das Olympiastadion (ANZ Stadium).
01.12.2012 | New South Wales - Sydney 15: Olympic Park
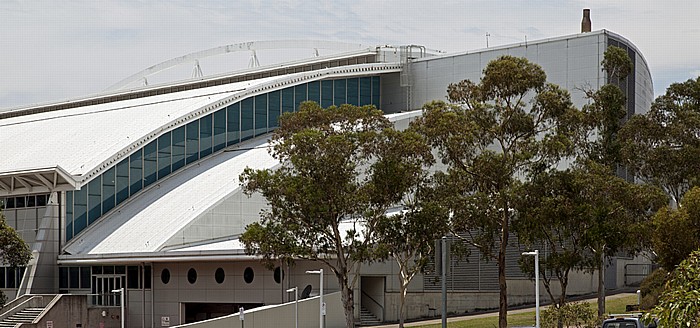
Sydney Olympic Park: Sydney International Aquatic Centre (SIAC)
| Sydney International Aquatic Centre | Sydney Olympic Park |
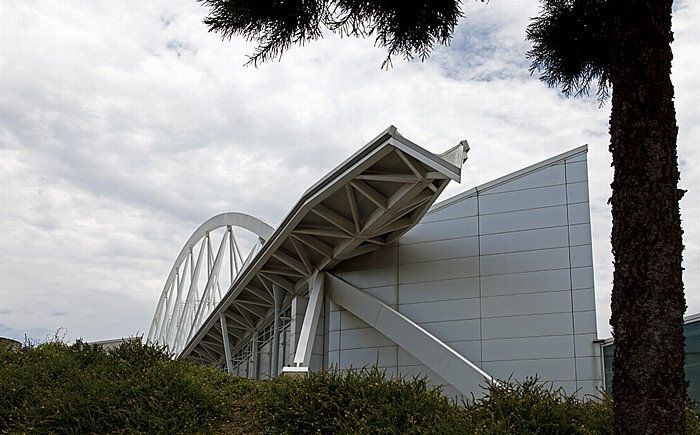
01.12.2012 | New South Wales - Sydney 15: Olympic Park
Sydney Olympic Park: Sydney International Aquatic Centre (SIAC)
| Sydney International Aquatic Centre | Sydney Olympic Park |
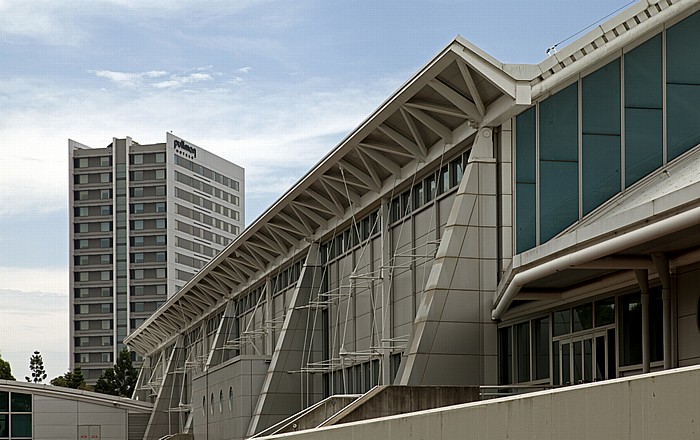
01.12.2012 | New South Wales - Sydney 15: Olympic Park
Sydney Olympic Park: Sydney International Aquatic Centre (SIAC)
| Sydney International Aquatic Centre | Sydney Olympic Park |
01.12.2012 | New South Wales - Sydney 15: Olympic Park
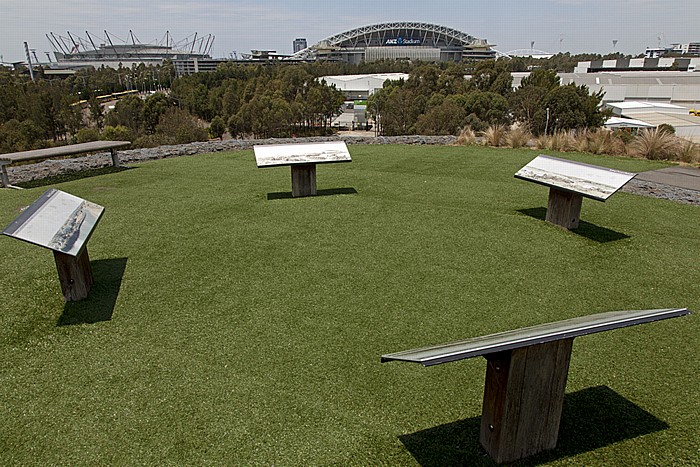
Haslams Creek Marker
Im Hintergrund der Sydney Olympic Park mit dem Sydney Super Dome (Allphones Arena) und dem Olympiastadion (ANZ Stadium).
| Allphones Arena | ANZ Stadium | Haslams Creek Marker | Sydney Olympic Park |
01.12.2012 | New South Wales - Sydney 15: Olympic Park
Haslams Creek Marker
Im Hintergrund der Sydney Olympic Park mit dem Sydney Super Dome (Allphones Arena) und dem Olympiastadion (ANZ Stadium).
| Allphones Arena | ANZ Stadium | Haslams Creek Marker | Sydney Olympic Park |
01.12.2012 | New South Wales - Sydney 15: Olympic Park
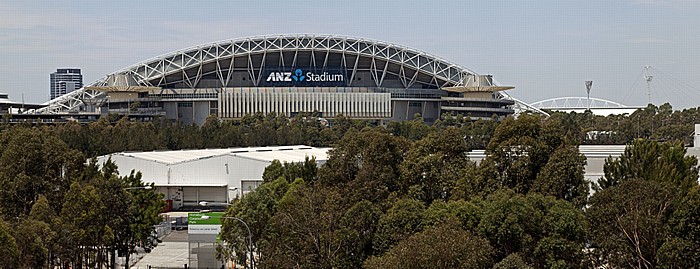
Blick vom Haslams Creek Marker: Sydney Olympic Park mit dem Olympiastadion (ANZ Stadium)
| ANZ Stadium | Haslams Creek Marker | Sydney Olympic Park |
01.12.2012 | New South Wales - Sydney 15: Olympic Park
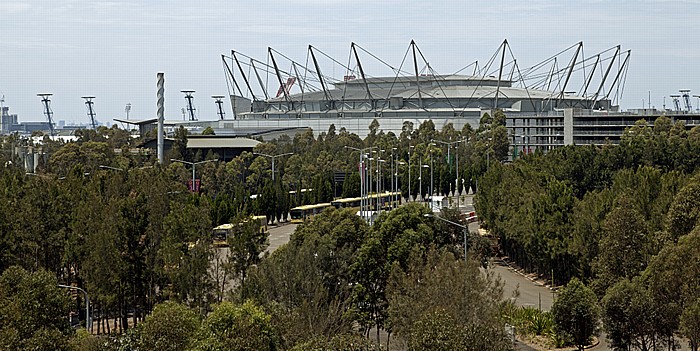
Blick vom Haslams Creek Marker: Sydney Olympic Park mit dem Sydney Super Dome (Allphones Arena)
| Allphones Arena | Haslams Creek Marker | Sydney Olympic Park |

01.12.2012 | New South Wales - Sydney 15: Olympic Park
Blick vom Haslams Creek Marker: Sydney Olympic Park
Links der Sydney Super Dome (Allphones Arena), rechts das Olympiastadion (ANZ Stadium).
| Allphones Arena | ANZ Stadium | Haslams Creek Marker | Sydney Olympic Park |
01.12.2012 | New South Wales - Sydney 15: Olympic Park
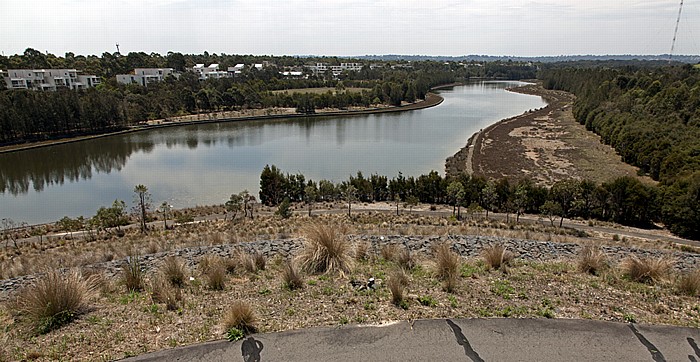
Blick vom Haslams Creek Marker: Newington und Haslams Creek
01.12.2012 | New South Wales - Sydney 15: Olympic Park
Sydney Olympic Park: Homebush Street Circuit (Sydney 500)
01.12.2012 | New South Wales - Sydney 15: Olympic Park
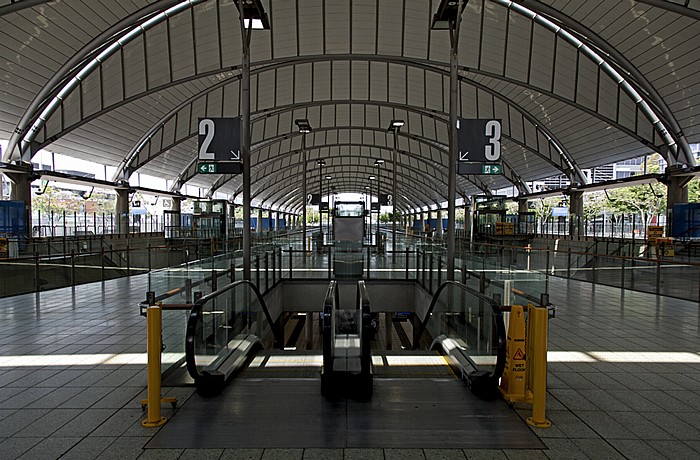
Sydney Olympic Park: Olympic Park Railway Station
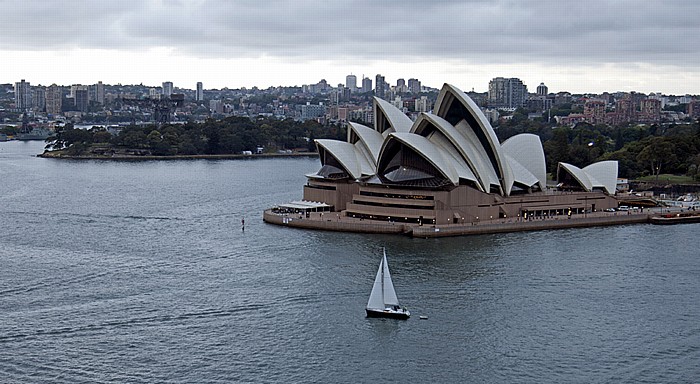
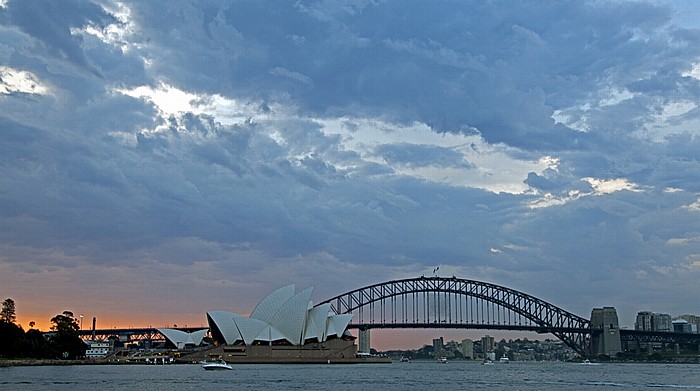
28.12.2012 | New South Wales - Sydney 2: Sydney Opera House
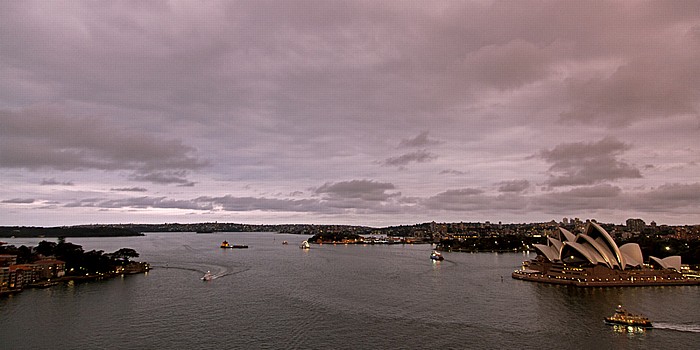
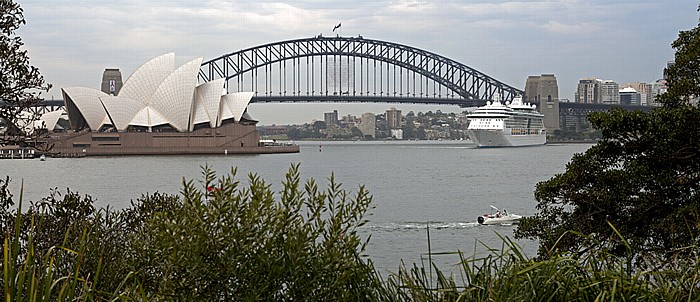
Blick von der Sydney Harbour Bridge: Port Jackson und Sydney Opera House
| Port Jackson | Sydney Harbour Bridge | Sydney Opera House |
27.12.2012 | New South Wales - Sydney 2: Sydney Opera House
Sydney Cove, Port Jackson, North Shore, Sydney Opera House
| North Shore | Port Jackson | Sydney Cove | Sydney Opera House |
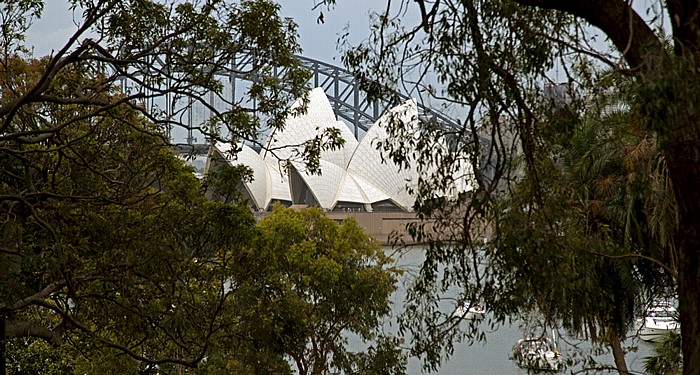
27.12.2012 | New South Wales - Sydney 2: Sydney Opera House
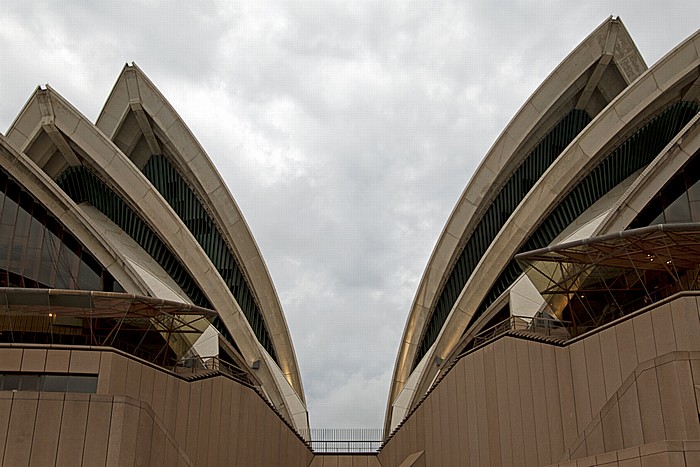
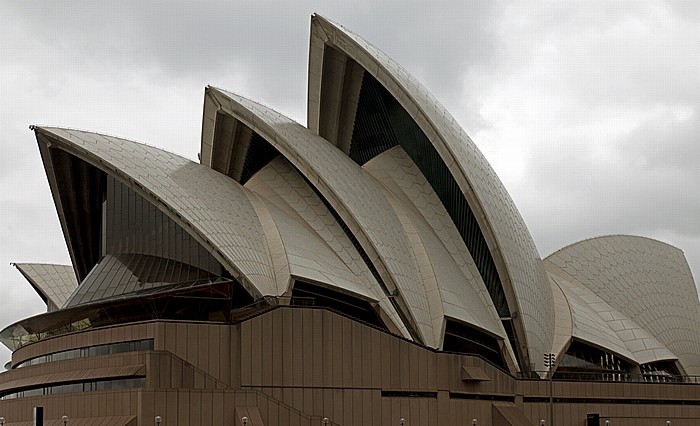
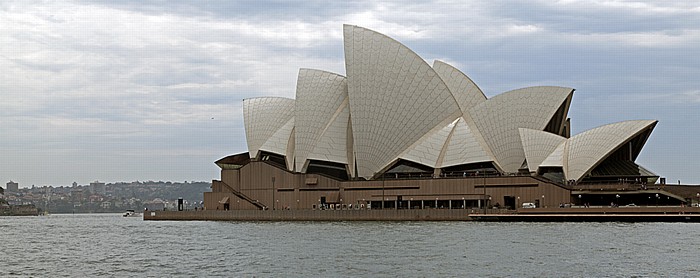
Sydney Opera House
27.12.2012 | New South Wales - Sydney 2: Sydney Opera House
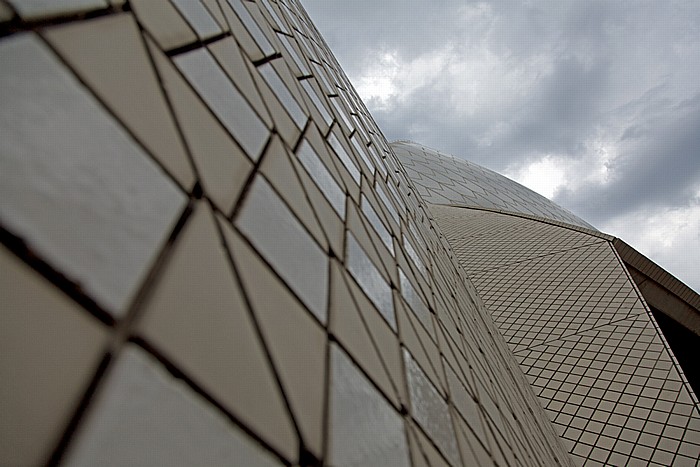
Sydney Opera House

27.12.2012 | New South Wales - Sydney 2: Sydney Opera House
Sydney Opera House

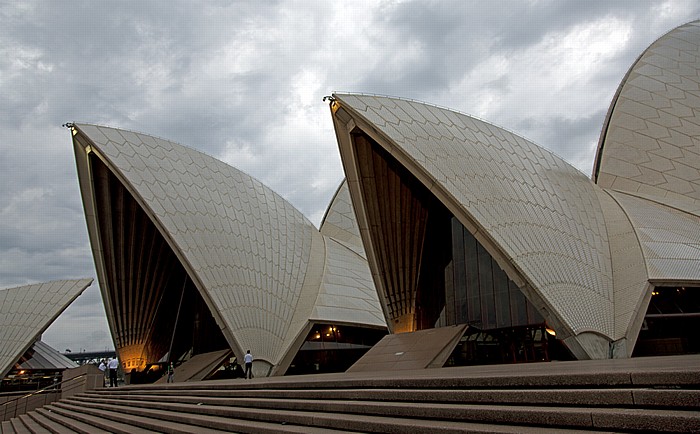
27.12.2012 | New South Wales - Sydney 2: Sydney Opera House
Sydney Opera House
Im Hintergrund der Royal Botanic Gardens und der Central Business District (CBD).
| Central Business District | Royal Botanic Gardens | Sydney Opera House |
27.12.2012 | New South Wales - Sydney 2: Sydney Opera House
Sydney Opera House
27.12.2012 | New South Wales - Sydney 2: Sydney Opera House
Sydney Opera House
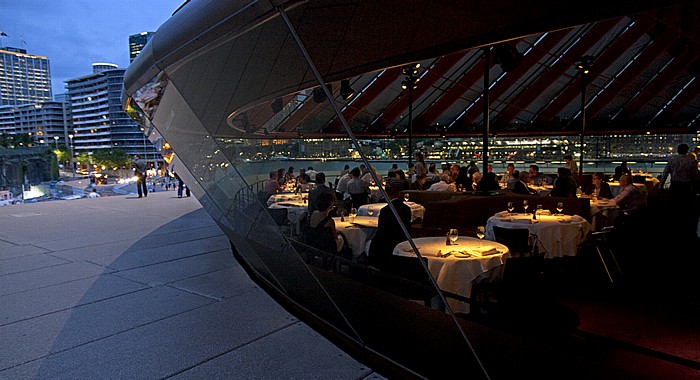
27.12.2012 | New South Wales - Sydney 2: Sydney Opera House
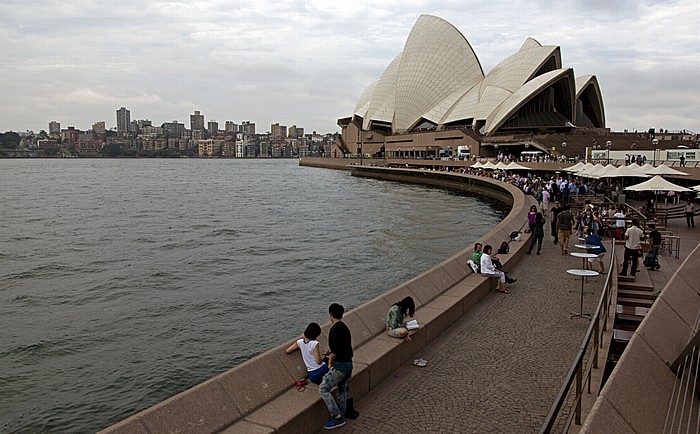
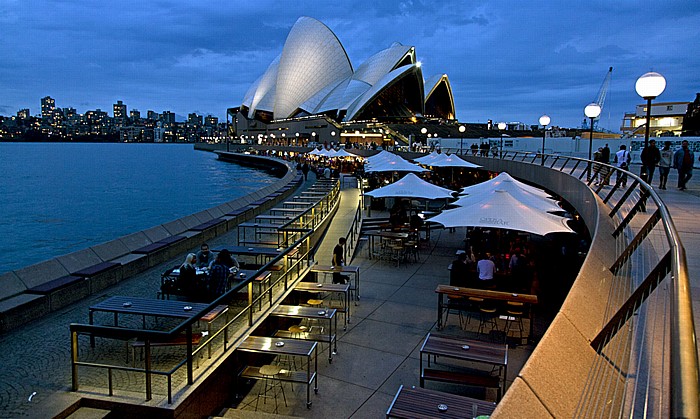
Sydney Cove, Port Jackson, North Shore, Sydney Opera House
Im Vordergrund die Opera Bar.
| North Shore | Opera Bar | Port Jackson | Sydney Cove | Sydney Opera House |
27.12.2012 | New South Wales - Sydney 2: Sydney Opera House
Sydney Cove, Sydney Opera House
28.12.2012 | New South Wales - Sydney 2: Sydney Opera House
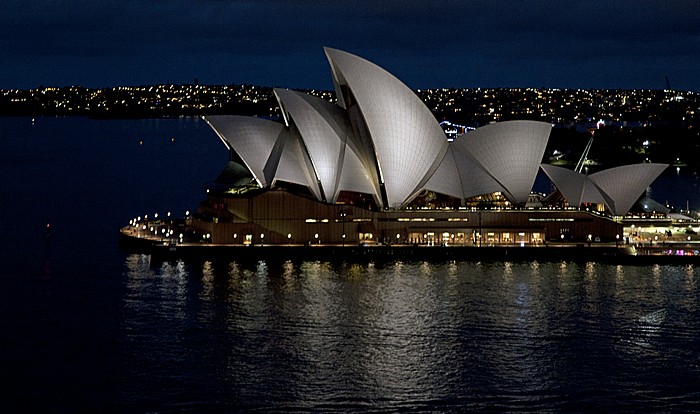
Sydney Opera House

28.12.2012 | New South Wales - Sydney 2: Sydney Opera House
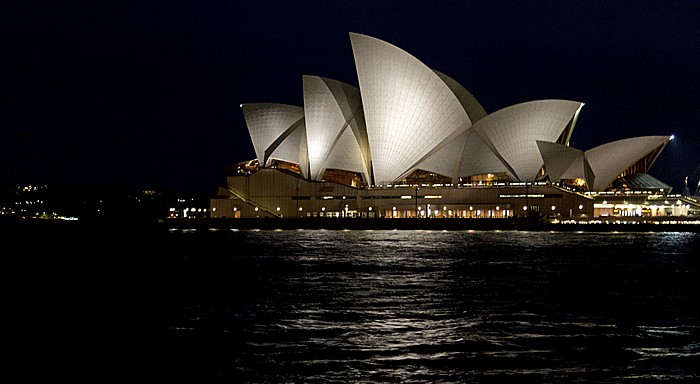
Port Jackson, Sydney Opera House
Rechts Sydney Cove und der Central Business District (CBD).
| Central Business District | Port Jackson | Sydney Cove | Sydney Opera House |
28.12.2012 | New South Wales - Sydney 2: Sydney Opera House
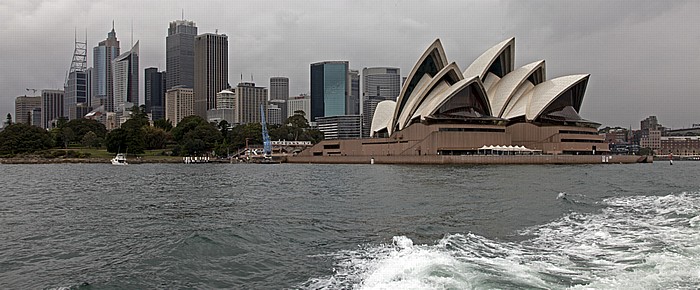
Port Jackson, Sydney Opera House
Links (von vorne): Farm Cove, Royal Botanic Gardens und Central Business District (CBD).
| Central Business District | Farm Cove | Port Jackson | Royal Botanic Gardens | Sydney Opera House |
01.12.2012 | New South Wales - Sydney 2: Sydney Opera House
Sydney Cove, Sydney Opera House
Links Port Jackson.

01.12.2012 | New South Wales - Sydney 2: Sydney Opera House
Sydney Opera House
29.11.2012 | New South Wales - Sydney 2: Sydney Opera House
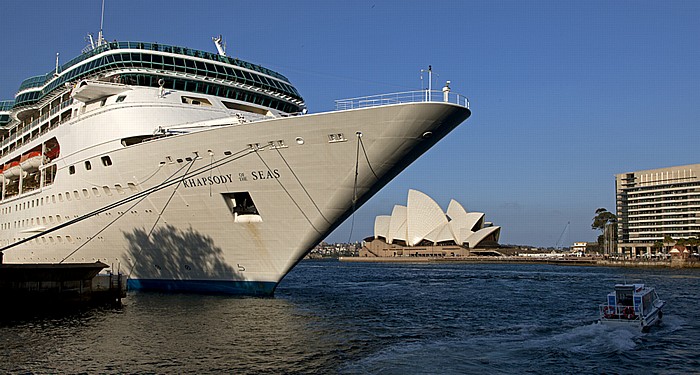
Sydney Cove: Kreuzfahrschiff "Rhapsody of the Seas"
Im Hintergrund das Sydney Opera House. Rechts die Bennelong Apartments ("The Toaster").
28.11.2012 | New South Wales - Sydney 2: Sydney Opera House
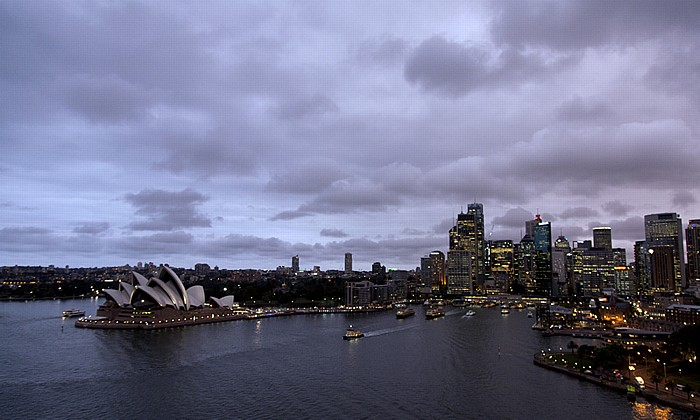
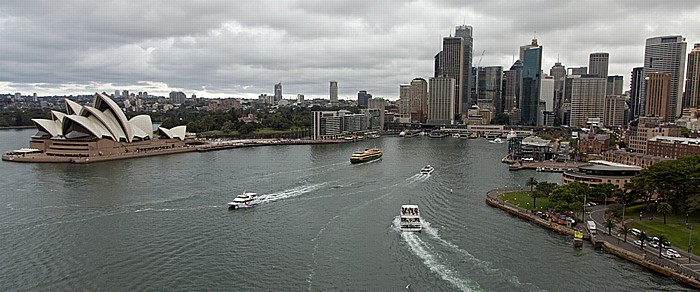
Blick von der Sydney Harbour Bridge
V.l.: Port Jackson, Sydney Opera House, Sydney Cove, Circular Quay und Central Business District (CBD).
| Central Business District | Circular Quay | Port Jackson | Sydney Cove | Sydney Harbour Bridge | Sydney Opera House |
28.11.2012 | New South Wales - Sydney 2: Sydney Opera House
Blick von der Sydney Harbour Bridge: Port Jackson, Sydney Opera House und Sydney Cove
| Port Jackson | Sydney Cove | Sydney Harbour Bridge | Sydney Opera House |
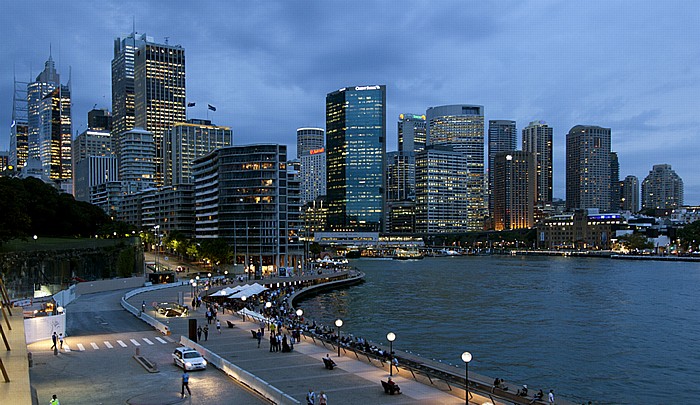
27.11.2012 | New South Wales - Sydney 3: Rund um Sydney Cove
Central Business District (CBD), Sydney Cove und Circular Quay
In der Bildmitte die Bennelong Apartments ("The Toaster").
| Bennelong Apartments | Central Business District | Circular Quay | Sydney Cove |

27.11.2012 | New South Wales - Sydney 3: Rund um Sydney Cove
Opera Bar, Sydney Cove, Port Jackson, Sydney Harbour Bridge, North Shore
| North Shore | Opera Bar | Port Jackson | Sydney Cove | Sydney Harbour Bridge |

27.11.2012 | New South Wales - Sydney 3: Rund um Sydney Cove
Circular Quay, Central Business District (CBD)
27.11.2012 | New South Wales - Sydney 3: Rund um Sydney Cove
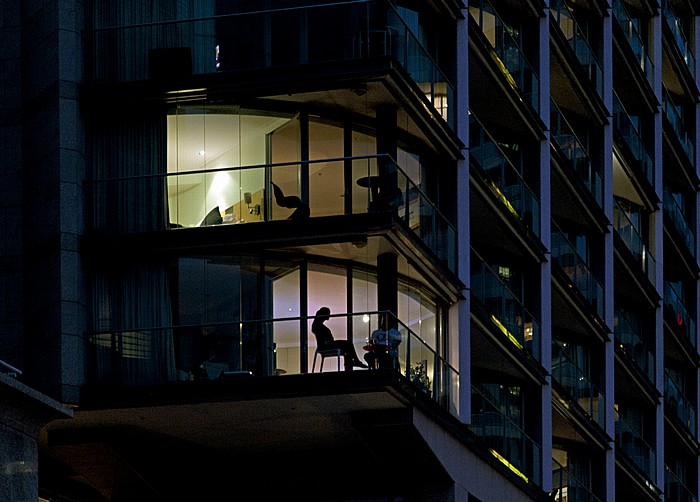
Circular Quay: Bennelong Apartments ("The Toaster")
27.11.2012 | New South Wales - Sydney 3: Rund um Sydney Cove
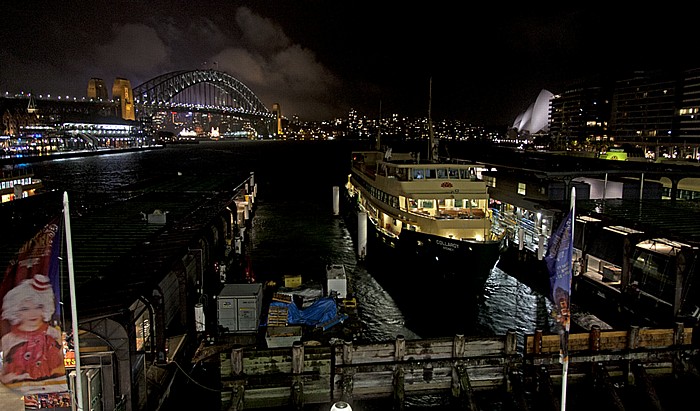
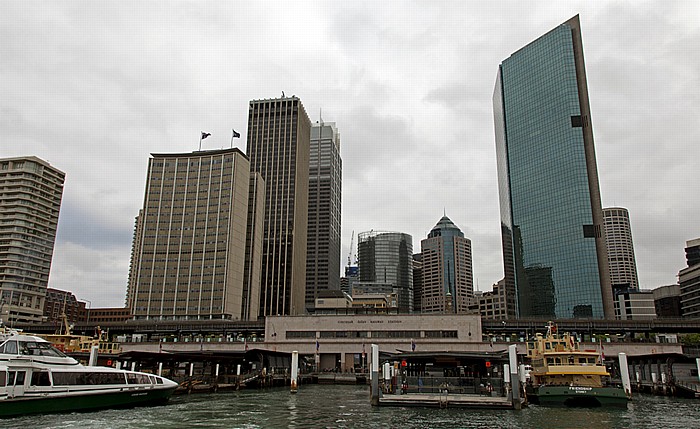
Circular Quay Ferry Wharf, Sydney Cove
Im Hintergrund (v.l.): Sydney Harbour Bridge, North Shore, Sydney Opera House und Bennelong Apartments ("The Toaster").
| Bennelong Apartments | Circular Quay | Circular Quay Ferry Wharf | North Shore | Sydney Cove | Sydney Harbour Bridge | Sydney Opera House |
28.11.2012 | New South Wales - Sydney 3: Rund um Sydney Cove
Sydney Cove, Circular Quay Ferry Wharf, Central Business District (CBD)
| Central Business District | Circular Quay | Circular Quay Ferry Wharf | Sydney Cove |
27.11.2012 | New South Wales - Sydney 3: Rund um Sydney Cove
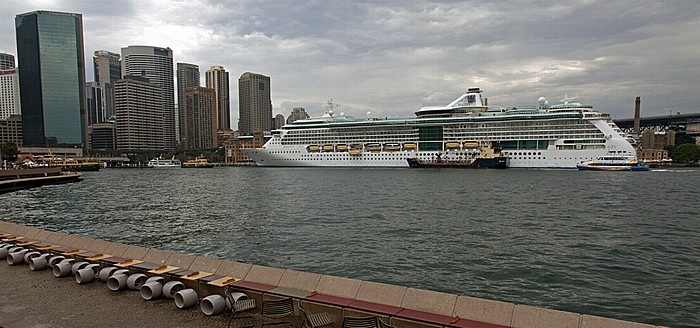
Circular Quay, Sydney Cove mit dem Kreuzfahrschiff "Carnival Spirit"
Im Hintergrund die Sydney Harbour Bridge und North Shore.
| Circular Quay | North Shore | Sydney Cove | Sydney Harbour Bridge |
28.11.2012 | New South Wales - Sydney 3: Rund um Sydney Cove
Sydney Cove, Circular Quay, The Rocks, Sydney Harbour Bridge
| Circular Quay | Sydney Cove | Sydney Harbour Bridge | The Rocks |
27.11.2012 | New South Wales - Sydney 3: Rund um Sydney Cove
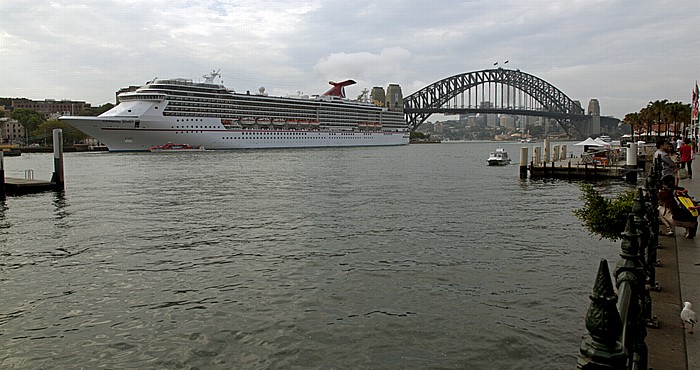
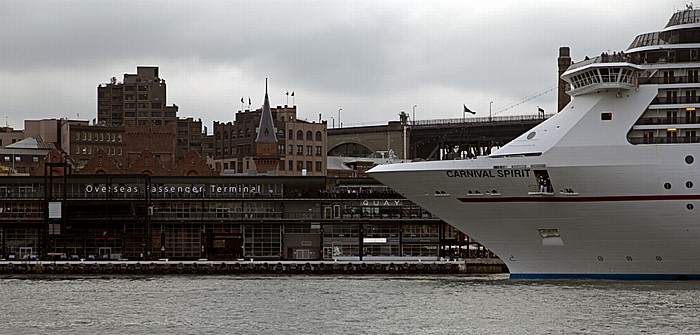
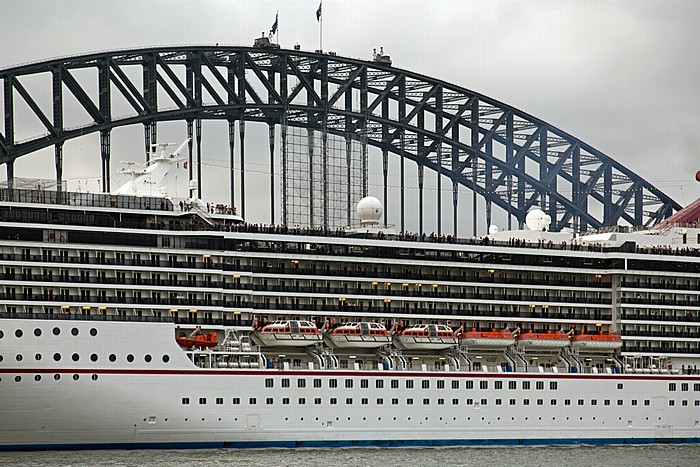
Circular Quay mit dem Overseas Passenger Terminal, Sydney Cove mit dem Kreuzfahrschiff "Carnival Spirit"
Im Hintergrund The Rocks und die Sydney Harbour Bridge.
| Circular Quay | Overseas Passenger Terminal | Sydney Cove | Sydney Harbour Bridge | The Rocks |
27.11.2012 | New South Wales - Sydney 3: Rund um Sydney Cove
Sydney Cove mit dem Kreuzfahrschiff "Carnival Spirit"
Im Hintergrund die Sydney Harbour Bridge.
27.11.2012 | New South Wales - Sydney 3: Rund um Sydney Cove
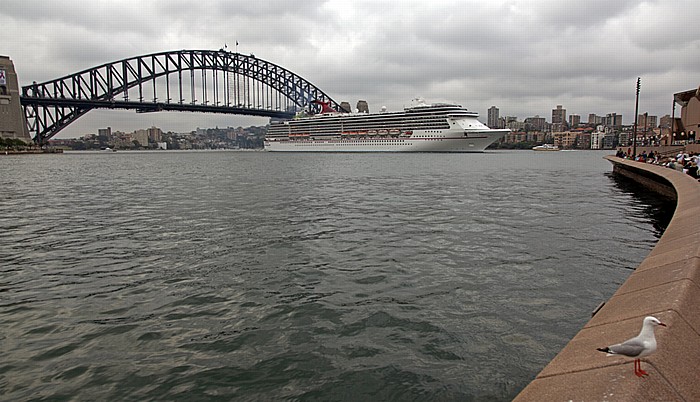
Circular Quay, Sydney Cove, Port Jackson mit dem Kreuzfahrschiff "Carnival Spirit"
Im Hintergrund die Sydney Harbour Bridge und North Shore.
| Circular Quay | North Shore | Port Jackson | Sydney Cove | Sydney Harbour Bridge |
27.11.2012 | New South Wales - Sydney 3: Rund um Sydney Cove
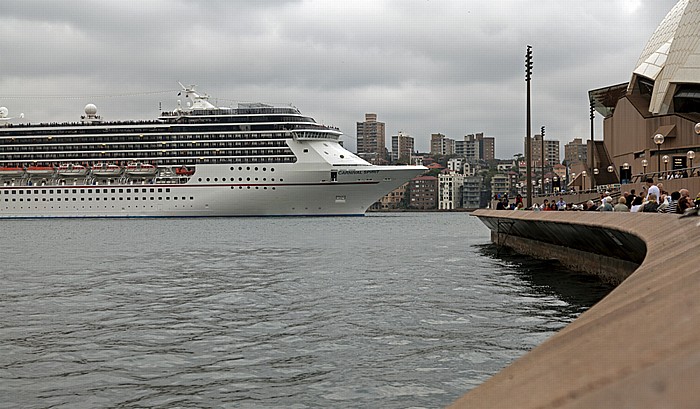
Circular Quay, Sydney Cove, Port Jackson mit dem Kreuzfahrschiff "Carnival Spirit"
Im Hintergrund North Shore und das Sydney Opera House.
| Circular Quay | North Shore | Port Jackson | Sydney Cove | Sydney Opera House |
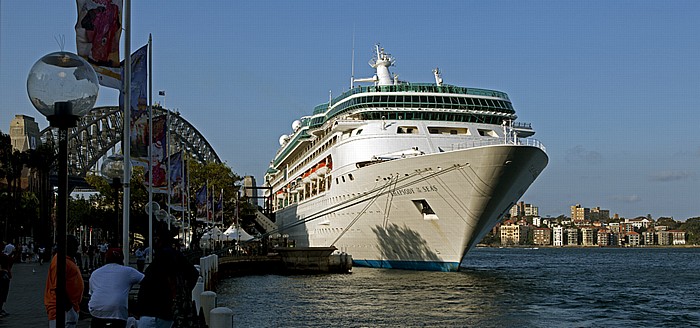
29.11.2012 | New South Wales - Sydney 3: Rund um Sydney Cove
Sydney Cove: Kreuzfahrschiff "Rhapsody of the Seas"
Im Hintergrund die Sydney Harbour Bridge und North Shore.
28.11.2012 | New South Wales - Sydney 3: Rund um Sydney Cove
Sydney Cove, Circular Quay Ferry Wharf, Circular Quay Railway Station, Central Business District (CBD)
Rechts das Gateway Plaza.
| Central Business District | Circular Quay | Circular Quay Ferry Wharf | Circular Quay Railway Station | Gateway Plaza | Sydney Cove |
01.12.2012 | New South Wales - Sydney 3: Rund um Sydney Cove
Central Business District (CBD), Circular Quay Ferry Wharf, Sydney Cove mit Kreuzfahrschiff ""
| Central Business District | Circular Quay | Circular Quay Ferry Wharf | Sydney Cove |
01.12.2012 | New South Wales - Sydney 3: Rund um Sydney Cove
Sydney Cove, Circular Quay
Im Hintergrund die Bennelong Apartments ("The Toaster").
01.12.2012 | New South Wales - Sydney 3: Rund um Sydney Cove
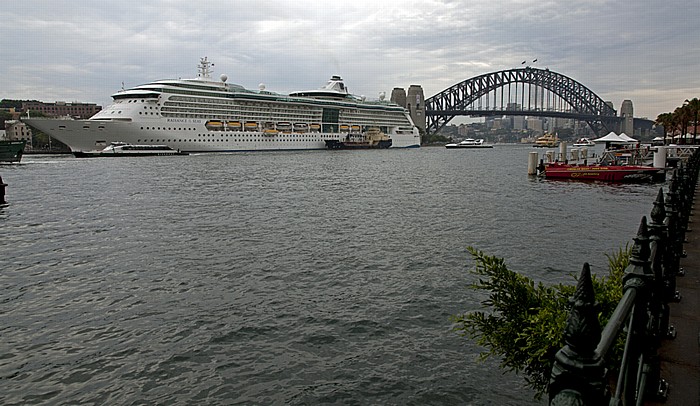
Sydney Cove mit Kreuzfahrschiff "Radiance of the Seas"
Im Hintergrund die Sydney Harbour Bridge und North Shore. Rechts Circular Quay.
| Circular Quay | North Shore | Sydney Cove | Sydney Harbour Bridge |

01.12.2012 | New South Wales - Sydney 3: Rund um Sydney Cove
Circular Quay Ferry Wharf, Sydney Cove mit Kreuzfahrschiff "Radiance of the Seas"
Im Hintergrund North Shore und das Sydney Opera House.
| Circular Quay | Circular Quay Ferry Wharf | North Shore | Sydney Cove | Sydney Opera House |
27.11.2012 | New South Wales - Sydney 3: Rund um Sydney Cove
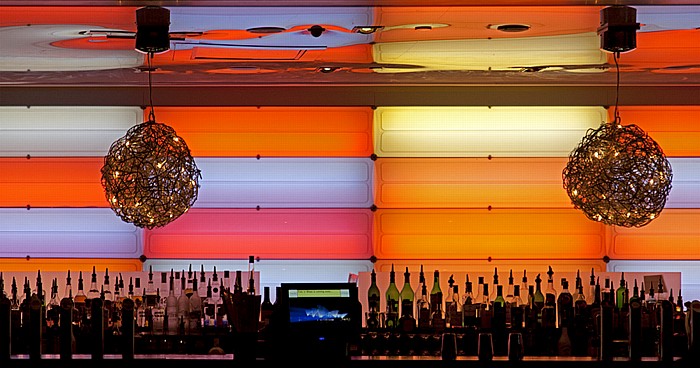
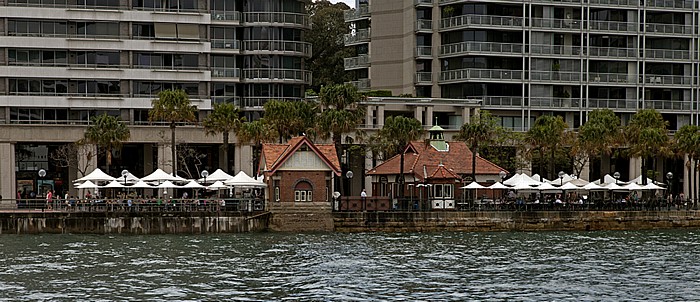
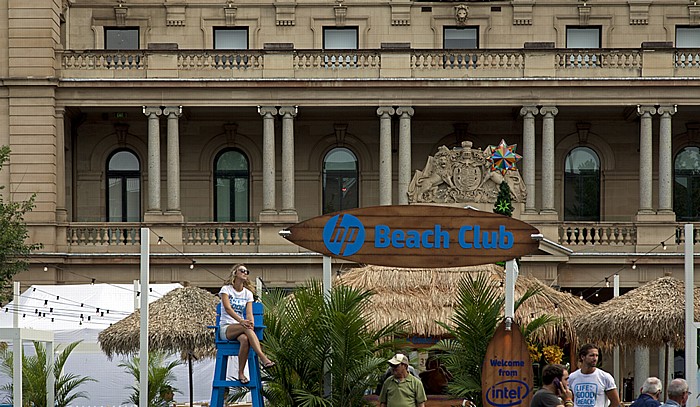
Circular Quay: "Beach Club" vor dem Customs House
| Circular Quay | Customs House |
27.11.2012 | New South Wales - Sydney 6: Central Business District (CBD)
Central Business District (CBD): Gateway Plaza
28.11.2012 | New South Wales - Sydney 4: Sydney Harbour Bridge 1
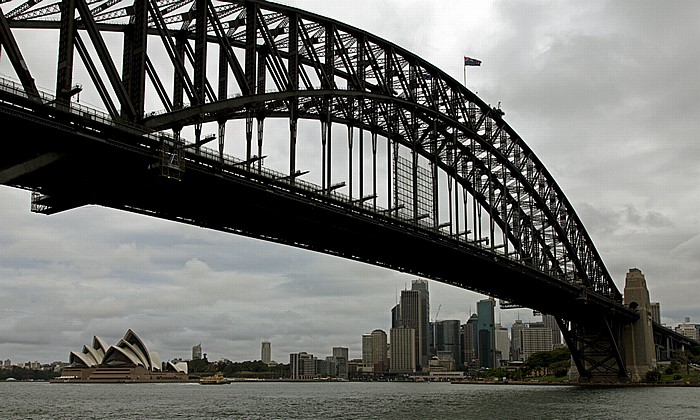
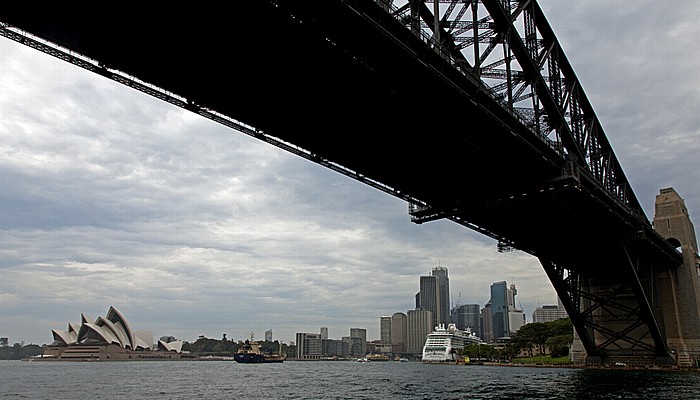
Port Jackson
V.l.: Central Business District (CBD) mit dem Sydney Tower, Fort Denison (mit einem Martello-Turm), Farm Cove, Sydney Opera House, Sydney Harbour Bridge und North Shore.
| Central Business District | Farm Cove | Fort Denison | North Shore | Port Jackson | Sydney Harbour Bridge | Sydney Opera House | Sydney Tower |
28.11.2012 | New South Wales - Sydney 4: Sydney Harbour Bridge 1
Port Jackson, Sydney Harbour Bridge
Rechts North Shore.
28.11.2012 | New South Wales - Sydney 4: Sydney Harbour Bridge 1
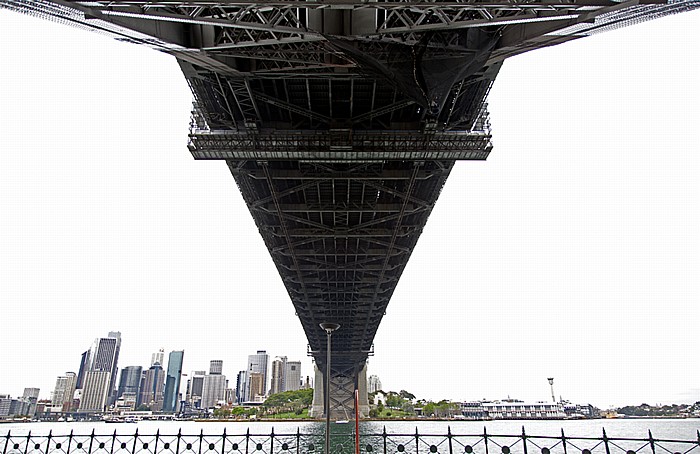
Port Jackson, Sydney Harbour Bridge
Links The Rocks. In der Bildmitte Dawes Point. Im Hintergrund North Shore.
| Dawes Point | North Shore | Port Jackson | Sydney Harbour Bridge | The Rocks |
28.11.2012 | New South Wales - Sydney 4: Sydney Harbour Bridge 1
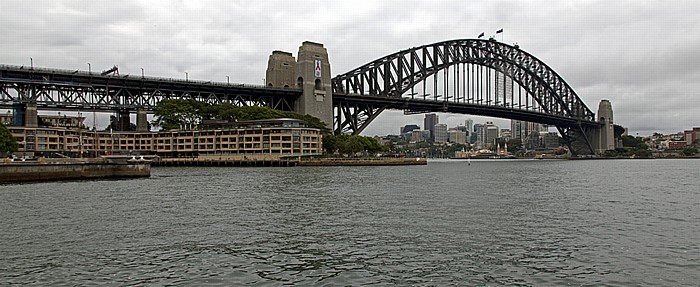
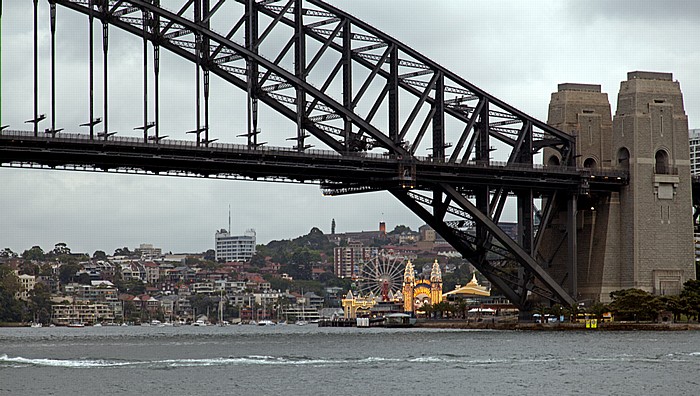
Port Jackson, Sydney Harbour Bridge, North Shore
In der Bildmitte Milsons Point mit dem Luna Park.
| Luna Park | Milsons Point | North Shore | Port Jackson | Sydney Harbour Bridge |
28.11.2012 | New South Wales - Sydney 4: Sydney Harbour Bridge 1
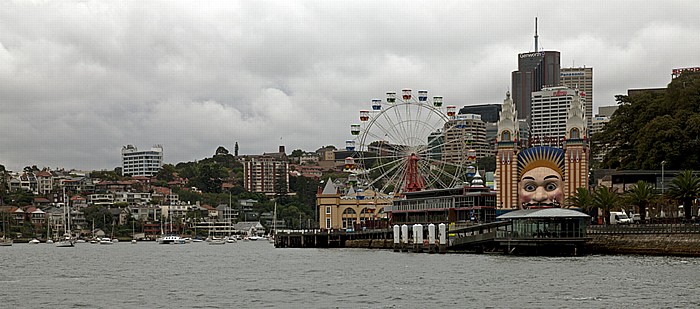
Port Jackson, Milsons Point mit dem Luna Park
Links die Lavender Bay.
| Lavender Bay | Luna Park | Milsons Point | Port Jackson |

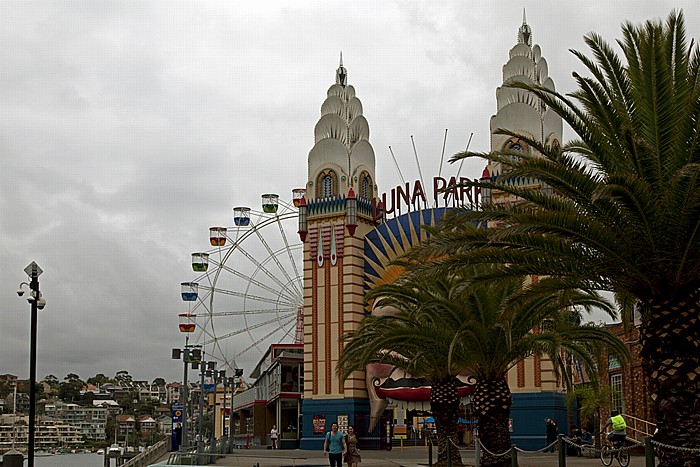
28.11.2012 | New South Wales - Sydney 4: Sydney Harbour Bridge 1
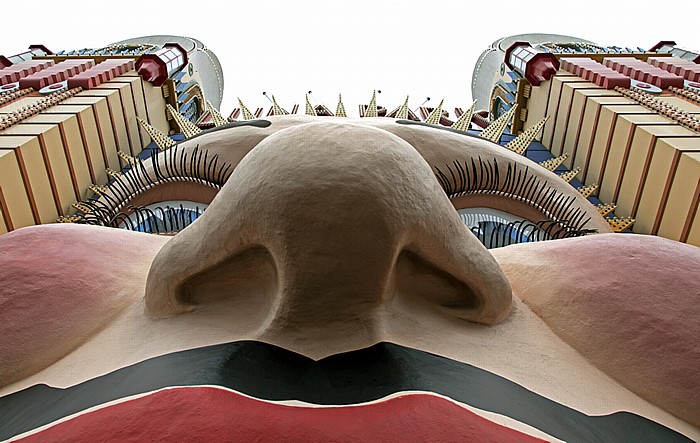
Milsons Point: Luna Park
| Luna Park | Milsons Point |
28.11.2012 | New South Wales - Sydney 4: Sydney Harbour Bridge 1
Milsons Point: Luna Park
| Luna Park | Milsons Point |
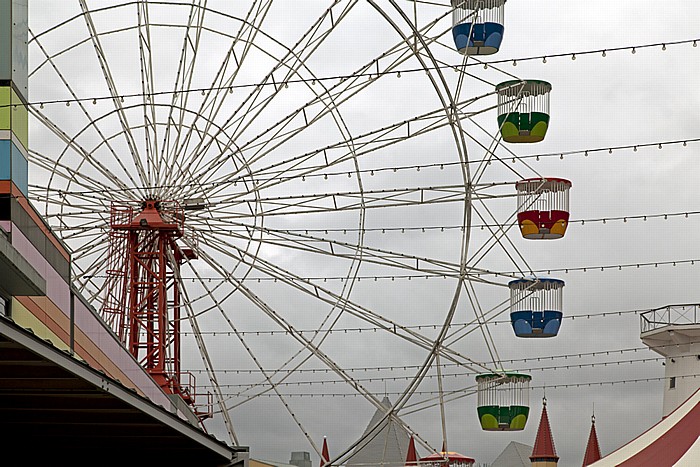
28.11.2012 | New South Wales - Sydney 4: Sydney Harbour Bridge 1
Milsons Point: Luna Park - Riesenrad
| Luna Park | Milsons Point |
28.11.2012 | New South Wales - Sydney 4: Sydney Harbour Bridge 1
Milsons Point: Luna Park
| Luna Park | Milsons Point |
27.11.2012 | New South Wales - Sydney 4: Sydney Harbour Bridge 1
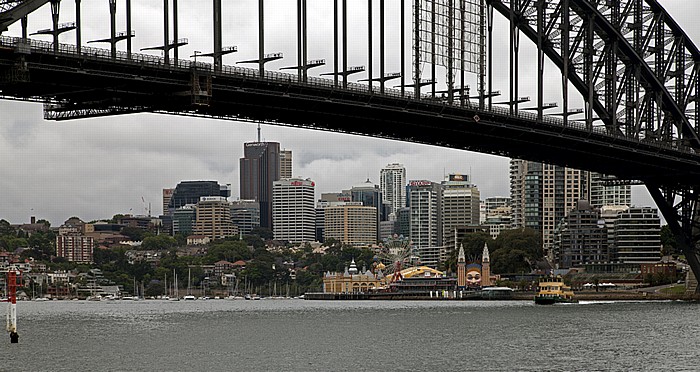
Port Jackson, Sydney Harbour Bridge, North Shore
In der Bildmitte Milsons Point mit dem Luna Park.
| Luna Park | Milsons Point | North Shore | Port Jackson | Sydney Harbour Bridge |
28.11.2012 | New South Wales - Sydney 4: Sydney Harbour Bridge 1
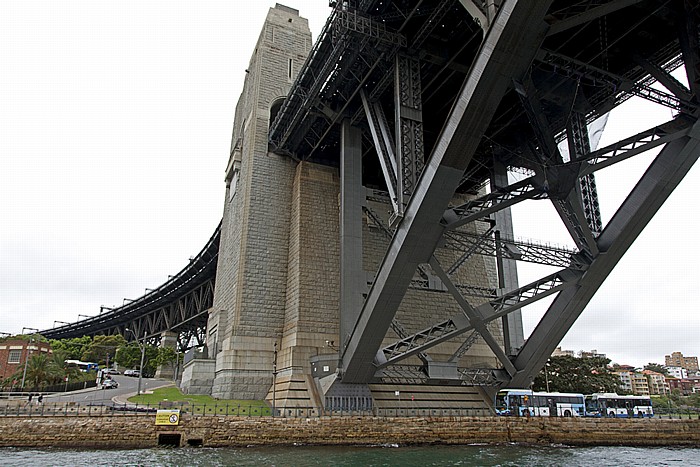
Milsons Point: Sydney Harbour Bridge
28.11.2012 | New South Wales - Sydney 4: Sydney Harbour Bridge 1
Blick von Milsons Point: Port Jackson, Sydney Opera House, Central Business District (CBD), Sydney Harbour Bridge
| Central Business District | Milsons Point | Port Jackson | Sydney Harbour Bridge | Sydney Opera House |

28.11.2012 | New South Wales - Sydney 4: Sydney Harbour Bridge 1
Milsons Point: Sydney Harbour Bridge
28.11.2012 | New South Wales - Sydney 4: Sydney Harbour Bridge 1
Milsons Point: Sydney Harbour Bridge
28.11.2012 | New South Wales - Sydney 4: Sydney Harbour Bridge 1
Milsons Point: Sydney Harbour Bridge
In der Bildmitte Dawes Point. Links der Central Business District (CBD).
| Central Business District | Dawes Point | Milsons Point | Sydney Harbour Bridge |
28.11.2012 | New South Wales - Sydney 4: Sydney Harbour Bridge 1
Milsons Point: Sydney Harbour Bridge
28.11.2012 | New South Wales - Sydney 4: Sydney Harbour Bridge 1
Milsons Point: Sydney Harbour Bridge
28.11.2012 | New South Wales - Sydney 4: Sydney Harbour Bridge 1
Milsons Point: Sydney Harbour Bridge
28.11.2012 | New South Wales - Sydney 4: Sydney Harbour Bridge 1
Milsons Point: Sydney Harbour Bridge
Links im Hintergrund Port Jackson und das Sydney Opera House.
| Milsons Point | Port Jackson | Sydney Harbour Bridge | Sydney Opera House |

28.11.2012 | New South Wales - Sydney 4: Sydney Harbour Bridge 1
Milsons Point: Sydney Harbour Bridge
28.11.2012 | New South Wales - Sydney 4: Sydney Harbour Bridge 1
Milsons Point: Sydney Harbour Bridge

01.12.2012 | New South Wales - Sydney 4: Sydney Harbour Bridge 1
Sydney Harbour Bridge
Oben die australische Flagge.
01.12.2012 | New South Wales - Sydney 4: Sydney Harbour Bridge 1
Blick von Milsons Point
V.l.: Port Jackson, Sydney Opera House, Central Business District (CBD), Dawes Point, Sydney Harbour Bridge.
| Central Business District | Dawes Point | Milsons Point | Sydney Harbour Bridge | Sydney Opera House |
29.11.2012 | New South Wales - Sydney 4: Sydney Harbour Bridge 1
The Rocks, Sydney Harbour Bridge
27.11.2012 | New South Wales - Sydney 4: Sydney Harbour Bridge 1
Circular Quay, Sydney Cove, Port Jackson, Sydney Harbour Bridge, North Shore
Links The Rocks.
| Circular Quay | North Shore | Port Jackson | Sydney Cove | Sydney Harbour Bridge | The Rocks |
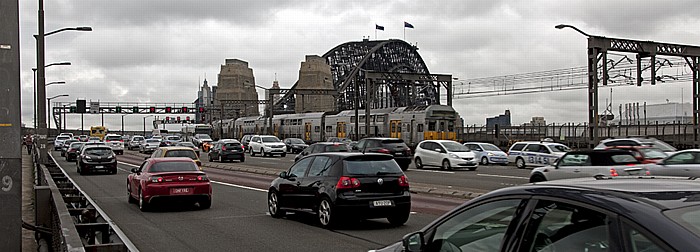
28.11.2012 | New South Wales - Sydney 5: Sydney Harbour Bridge 2
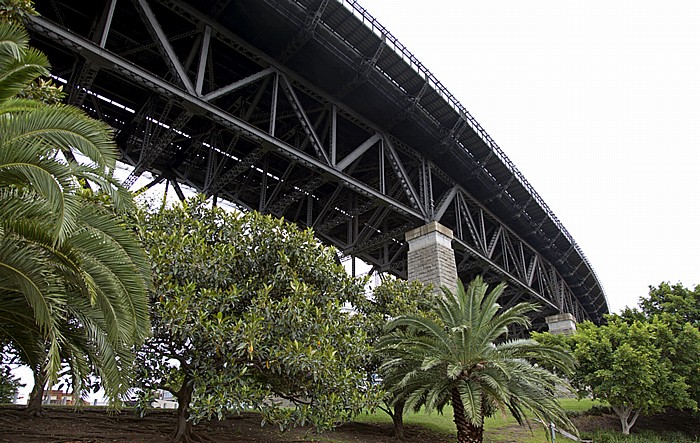
Sydney Harbour Bridge: Bradfield Highway
Acht Autospuren (die beiden ersten Spuren waren früher für die Sydney Tram) und zwei Eisenbahngleise.
28.11.2012 | New South Wales - Sydney 5: Sydney Harbour Bridge 2
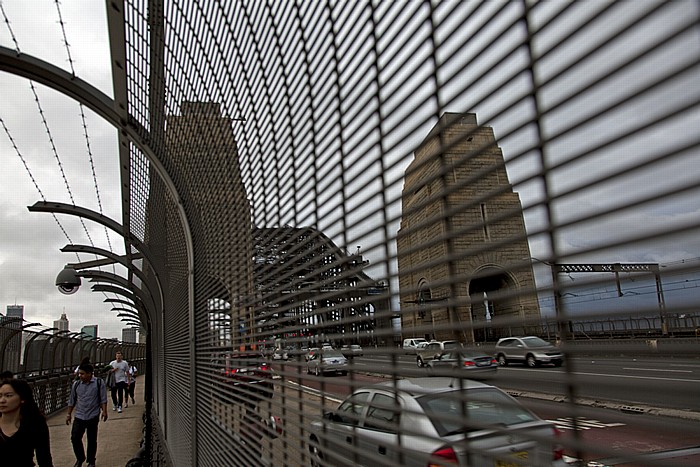
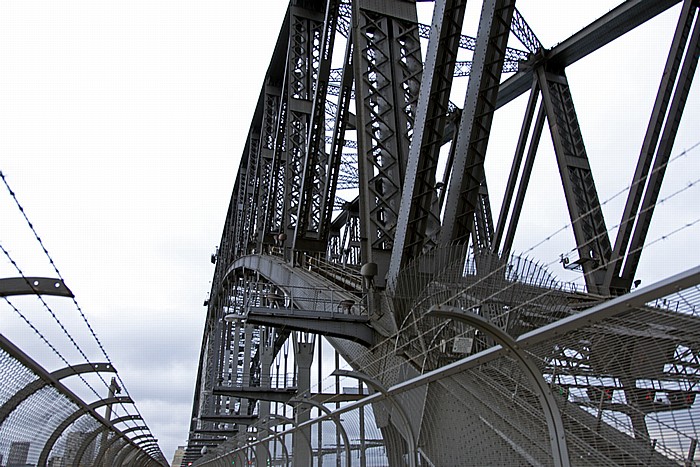
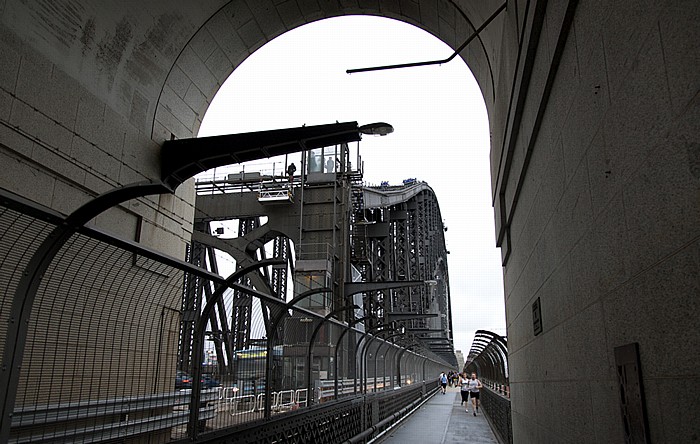
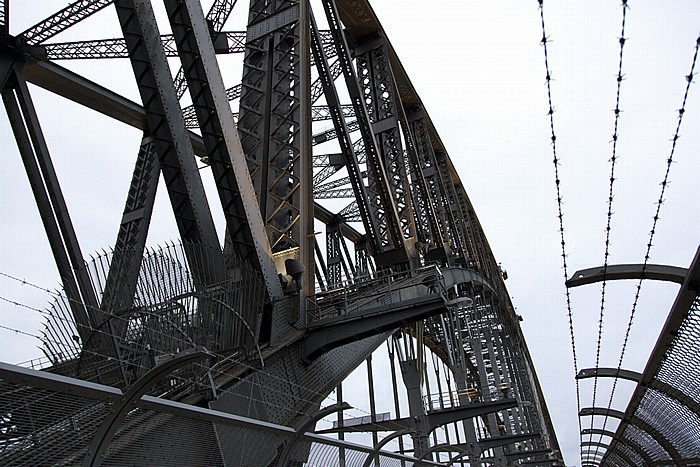
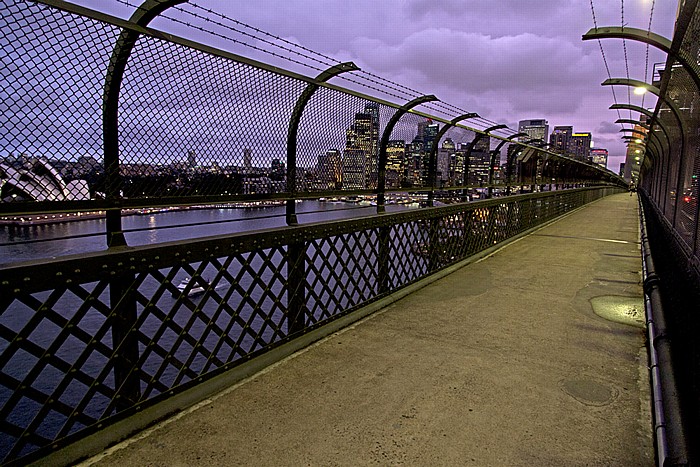
Sydney Harbour Bridge: Fußweg und Bradfield Highway
28.11.2012 | New South Wales - Sydney 5: Sydney Harbour Bridge 2
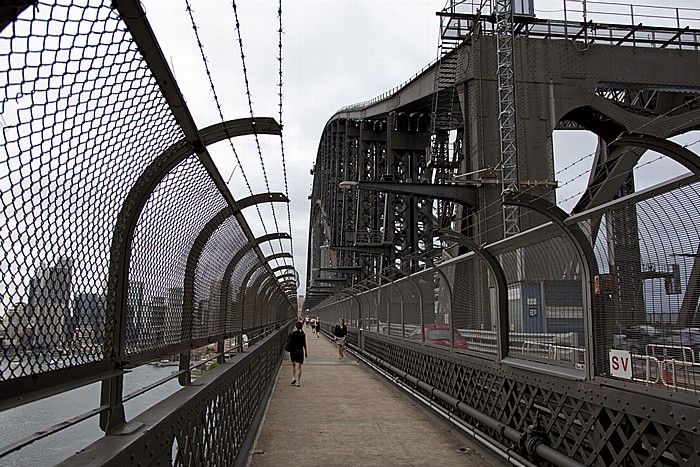
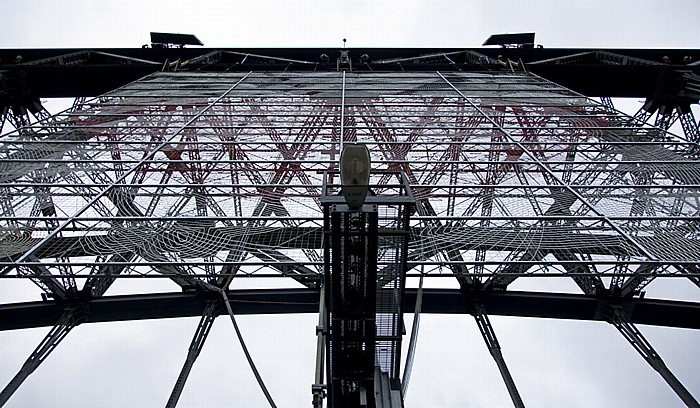
Sydney Harbour Bridge: Fußweg

28.11.2012 | New South Wales - Sydney 5: Sydney Harbour Bridge 2
Blick von der Sydney Harbour Bridge: Kirribilli (North Shore)
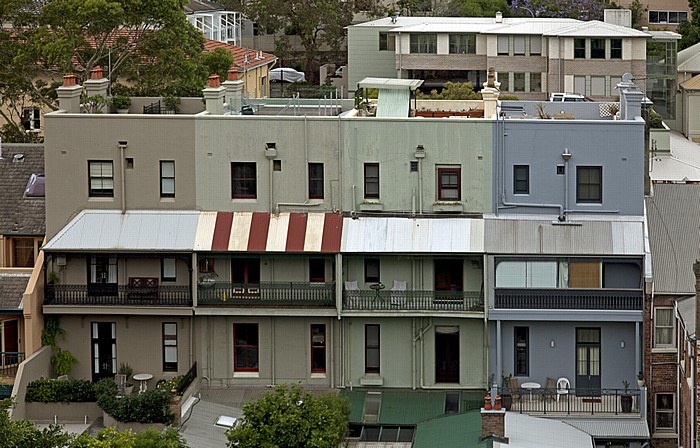
28.11.2012 | New South Wales - Sydney 5: Sydney Harbour Bridge 2
Blick von der Sydney Harbour Bridge: Kirribilli (North Shore)
28.11.2012 | New South Wales - Sydney 5: Sydney Harbour Bridge 2
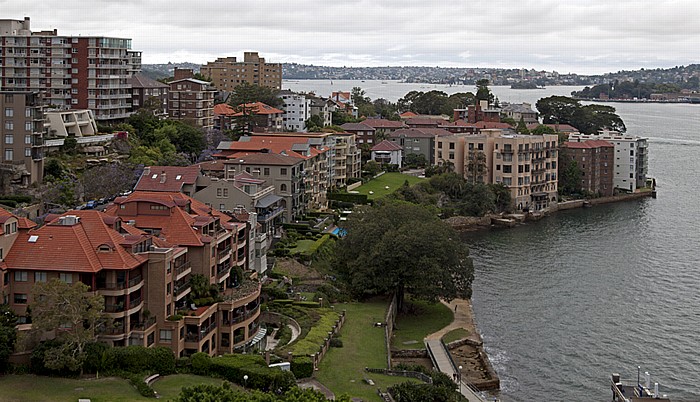
Blick von der Sydney Harbour Bridge: Kirribilli (North Shore), Port Jackson
| Kirribilli | North Shore | Port Jackson | Sydney Harbour Bridge |
28.11.2012 | New South Wales - Sydney 5: Sydney Harbour Bridge 2
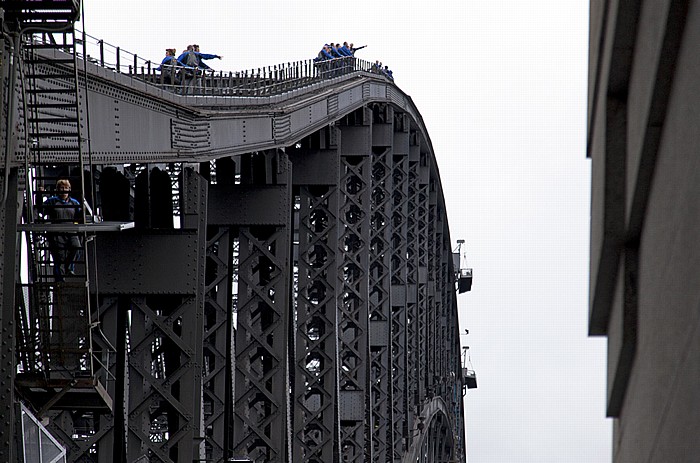
Sydney Harbour Bridge
28.11.2012 | New South Wales - Sydney 5: Sydney Harbour Bridge 2
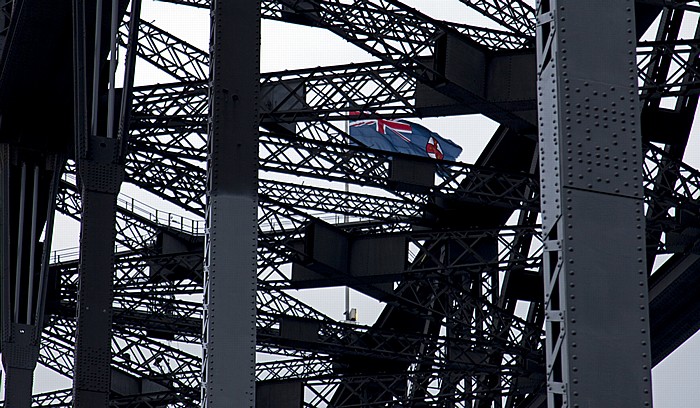
Sydney Harbour Bridge mit der Flagge von New South Wales
28.11.2012 | New South Wales - Sydney 5: Sydney Harbour Bridge 2
Sydney Harbour Bridge
28.11.2012 | New South Wales - Sydney 5: Sydney Harbour Bridge 2
Blick von der Sydney Harbour Bridge: Port Jackson
Links Kirribilli (North Shore), rechts das Sydney Opera House. Links oben Fort Denison (mit einem Martello-Turm).
| Fort Denison | Kirribilli | North Shore | Port Jackson | Sydney Harbour Bridge | Sydney Opera House |
28.11.2012 | New South Wales - Sydney 5: Sydney Harbour Bridge 2
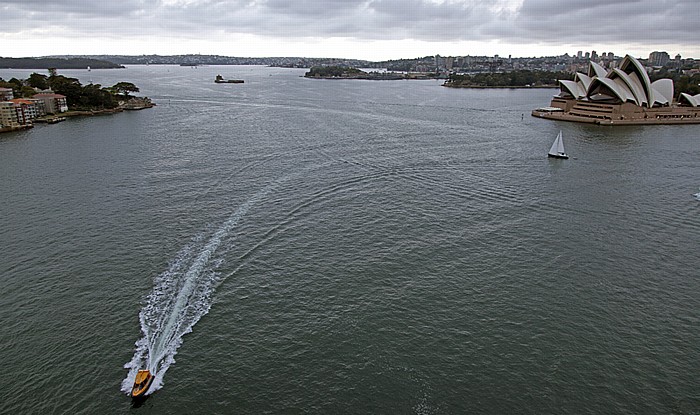
Blick von der Sydney Harbour Bridge: Port Jackson, Sydney Opera House, Royal Botanic Gardens, Sydney Cove
| Port Jackson | Royal Botanic Gardens | Sydney Cove | Sydney Harbour Bridge | Sydney Opera House |
28.11.2012 | New South Wales - Sydney 5: Sydney Harbour Bridge 2
Blick von der Sydney Harbour Bridge: Royal Botanic Gardens, Farm Cove, Sydney Opera House, Central Business District
In der Bildmitte die Bennelong Apartments ("The Toaster"), rechts davon die Circular Quay Ferry Wharf und die Circular Quay Railway Station. Rechts The Rocks und Dawes Point.
| Bennelong Apartments | Central Business District | Circular Quay | Circular Quay Ferry Wharf | Circular Quay Railway Station | Dawes Point | Farm Cove | Royal Botanic Gardens | Sydney Harbour Bridge | Sydney Opera House | The Rocks |

28.11.2012 | New South Wales - Sydney 5: Sydney Harbour Bridge 2
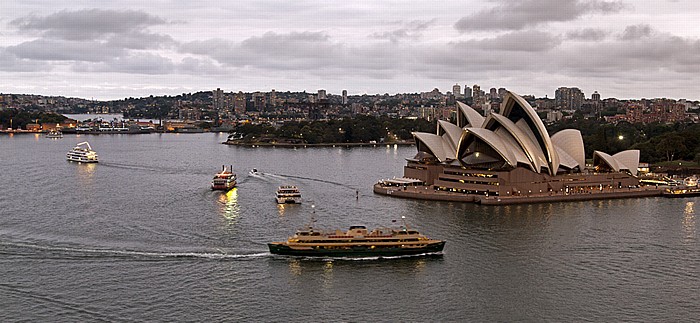
Blick von der Sydney Harbour Bridge: Port Jackson, Sydney Opera House
Links oben Garden Island.
| Garden Island | Port Jackson | Sydney Harbour Bridge | Sydney Opera House |
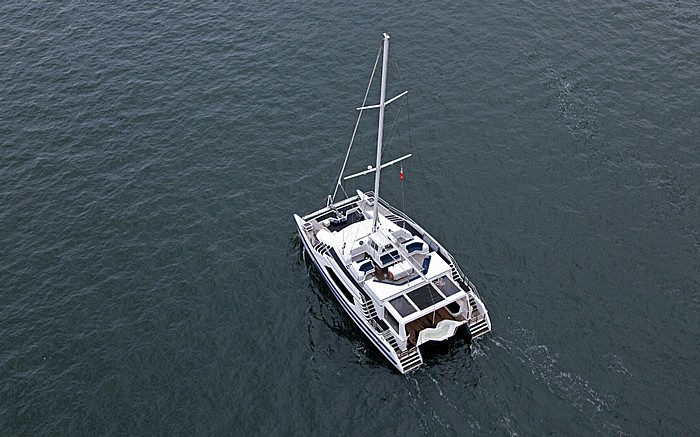
28.11.2012 | New South Wales - Sydney 5: Sydney Harbour Bridge 2
Blick von der Sydney Harbour Bridge: Port Jackson - Segelboot

28.11.2012 | New South Wales - Sydney 5: Sydney Harbour Bridge 2
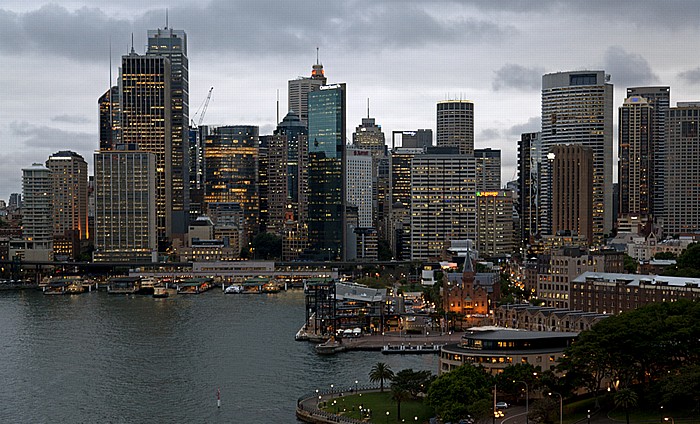
Blick von der Sydney Harbour Bridge: Sydney Cove, Central Business District (CBD), The Rocks
Im Vordergrund Dawes Point. In der Bildmitte der Circular Quay mit dem Overseas Passenger Terminal, darüber die Circular Quay Ferry Wharf und die Circular Quay Railway Station.
28.11.2012 | New South Wales - Sydney 5: Sydney Harbour Bridge 2
Blick von der Sydney Harbour Bridge: Central Business District (CBD), The Rocks
| Central Business District | Sydney Harbour Bridge | The Rocks |
28.11.2012 | New South Wales - Sydney 5: Sydney Harbour Bridge 2
Blick von der Sydney Harbour Bridge: Central Business District (CBD) mit dem Sydney Tower
| Central Business District | Sydney Harbour Bridge | Sydney Tower |
28.11.2012 | New South Wales - Sydney 5: Sydney Harbour Bridge 2
Blick von der Sydney Harbour Bridge: Port Jackson, Kirribilli (North Shore).
| Kirribilli | North Shore | Port Jackson | Sydney Harbour Bridge |
28.11.2012 | New South Wales - Sydney 5: Sydney Harbour Bridge 2
Sydney Harbour Bridge
28.11.2012 | New South Wales - Sydney 5: Sydney Harbour Bridge 2
Sydney Harbour Bridge
28.11.2012 | New South Wales - Sydney 5: Sydney Harbour Bridge 2
Sydney Harbour Bridge
28.11.2012 | New South Wales - Sydney 5: Sydney Harbour Bridge 2
Sydney Harbour Bridge
28.11.2012 | New South Wales - Sydney 5: Sydney Harbour Bridge 2
Blick von der Sydney Harbour Bridge: Central Business District (CBD), The Rocks
In der Bildmitte der Circular Quay mit dem Overseas Passenger Terminal, darüber die Circular Quay Ferry Wharf und die Circular Quay Railway Station.
| Central Business District | Circular Quay | Circular Quay Ferry Wharf | Circular Quay Railway Station | Overseas Passenger Terminal | Sydney Harbour Bridge | The Rocks |
28.11.2012 | New South Wales - Sydney 5: Sydney Harbour Bridge 2
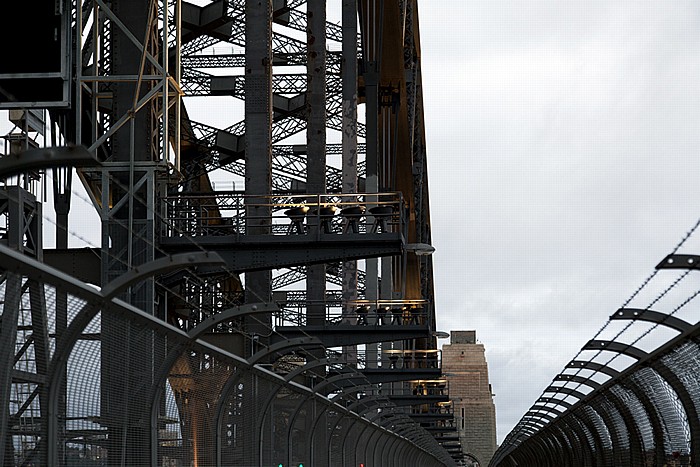
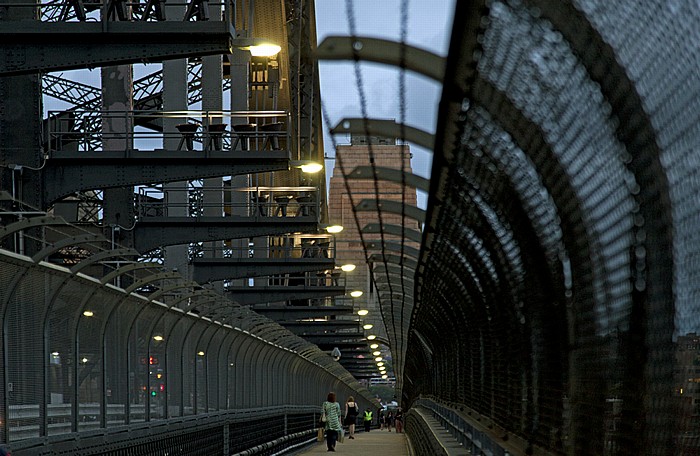
Sydney Harbour Bridge: Fußweg
28.11.2012 | New South Wales - Sydney 5: Sydney Harbour Bridge 2
Sydney Harbour Bridge: Fußweg
Im Hintergrund (v.l.): Sydney Opera House, Sydney Cove, Circular Quay, Central Business District (CBD).
| Central Business District | Circular Quay | Sydney Cove | Sydney Harbour Bridge | Sydney Opera House |
28.11.2012 | New South Wales - Sydney 5: Sydney Harbour Bridge 2
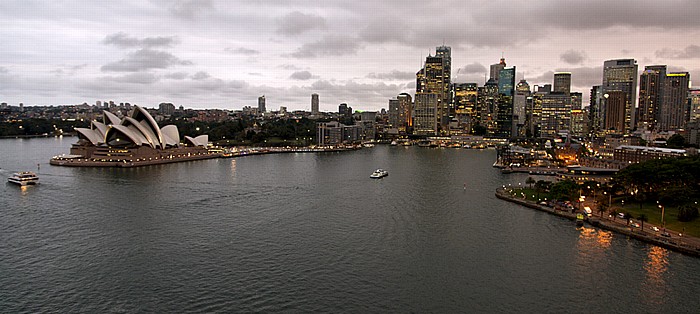
Blick von der Sydney Harbour Bridge
V.l.: Port Jackson, Sydney Opera House, Royal Botanic Gardens, Sydney Cove, Central Business District (CBD), The Rocks
| Central Business District | Port Jackson | Royal Botanic Gardens | Sydney Cove | Sydney Harbour Bridge | Sydney Opera House | The Rocks |
28.11.2012 | New South Wales - Sydney 5: Sydney Harbour Bridge 2
Blick von der Sydney Harbour Bridge: Port Jackson, Sydney Opera House
Links oben Garden Island.
| Garden Island | Port Jackson | Sydney Harbour Bridge | Sydney Opera House |
28.11.2012 | New South Wales - Sydney 5: Sydney Harbour Bridge 2
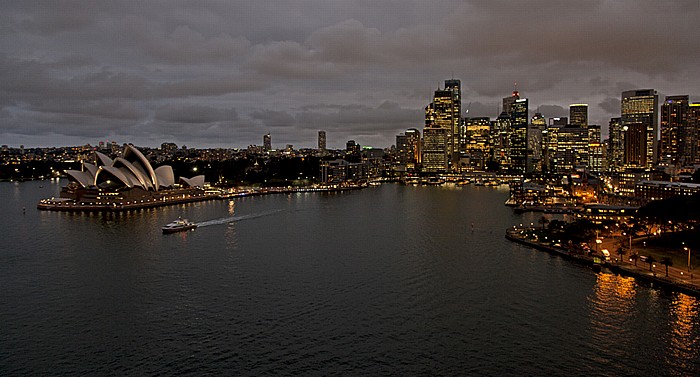
Blick von der Sydney Harbour Bridge
V.l.: Port Jackson, Sydney Opera House, Sydney Cove, Central Business District (CBD), The Rocks
| Central Business District | Port Jackson | Sydney Cove | Sydney Harbour Bridge | Sydney Opera House | The Rocks |
28.11.2012 | New South Wales - Sydney 5: Sydney Harbour Bridge 2
Blick von der Sydney Harbour Bridge: Sydney Cove, Central Business District (CBD), The Rocks
| Central Business District | Sydney Cove | Sydney Harbour Bridge | The Rocks |
28.11.2012 | New South Wales - Sydney 5: Sydney Harbour Bridge 2
Blick von der Sydney Harbour Bridge: The Rocks
Im Hintergrund Sydney Cove und Central Business District (CBD).
| Central Business District | Sydney Cove | Sydney Harbour Bridge | The Rocks |
28.11.2012 | New South Wales - Sydney 5: Sydney Harbour Bridge 2
Blick von der Sydney Harbour Bridge: The Rocks, Sydney Cove, Sydney Opera House
| Sydney Cove | Sydney Harbour Bridge | Sydney Opera House | The Rocks |
28.11.2012 | New South Wales - Sydney 5: Sydney Harbour Bridge 2
Blick von der Sydney Harbour Bridge: Sydney Opera House
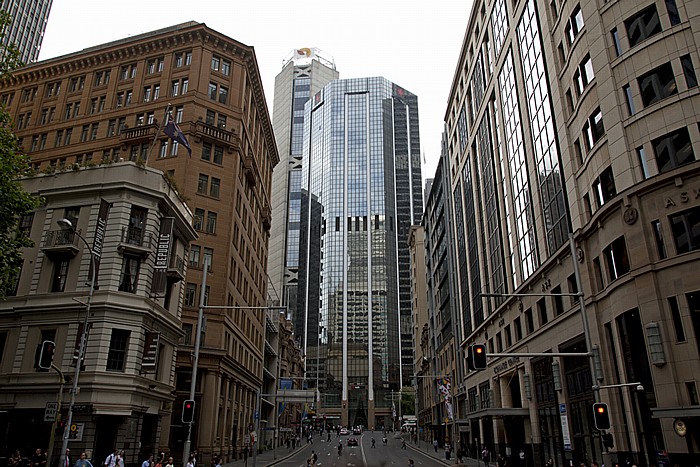
11.11.2012 | New South Wales - Sydney 6: Central Business District (CBD)
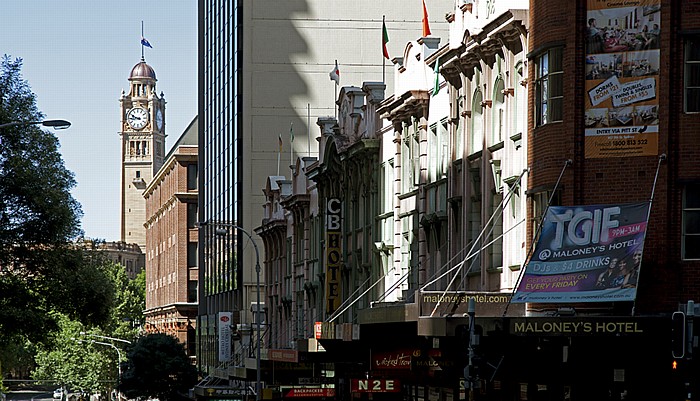
Central Business District (CBD): Pitt Street
Im Hintergrund der Turm der Central Railway Station.
| Central Business District | Central Railway Station | Pitt Street |
11.11.2012 | New South Wales - Sydney 6: Central Business District (CBD)
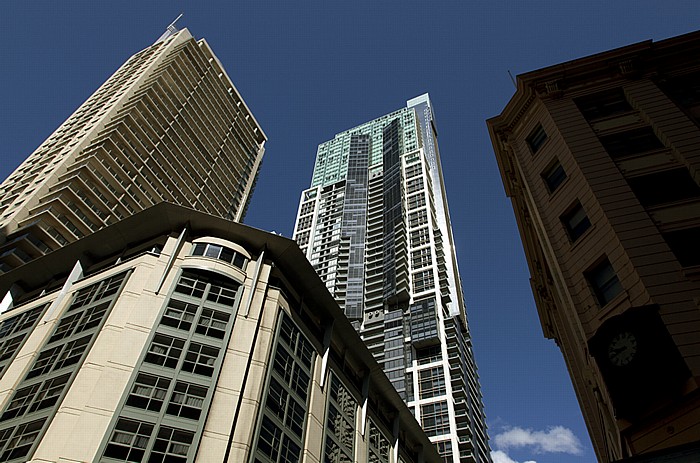
Central Business District (CBD): Pitt Street - World Square
In der Bildmitte der World Tower.
| Central Business District | Pitt Street | World Square | World Tower |
11.11.2012 | New South Wales - Sydney 6: Central Business District (CBD)
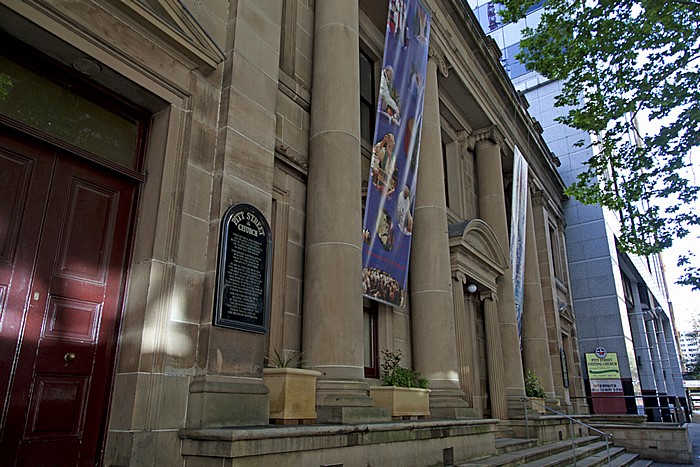
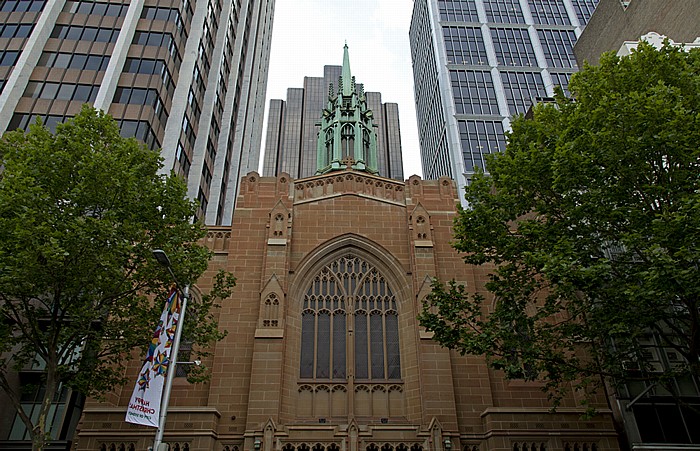
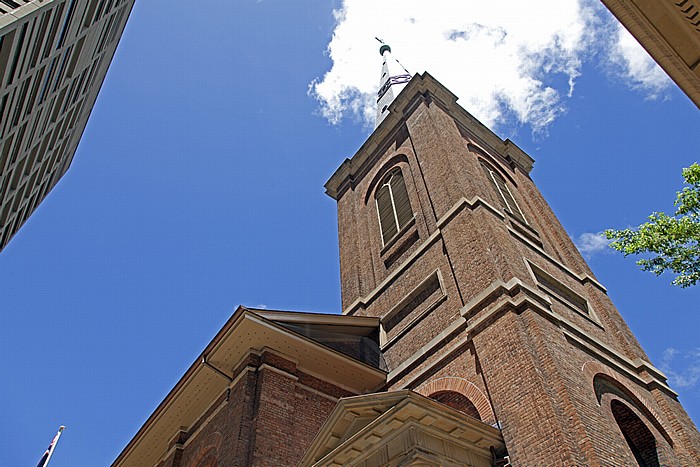
Central Business District (CBD): Pitt Street - Pitt Street Uniting Church
| Central Business District | Pitt Street | Pitt Street Uniting Church |
11.11.2012 | New South Wales - Sydney 6: Central Business District (CBD)
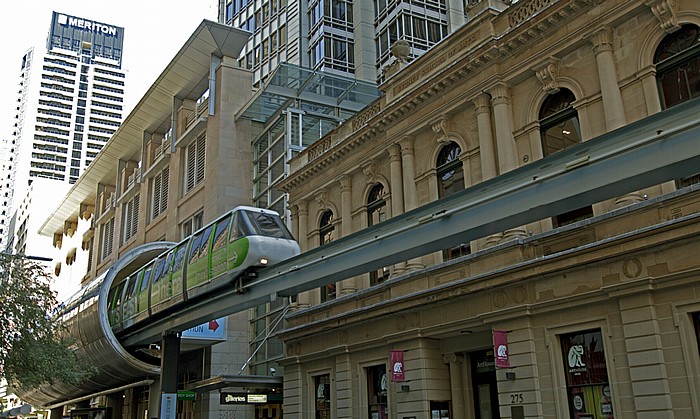
Central Business District (CBD): Pitt Street - Metro Monorail Galeries Victoria Station
| Central Business District | Metro Monorail | Metro Monorail Galeries Victoria Station | Pitt Street |
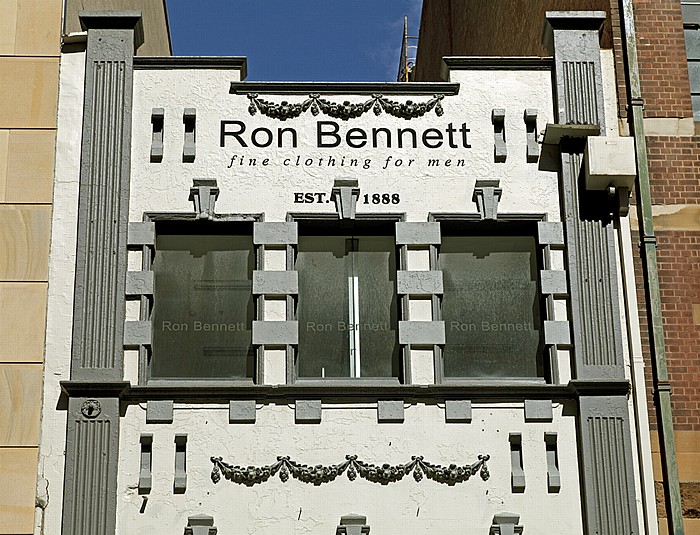
11.11.2012 | New South Wales - Sydney 6: Central Business District (CBD)
Central Business District (CBD): Pitt Street - Ron Bennett Menswear
| Central Business District | Pitt Street | Ron Bennett Menswear |
27.11.2012 | New South Wales - Sydney 6: Central Business District (CBD)
Central Business District (CBD): Pitt Street

27.11.2012 | New South Wales - Sydney 6: Central Business District (CBD)
Central Business District (CBD): Westfield Sydney mit dem Sydney Tower
| Central Business District | Sydney Tower | Westfield Sydney |
27.11.2012 | New South Wales - Sydney 6: Central Business District (CBD)
Central Business District (CBD): Pitt Street Mall (Westfield Sydney)
Oben der Sydney Tower.
| Central Business District | Pitt Street | Pitt Street Mall | Sydney Tower | Westfield Sydney |
27.11.2012 | New South Wales - Sydney 6: Central Business District (CBD)
Central Business District (CBD): MLC Centre
27.11.2012 | New South Wales - Sydney 6: Central Business District (CBD)
Central Business District (CBD): Martin Place - Macquarie Bank
| Central Business District | Macquarie Bank | Martin Place |
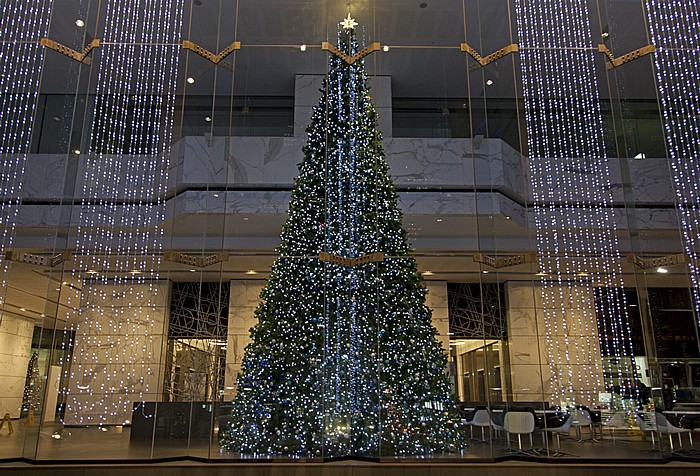
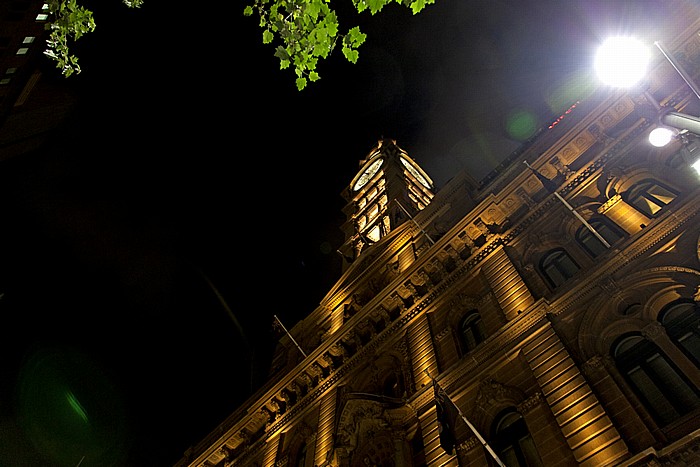
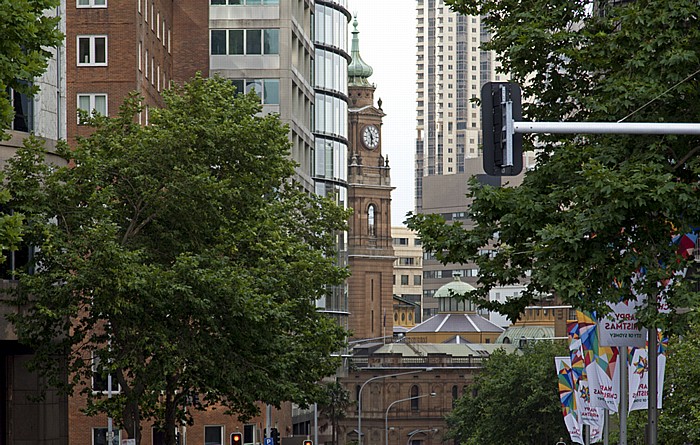
27.11.2012 | New South Wales - Sydney 6: Central Business District (CBD)
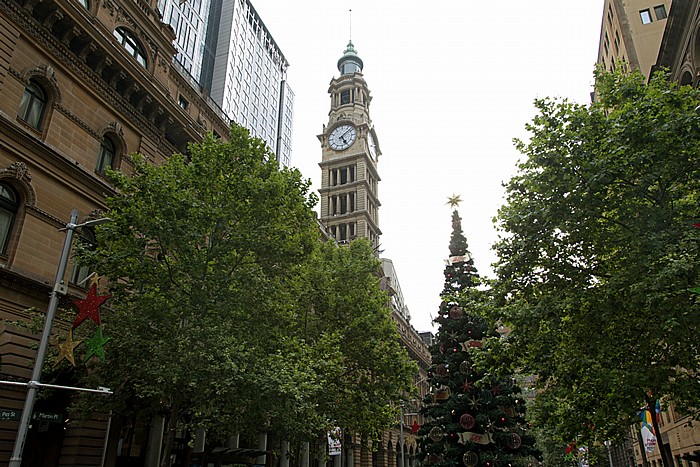
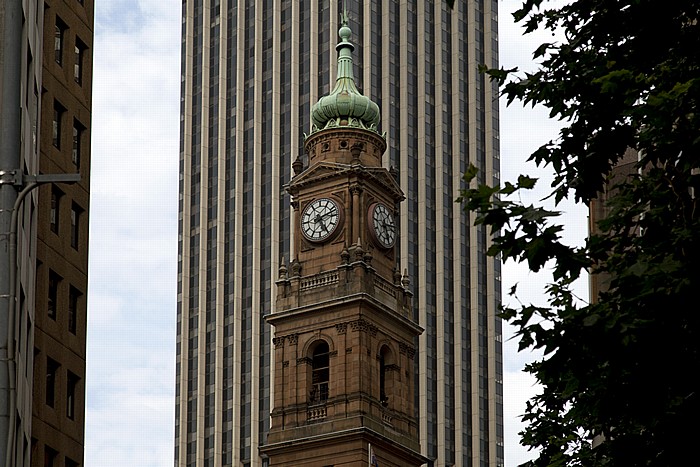
Central Business District (CBD): Martin Place - Weihnachtsbaum und Turm des General Post Office
| Central Business District | General Post Office | Martin Place |
27.11.2012 | New South Wales - Sydney 6: Central Business District (CBD)
Central Business District (CBD): Martin Place / Pitt Street

27.11.2012 | New South Wales - Sydney 6: Central Business District (CBD)
Central Business District (CBD): Pitt Street
27.11.2012 | New South Wales - Sydney 6: Central Business District (CBD)
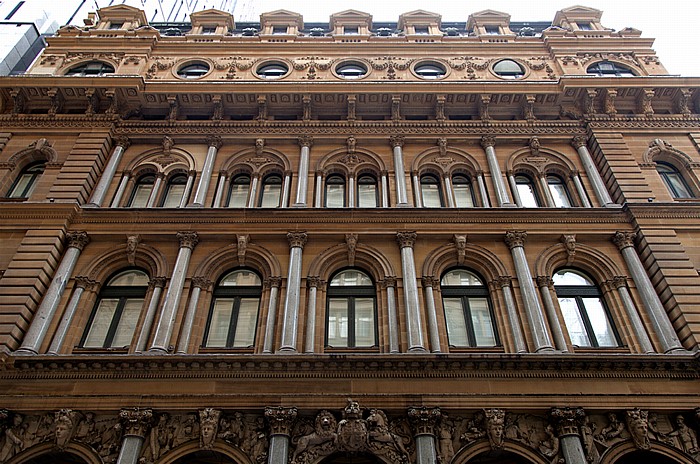
Central Business District (CBD): Department of Lands (NSW Department of Planning & Infrastructure)
Im Hintergrund das AMP Centre.
| AMP Centre | Central Business District | Department of Lands |
27.11.2012 | New South Wales - Sydney 6: Central Business District (CBD)
Central Business District (CBD): Bridge Street, National Australia Bank
Links im Hintergrund das Suncorp Place (AAPT Centre).
| Bridge Street | Central Business District | National Australia Bank | Suncorp Place |
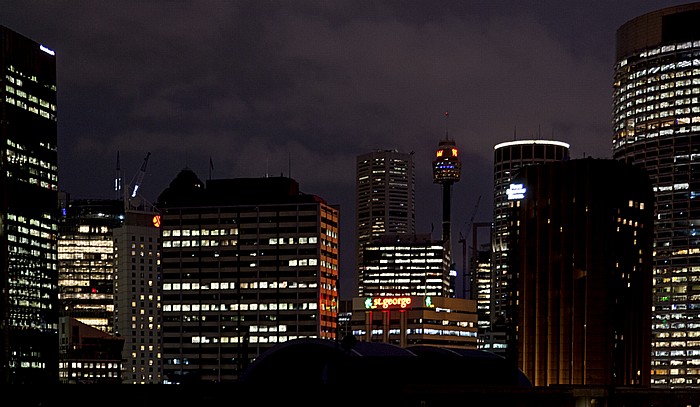
28.11.2012 | New South Wales - Sydney 6: Central Business District (CBD)
Central Business District (CBD) mit Sydney Tower
28.11.2012 | New South Wales - Sydney 6: Central Business District (CBD)
Central Business District (CBD): George Street - National Australia Bank - Weihnachtsbaum
| Central Business District | George Street | National Australia Bank |
28.11.2012 | New South Wales - Sydney 6: Central Business District (CBD)
Central Business District (CBD): George Street - Australia Square: Eingangshalle
| Australia Square | Central Business District | George Street |

28.11.2012 | New South Wales - Sydney 6: Central Business District (CBD)
Central Business District (CBD): Angel Place - Vogelkäfige
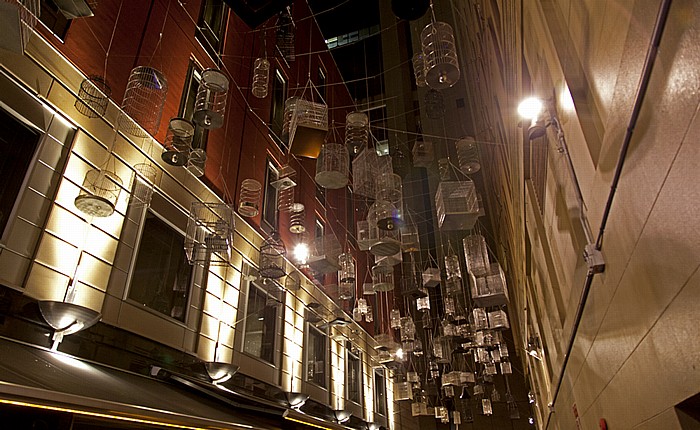
28.11.2012 | New South Wales - Sydney 6: Central Business District (CBD)
Central Business District (CBD): Angel Place - Vogelkäfige
28.11.2012 | New South Wales - Sydney 6: Central Business District (CBD)
Central Business District (CBD): Martin Place - General Post Office
| Central Business District | General Post Office | Martin Place |
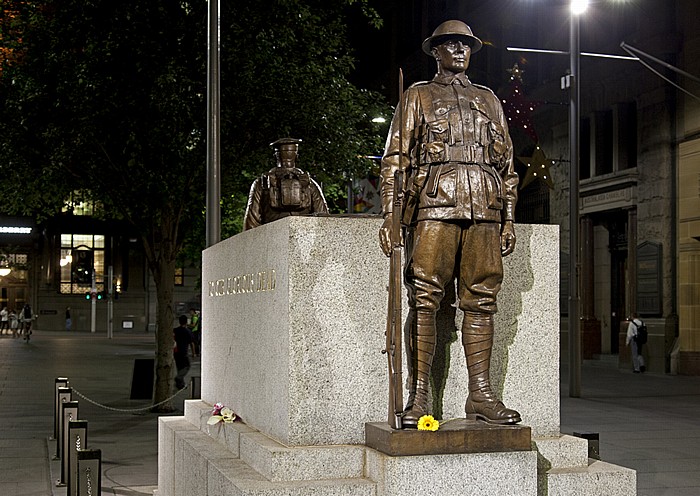
28.11.2012 | New South Wales - Sydney 6: Central Business District (CBD)
Central Business District (CBD): Martin Place - ANZAC-Kenotaph (Cenotaph)
| ANZAC-Kenotaph | Central Business District | Martin Place |
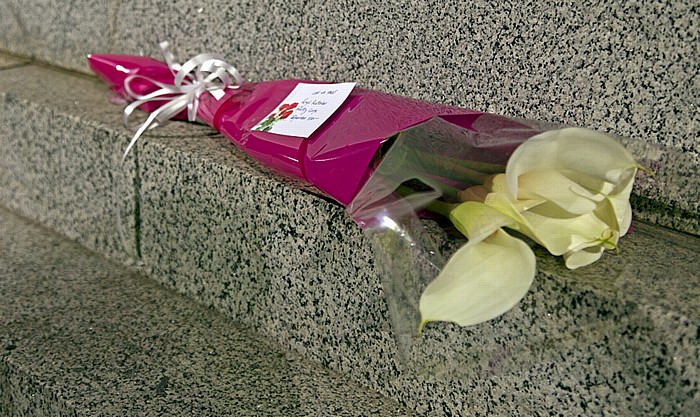
28.11.2012 | New South Wales - Sydney 6: Central Business District (CBD)
Central Business District (CBD): Martin Place - ANZAC-Kenotaph (Cenotaph)
| ANZAC-Kenotaph | Central Business District | Martin Place |
28.11.2012 | New South Wales - Sydney 6: Central Business District (CBD)
Central Business District (CBD): Martin Place - ANZAC-Kenotaph (Cenotaph)
| ANZAC-Kenotaph | Central Business District | Martin Place |
28.11.2012 | New South Wales - Sydney 6: Central Business District (CBD)
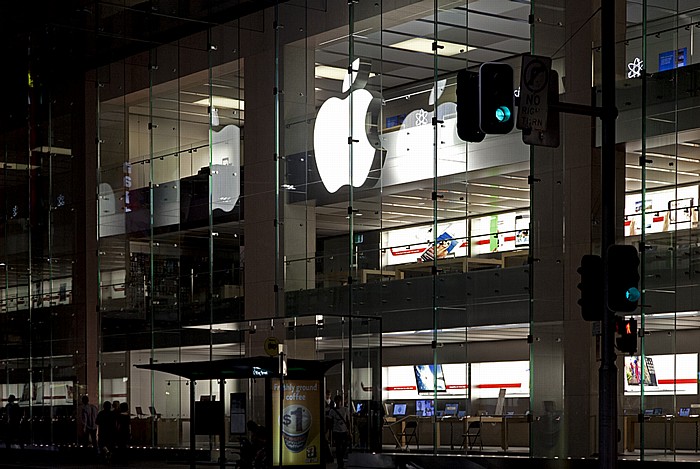
Central Business District (CBD): George Street - Apple Store
28.11.2012 | New South Wales - Sydney 6: Central Business District (CBD)
Central Business District (CBD): George Street
28.11.2012 | New South Wales - Sydney 6: Central Business District (CBD)
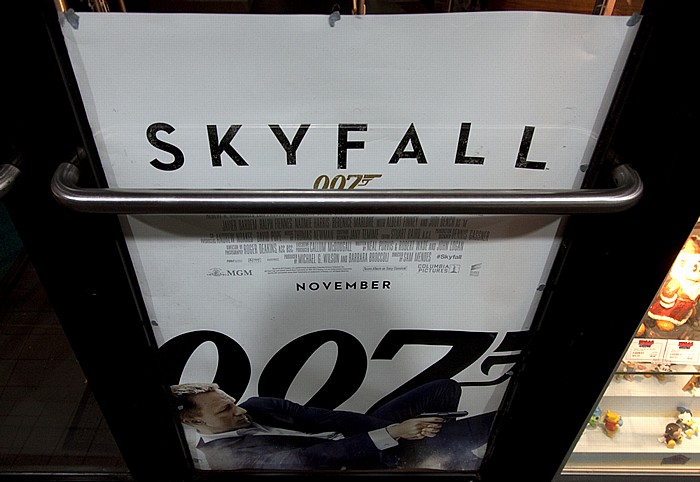
Central Business District (CBD): Werbung für den James Bond-Film "Skyfall"
28.11.2012 | New South Wales - Sydney 6: Central Business District (CBD)
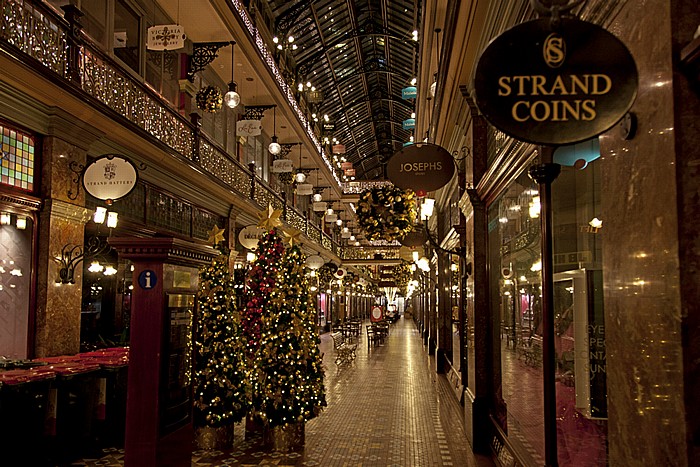
Central Business District (CBD): George Street - The Dymocks Building: The Strand Arcade
| Central Business District | George Street | The Dymocks Building |

28.11.2012 | New South Wales - Sydney 6: Central Business District (CBD)
Central Business District (CBD): George Street - Queen Victoria Building
| Central Business District | George Street | Queen Victoria Building |
28.11.2012 | New South Wales - Sydney 6: Central Business District (CBD)
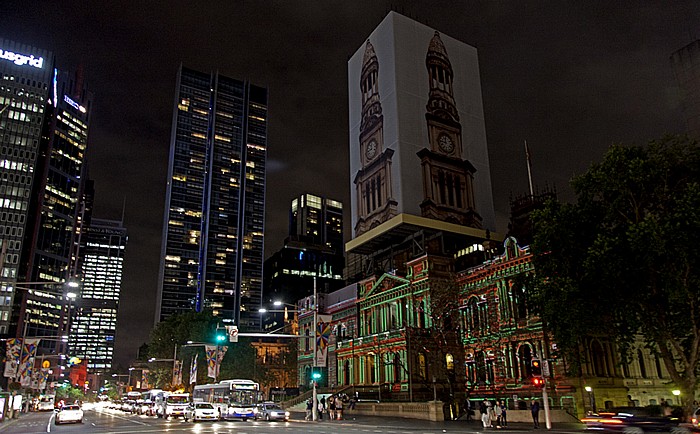
Central Business District (CBD): George Street - Sydney Town Hall
| Central Business District | George Street | Sydney Town Hall |

28.11.2012 | New South Wales - Sydney 6: Central Business District (CBD)
Central Business District (CBD): George Street - Sydney Town Hall
| Central Business District | George Street | Sydney Town Hall |
29.11.2012 | New South Wales - Sydney 6: Central Business District (CBD)
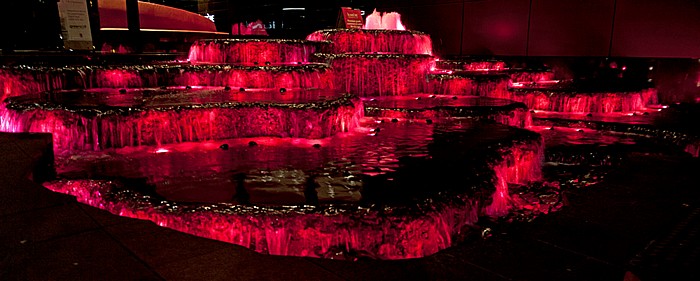
Central Business District (CBD): Bathurst Street - Lumière Residences: Illuminierter Brunnen
| Bathurst Street | Central Business District | Lumière Residences |
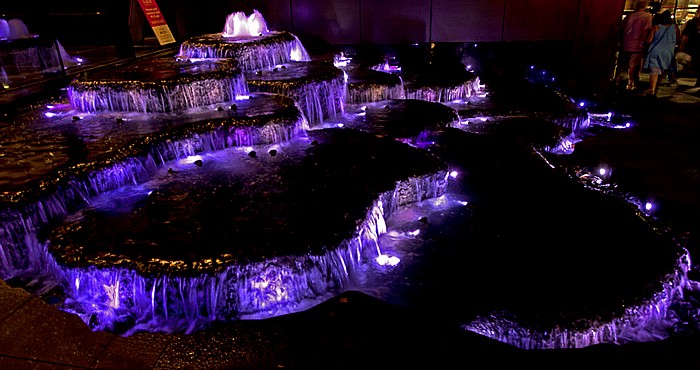
29.11.2012 | New South Wales - Sydney 6: Central Business District (CBD)
Central Business District (CBD): Bathurst Street - Lumière Residences: Illuminierter Brunnen
| Bathurst Street | Central Business District | Lumière Residences |
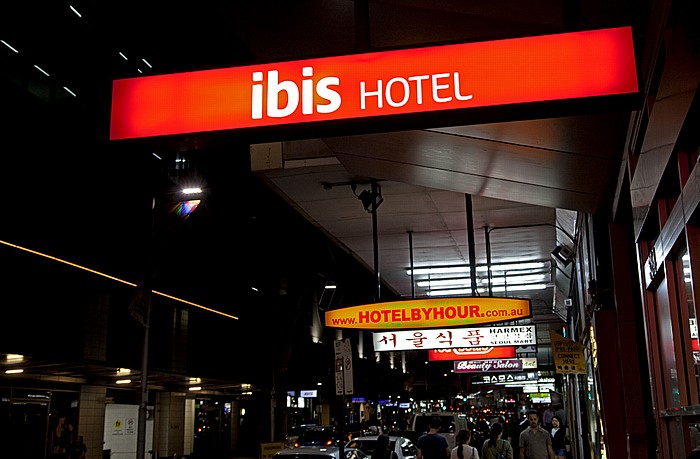
29.11.2012 | New South Wales - Sydney 6: Central Business District (CBD)
Central Business District (CBD): Pitt Street - ibis Hotel
01.12.2012 | New South Wales - Sydney 6: Central Business District (CBD)
Central Business District (CBD): Macquarie Street - Sydney Mint
| Central Business District | Macquarie Street | Sydney Mint |
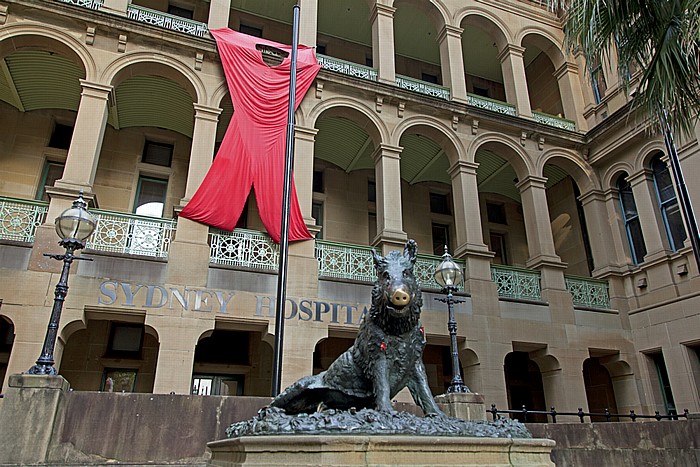
01.12.2012 | New South Wales - Sydney 6: Central Business District (CBD)
Central Business District (CBD): Macquarie Street - Sydney Hospital
| Central Business District | Macquarie Street | Sydney Hospital |
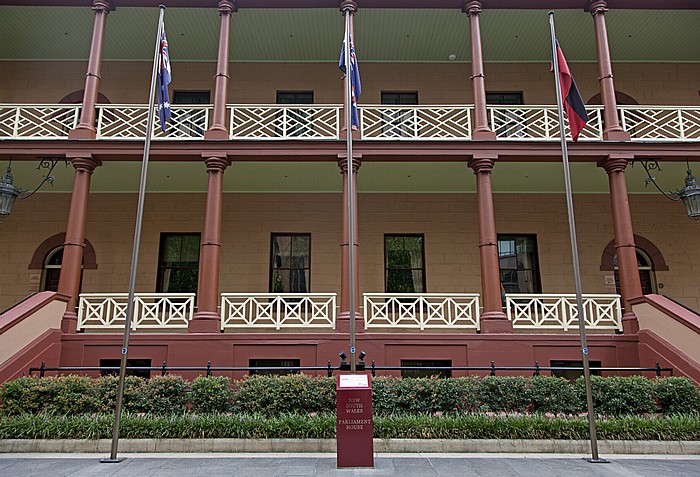
01.12.2012 | New South Wales - Sydney 6: Central Business District (CBD)
Central Business District (CBD): Macquarie Street - Parliament House (Parlament von New South Wales)
| Central Business District | Macquarie Street | Parliament House |
01.12.2012 | New South Wales - Sydney 6: Central Business District (CBD)
Central Business District (CBD): Macquarie Street - St Stephen's Uniting Church
Links das Westpac Bank Building, rechts Deutsche Bank Place. In der Bildmitte im Hintergrund die Colonial State Bank.
| Central Business District | Colonial State Bank | Deutsche Bank Place | Macquarie Street | St Stephen's Uniting Church | Westpac Bank Building |
01.12.2012 | New South Wales - Sydney 6: Central Business District (CBD)
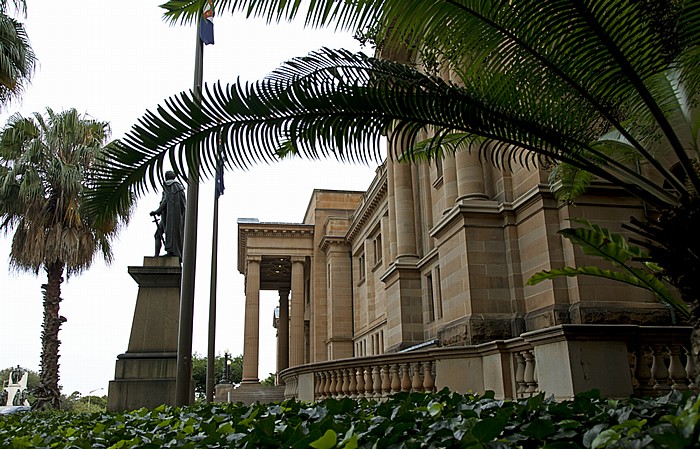
Central Business District (CBD): State Library of New South Wales
| Central Business District | State Library of New South Wales |
01.12.2012 | New South Wales - Sydney 6: Central Business District (CBD)
Central Business District (CBD): Bent Street
In der Bildmitte das Department of Lands (NSW Department of Planning & Infrastructure).
| Bent Street | Central Business District | Department of Lands |
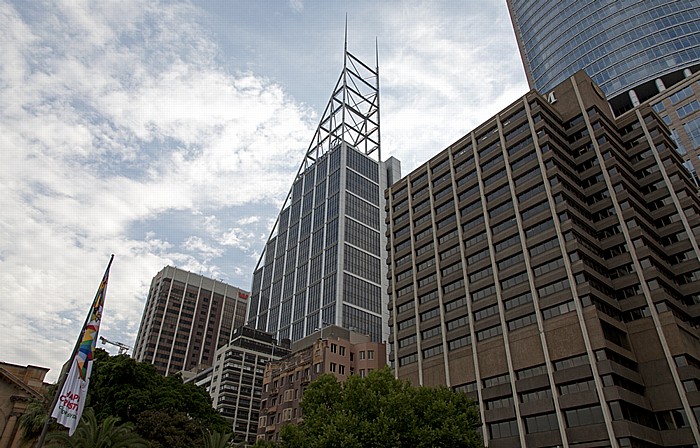
01.12.2012 | New South Wales - Sydney 6: Central Business District (CBD)
Central Business District (CBD): Macquarie Street - Deutsche Bank Place
Rechts oben der Chifley Tower.
| Central Business District | Chifley Tower | Deutsche Bank Place | Macquarie Street |
01.12.2012 | New South Wales - Sydney 6: Central Business District (CBD)
Central Business District (CBD)
01.12.2012 | New South Wales - Sydney 6: Central Business District (CBD)
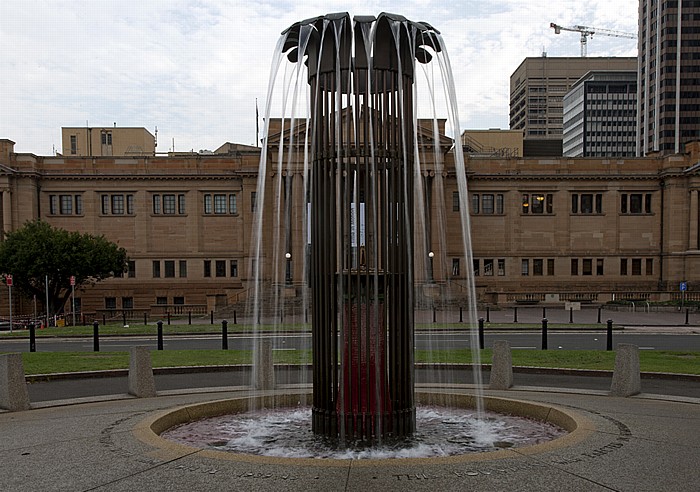
Central Business District (CBD): Brunnen
Im Hintergrund die State Library of New South Wales.
| Central Business District | State Library of New South Wales |
01.12.2012 | New South Wales - Sydney 6: Central Business District (CBD)
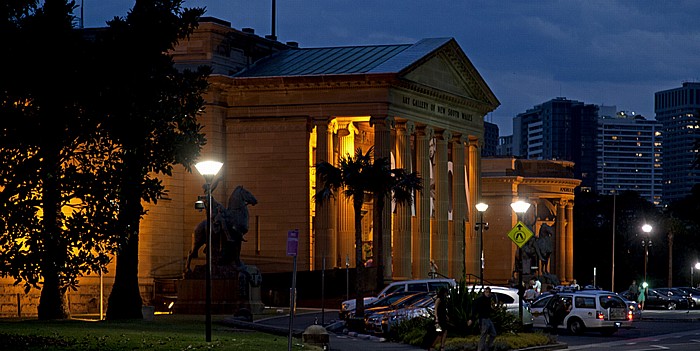
Central Business District (CBD): Art Gallery of New South Wales
| Art Gallery of New South Wales | Central Business District |
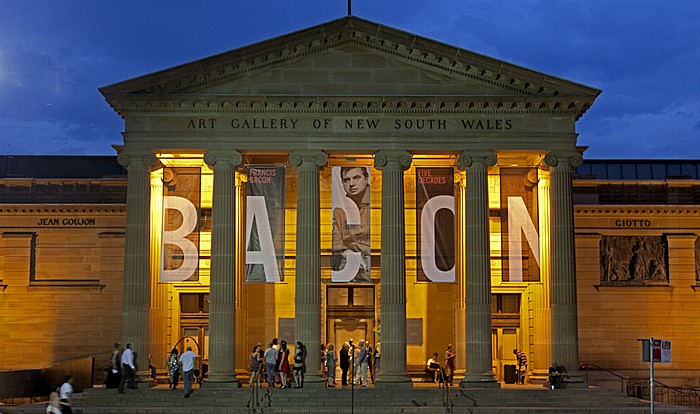
01.12.2012 | New South Wales - Sydney 6: Central Business District (CBD)
Central Business District (CBD): Art Gallery of New South Wales
| Art Gallery of New South Wales | Central Business District |
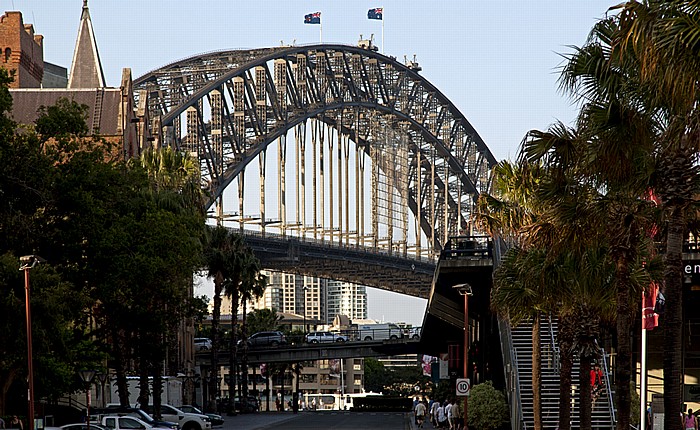
29.11.2012 | New South Wales - Sydney 7: The Rocks / Millers Point
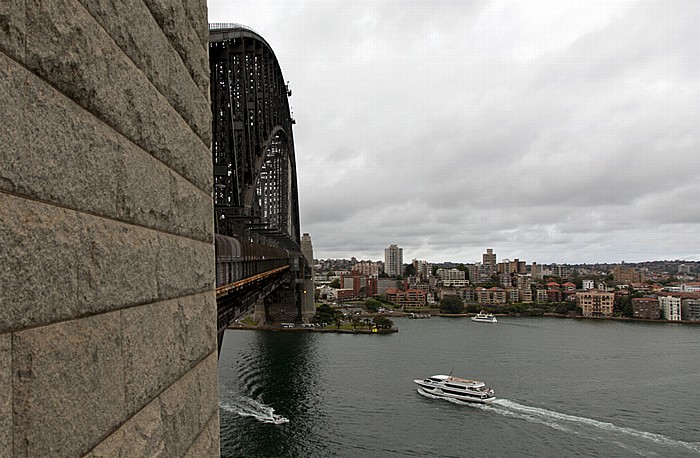
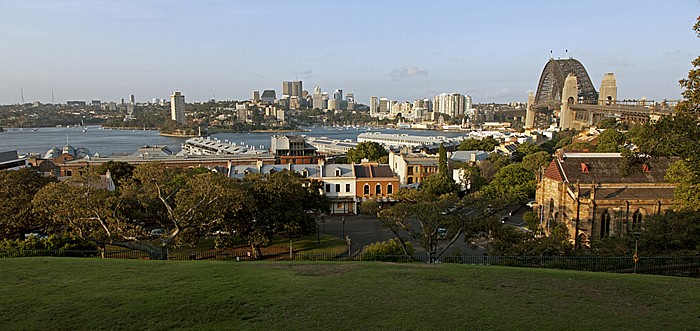
Blick vom Observatory Hill (Millers Point): Port Jackson, North Shore, Sydney Harbour Bridge
| Millers Point | North Shore | Observatory Hill | Port Jackson | Sydney Harbour Bridge |
29.11.2012 | New South Wales - Sydney 7: The Rocks / Millers Point
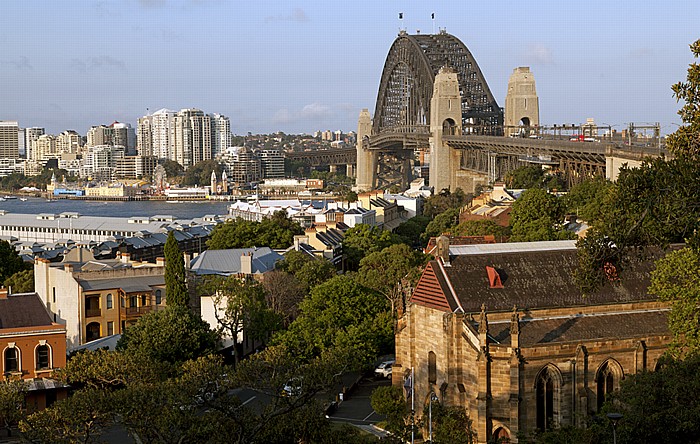
Blick vom Observatory Hill (Millers Point): Sydney Harbour Bridge
Links oben Milsons Point mit dem Luna Park. Rechts unten die Garrison Church (Holy Trinity Anglican Church).
| Garrison Church | Luna Park | Millers Point | Milsons Point | Observatory Hill | Sydney Harbour Bridge |
29.11.2012 | New South Wales - Sydney 7: The Rocks / Millers Point
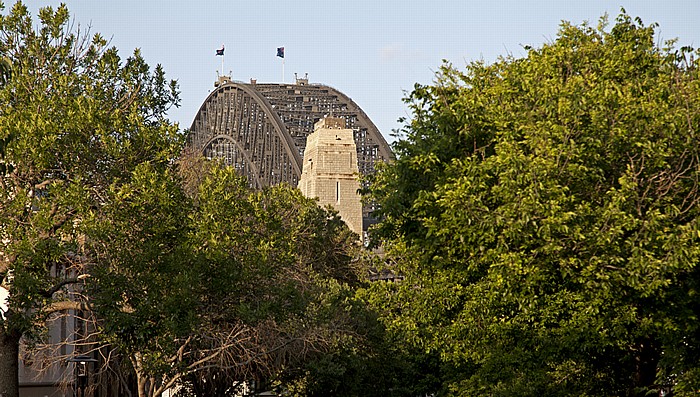
Blick von Millers Point auf die Sydney Harbour Bridge
29.11.2012 | New South Wales - Sydney 7: The Rocks / Millers Point
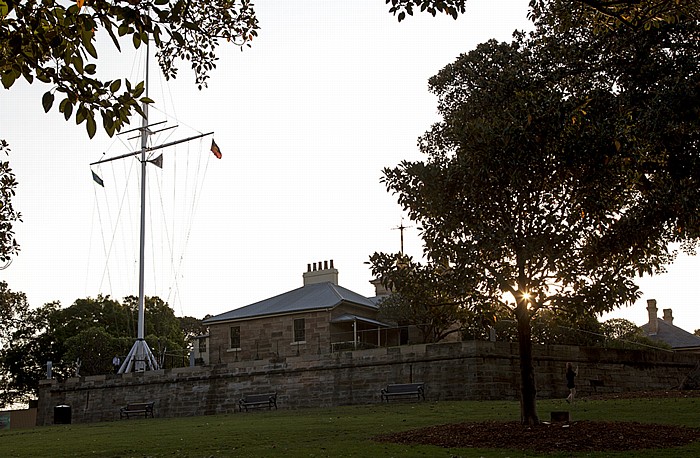
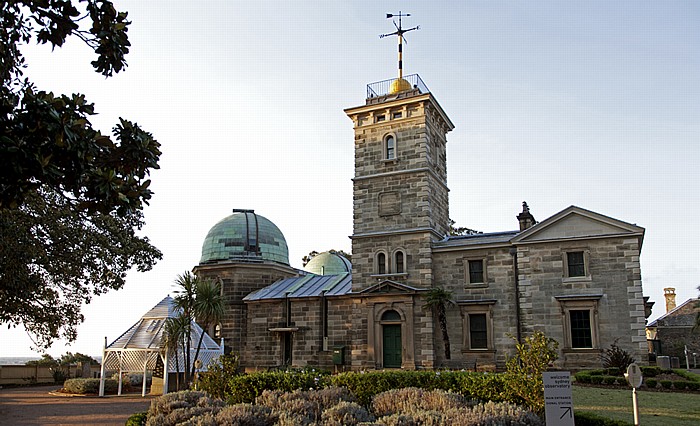
Observatory Hill (Millers Point): Sydney Observatory

29.11.2012 | New South Wales - Sydney 7: The Rocks / Millers Point
Observatory Hill (Millers Point): Sydney Observatory
29.11.2012 | New South Wales - Sydney 7: The Rocks / Millers Point
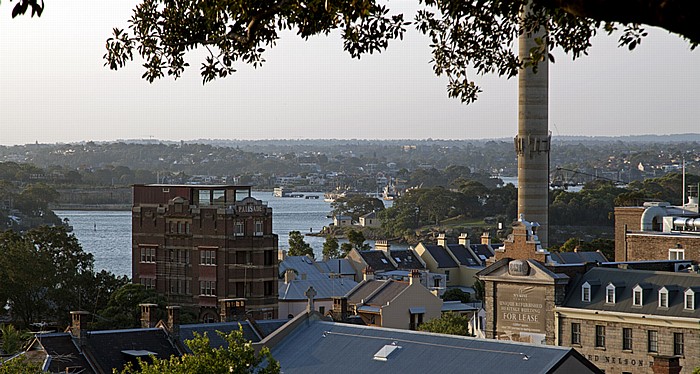
Blick vom Observatory Hill (Millers Point): Port Jackson
29.11.2012 | New South Wales - Sydney 7: The Rocks / Millers Point
Observatory Hill (Millers Point): Sydney Observatory
29.11.2012 | New South Wales - Sydney 7: The Rocks / Millers Point
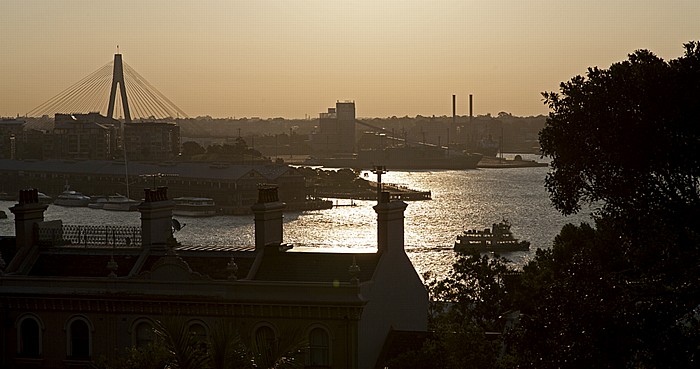
Blick vom Observatory Hill (Millers Point): Pyrmont (vorne), Balmain
Im Hintergrund die ANZAC Bridge.
| ANZAC Bridge | Balmain | Millers Point | Observatory Hill | Pyrmont |
29.11.2012 | New South Wales - Sydney 7: The Rocks / Millers Point
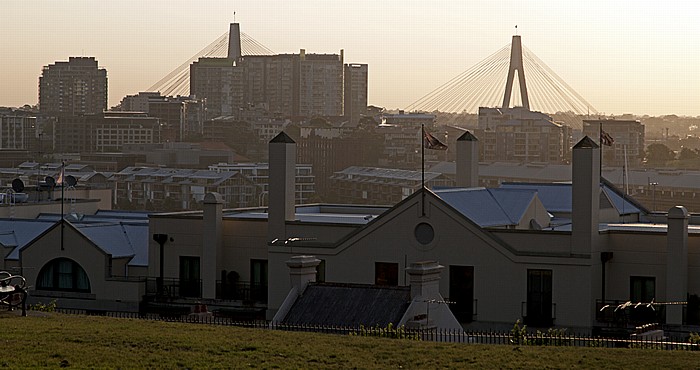
Blick vom Observatory Hill (Millers Point): Balmain
Im Hintergrund die ANZAC Bridge.
| ANZAC Bridge | Balmain | Millers Point | Observatory Hill |
29.11.2012 | New South Wales - Sydney 7: The Rocks / Millers Point
The Rocks: Wilson Parking
| The Rocks |
29.11.2012 | New South Wales - Sydney 7: The Rocks / Millers Point
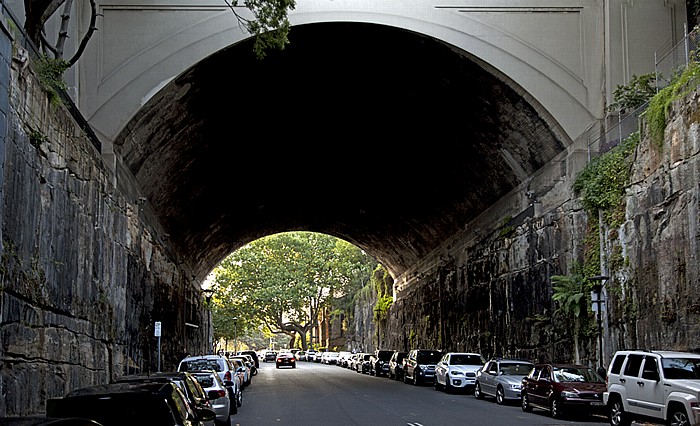
The Rocks: Argyle Cut (Argyle Street)
| Argyle Cut | Argyle Street | The Rocks |
29.11.2012 | New South Wales - Sydney 7: The Rocks / Millers Point
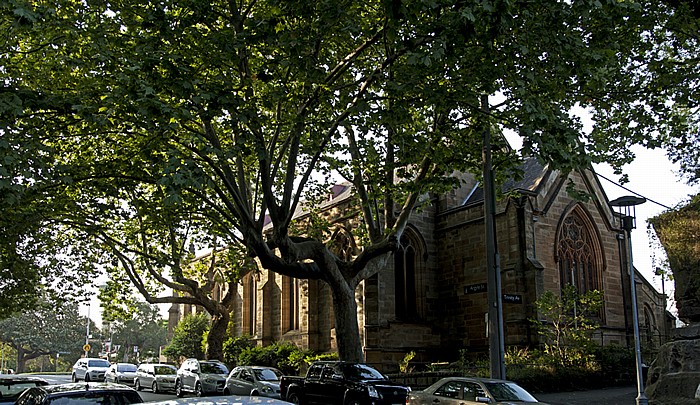
Millers Point: Argyle Street, Garrison Church (Holy Trinity Anglican Church)
29.11.2012 | New South Wales - Sydney 7: The Rocks / Millers Point
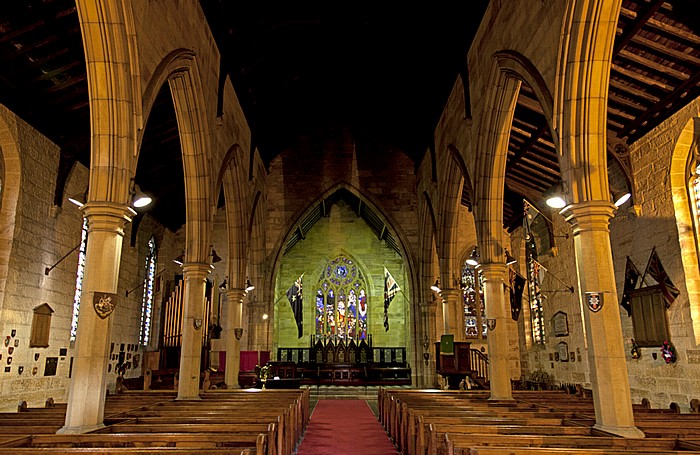
Garrison Church (Holy Trinity Anglican Church)
| Garrison Church |
29.11.2012 | New South Wales - Sydney 7: The Rocks / Millers Point
Garrison Church (Holy Trinity Anglican Church)
| Garrison Church |

29.11.2012 | New South Wales - Sydney 7: The Rocks / Millers Point
Millers Point: Argyle Place
| Argyle Place | Millers Point |
29.11.2012 | New South Wales - Sydney 7: The Rocks / Millers Point
Millers Point: Argyle Place
| Argyle Place | Millers Point |
28.11.2012 | New South Wales - Sydney 7: The Rocks / Millers Point
Blick von der Sydney Harbour Bridge: The Rocks
28.11.2012 | New South Wales - Sydney 7: The Rocks / Millers Point
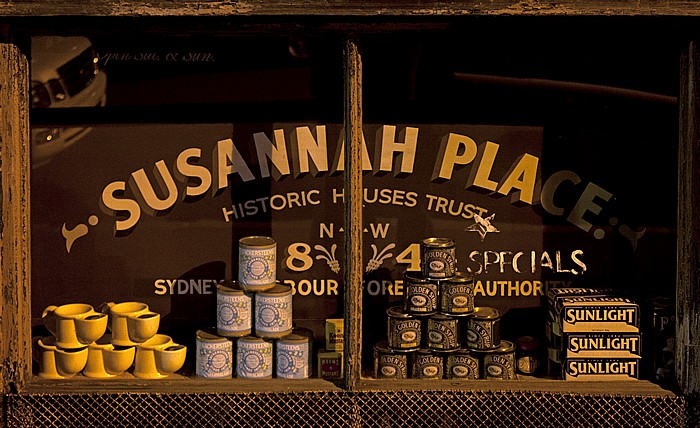
The Rocks: Susannah Place Museum
28.11.2012 | New South Wales - Sydney 7: The Rocks / Millers Point
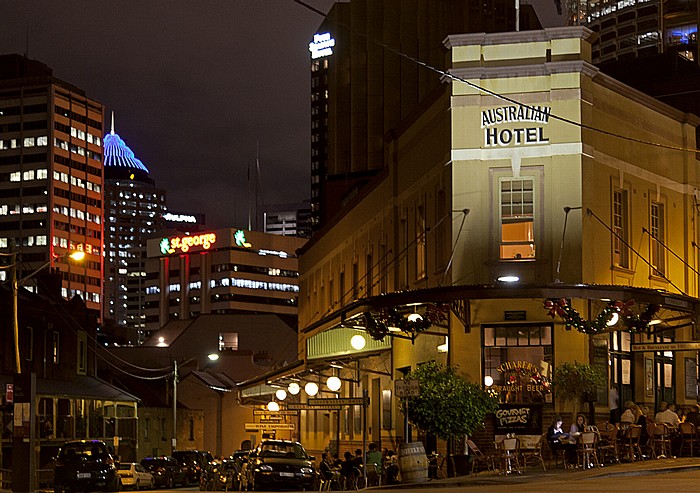
The Rocks: Australian Hotel
Links im Hintergrund der Central Business District (CBD).
| Australian Hotel | Central Business District | The Rocks |
11.11.2012 | New South Wales - Sydney 9: Rund um den Hyde Park
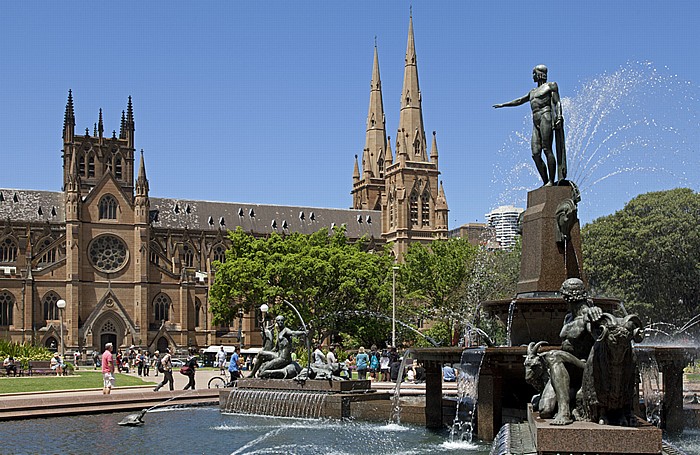
Hyde Park: Archibald Fountain
Im Hintergrund die Saint Mary's Cathedral.
11.11.2012 | New South Wales - Sydney 9: Rund um den Hyde Park
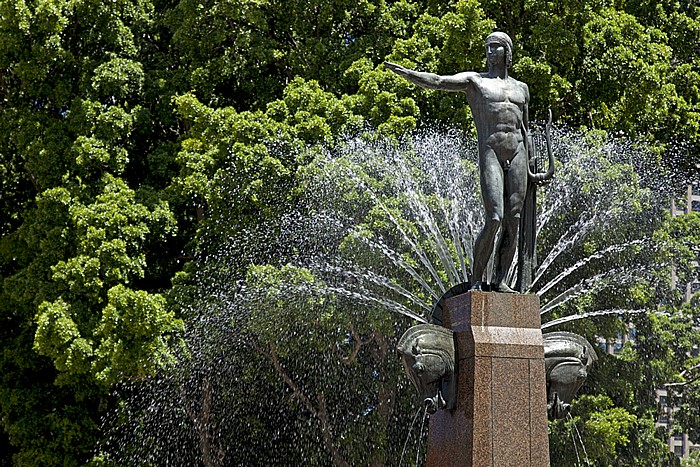
Hyde Park: Archibald Fountain
| Archibald Fountain | Hyde Park |
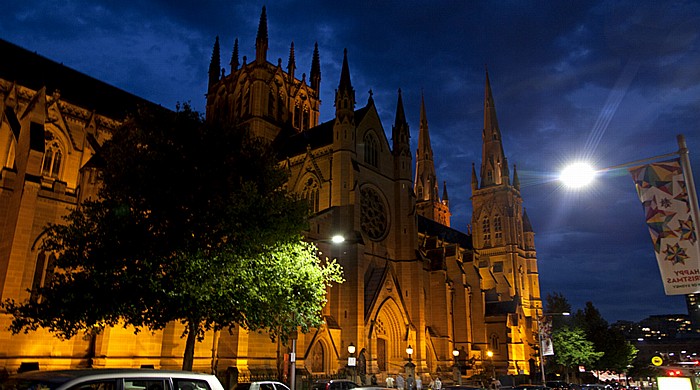
11.11.2012 | New South Wales - Sydney 9: Rund um den Hyde Park
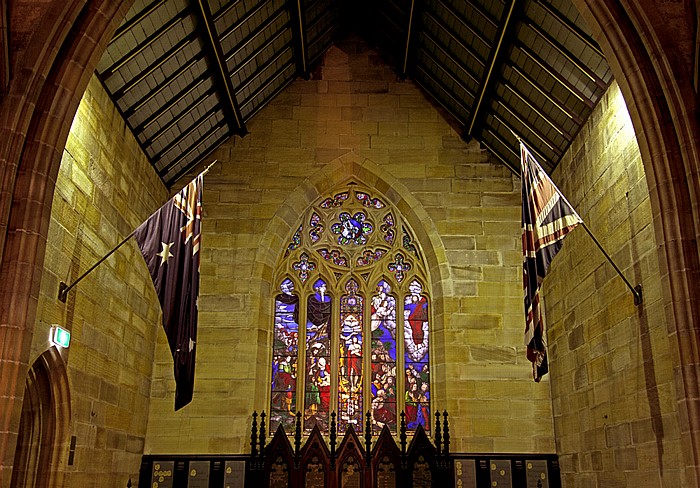
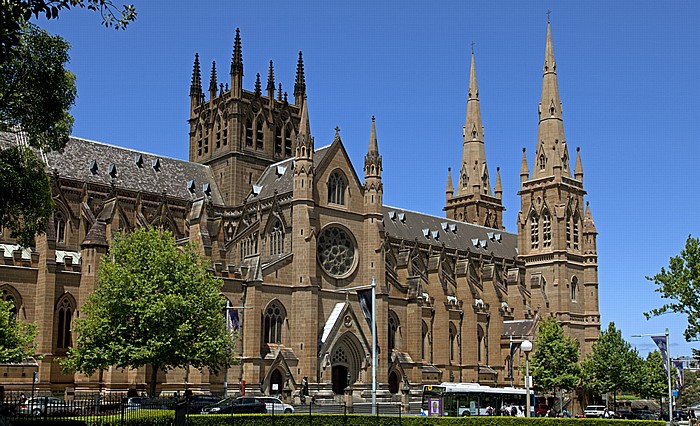
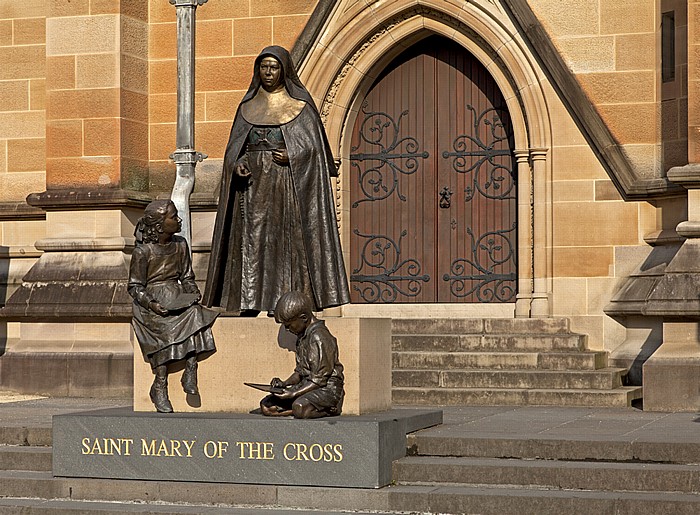
Saint Mary's Cathedral
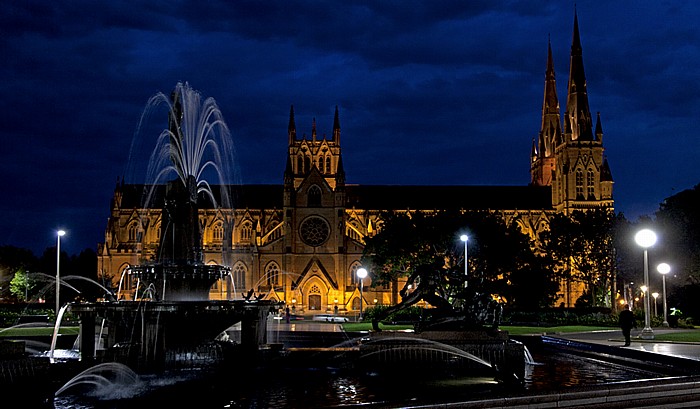
01.12.2012 | New South Wales - Sydney 9: Rund um den Hyde Park
Saint Mary's Cathedral
01.12.2012 | New South Wales - Sydney 9: Rund um den Hyde Park
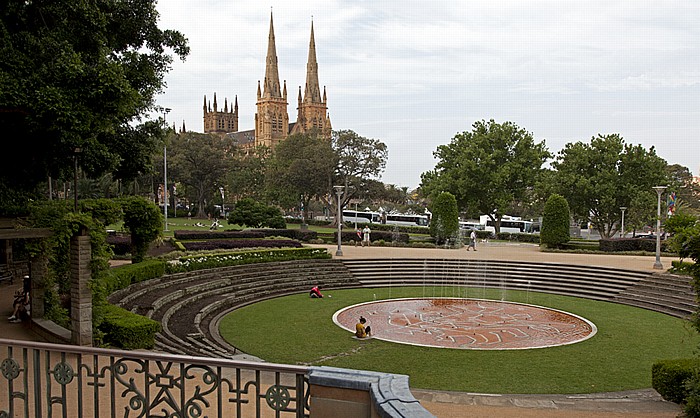
Hyde Park: Sandringham Gardens
Im Hintergrund die Saint Mary's Cathedral.
| Hyde Park | Saint Mary's Cathedral | Sandringham Gardens |
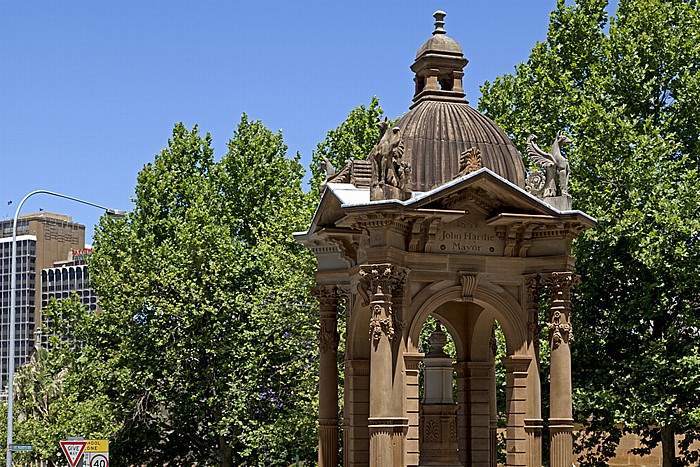
11.11.2012 | New South Wales - Sydney 9: Rund um den Hyde Park
Mayor John Hardie Memorial
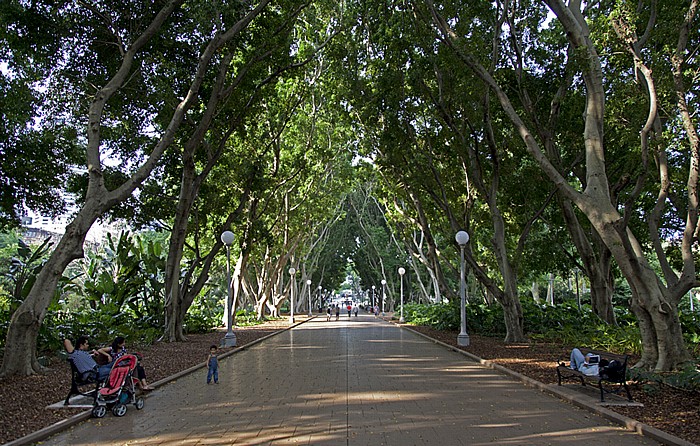
01.12.2012 | New South Wales - Sydney 9: Rund um den Hyde Park
Hyde Park: Feigen-Allee
| Hyde Park |
11.11.2012 | New South Wales - Sydney 9: Rund um den Hyde Park
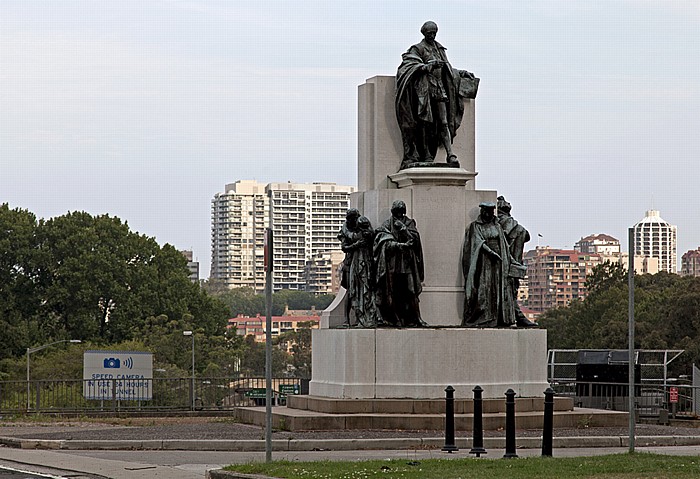
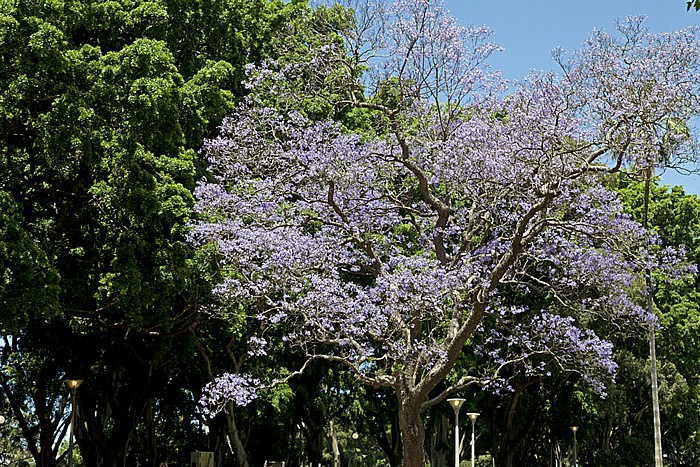
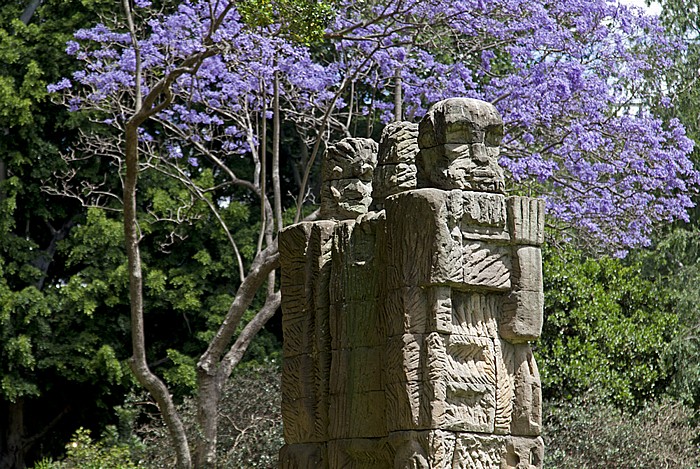
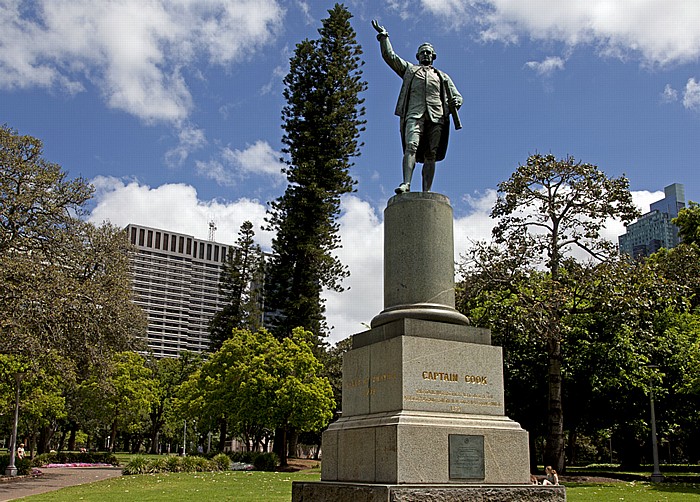
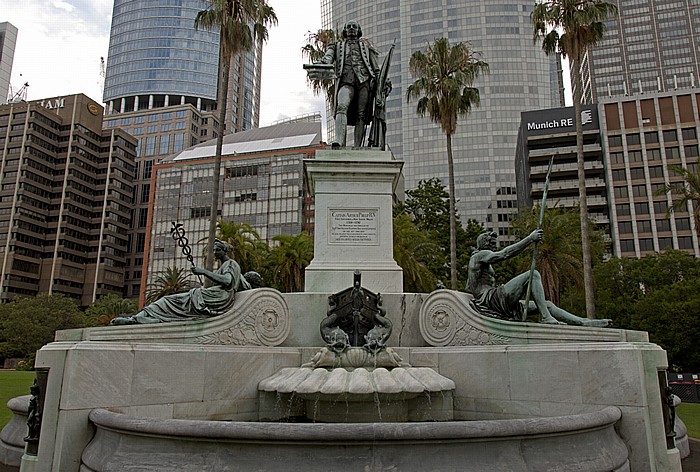
Hyde Park: Captain-Cook-Denkmal
01.12.2012 | New South Wales - Sydney 9: Rund um den Hyde Park
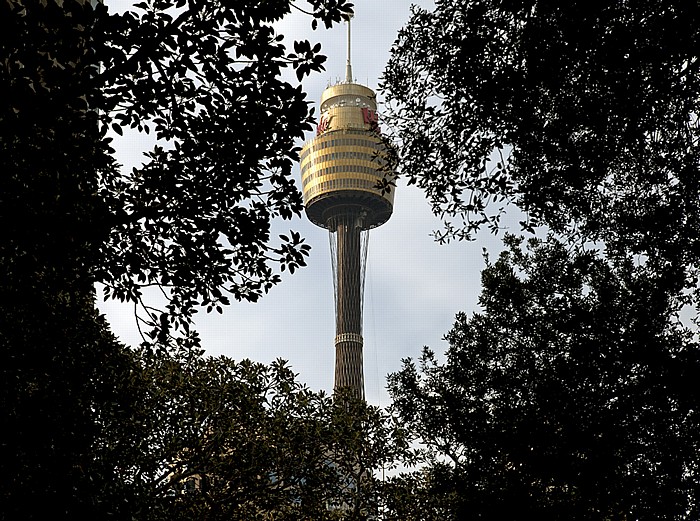
Blick aus dem Hyde Park auf den Sydney Tower
| Hyde Park | Sydney Tower |

01.12.2012 | New South Wales - Sydney 9: Rund um den Hyde Park
Hyde Park: Archibald Fountain
| Archibald Fountain | Hyde Park |
01.12.2012 | New South Wales - Sydney 9: Rund um den Hyde Park
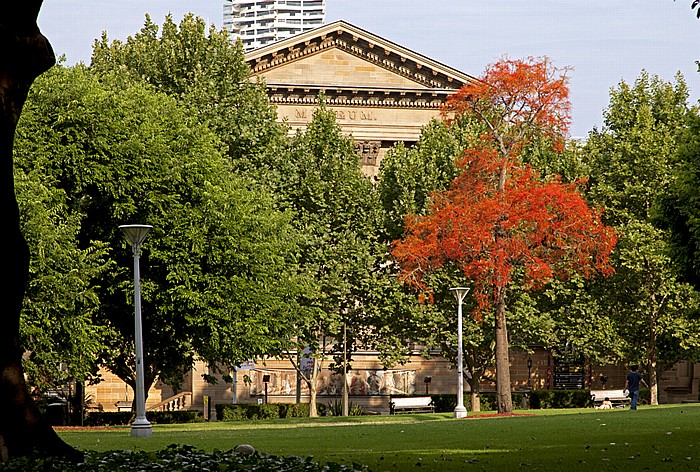
Hyde Park
Im Hintergrund das Australian Museum.
| Australian Museum | Hyde Park |
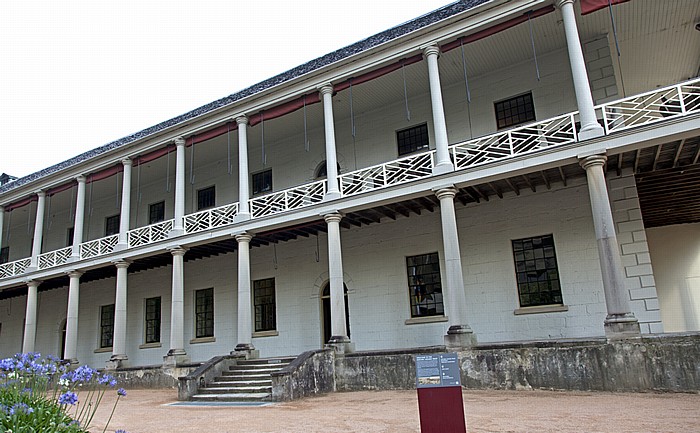
11.11.2012 | New South Wales - Sydney 9: Rund um den Hyde Park
Land Titles Office
11.11.2012 | New South Wales - Sydney 9: Rund um den Hyde Park
Hyde Park Barracks: Irish Famine Memorial (Große Hungersnot in Irland)
11.11.2012 | New South Wales - Sydney 9: Rund um den Hyde Park
Hyde Park Barracks
01.12.2012 | New South Wales - Sydney 9: Rund um den Hyde Park
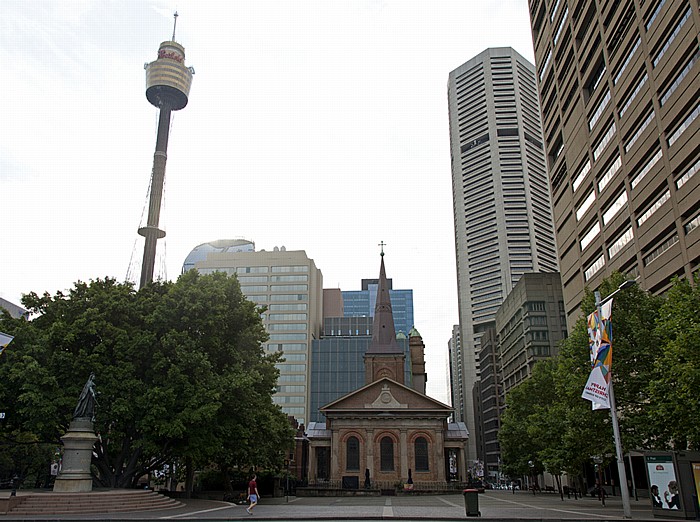
Central Business District (CBD): St James' Church
Links das Queen-Victoria-Denkmal. Im Hintergrund der Sydney Tower (links) und das MLC Centre.
| Central Business District | MLC Centre | Queen-Victoria-Denkmal | St James' Church | Sydney Tower |
11.11.2012 | New South Wales - Sydney 9: Rund um den Hyde Park
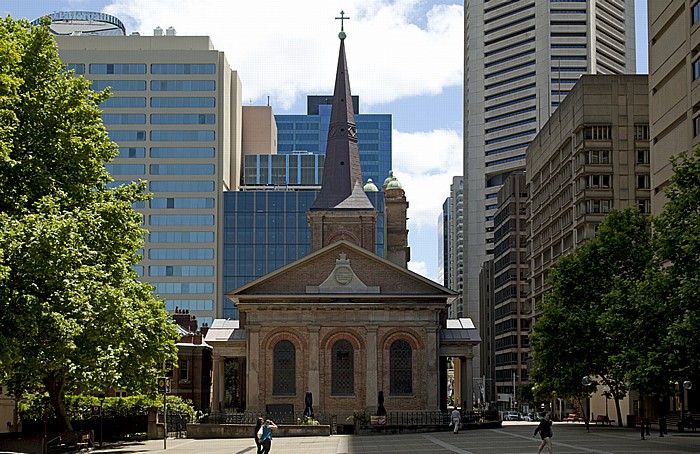
Central Business District (CBD): St James' Church
Rechts im Hintergrund das MLC Centre.
| Central Business District | MLC Centre | St James' Church |
11.11.2012 | New South Wales - Sydney 9: Rund um den Hyde Park
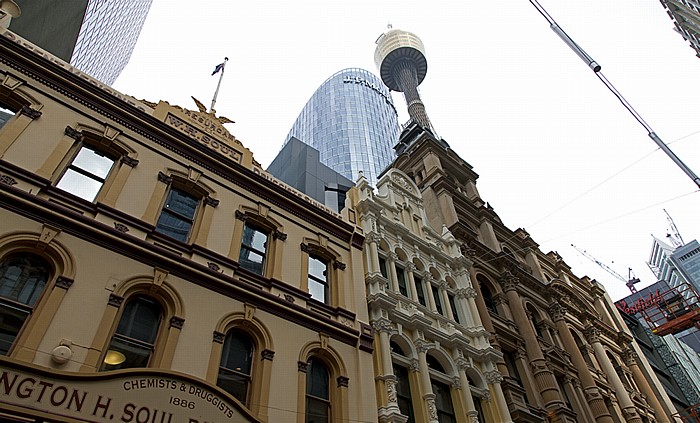
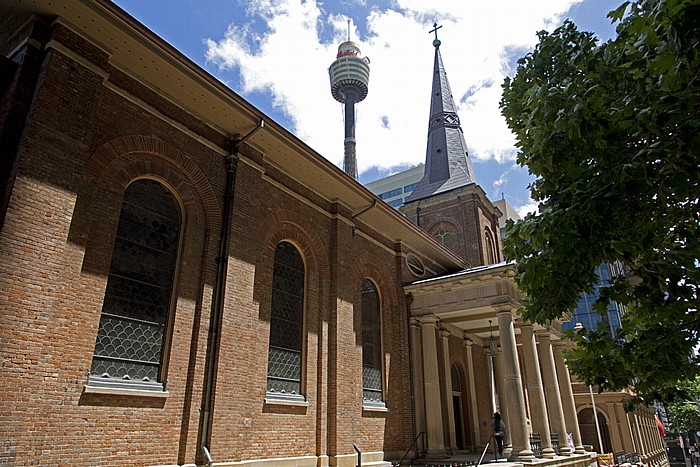
Central Business District (CBD): St James' Church
Im Hintergrund der Sydney Tower.
| Central Business District | St James' Church | Sydney Tower |
11.11.2012 | New South Wales - Sydney 9: Rund um den Hyde Park
Central Business District (CBD): St James' Church
01.12.2012 | New South Wales - Sydney 9: Rund um den Hyde Park
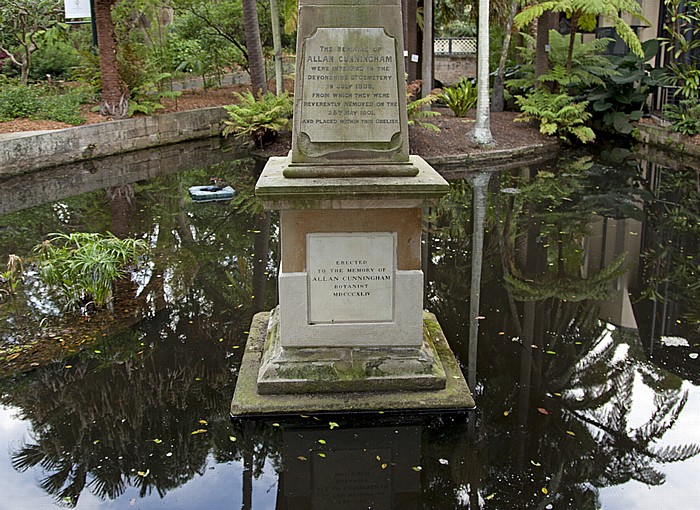
Central Business District (CBD): Hyde Park Obelisk
11.11.2012 | New South Wales - Sydney 9: Rund um den Hyde Park
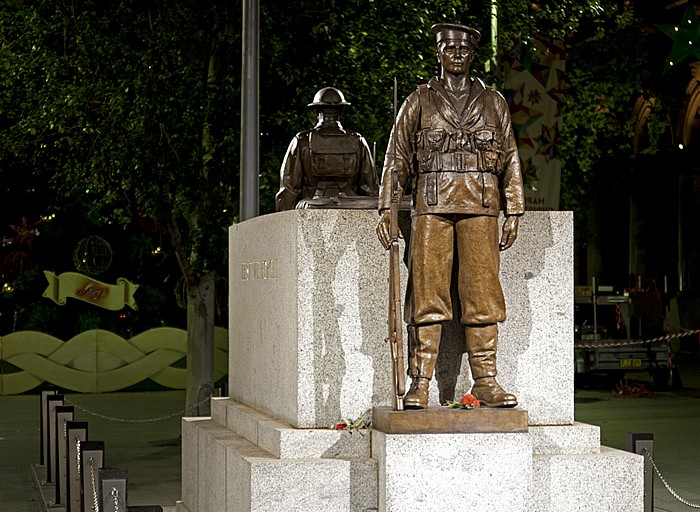
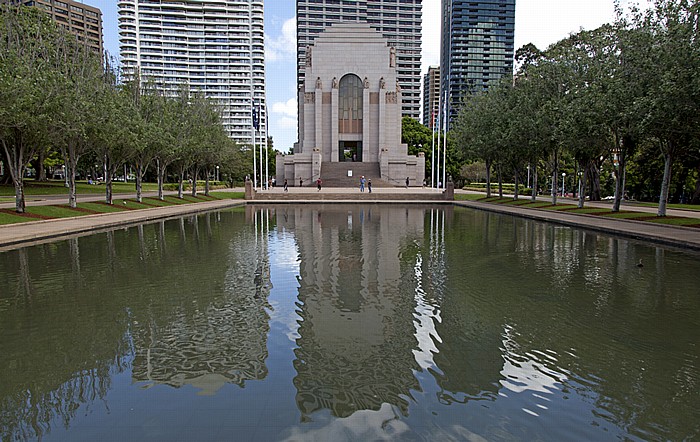
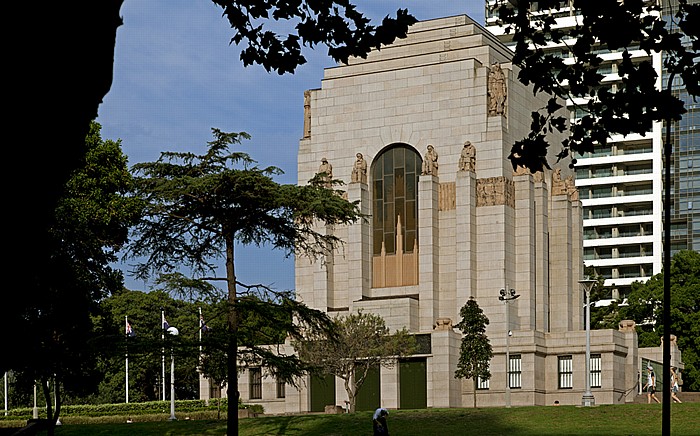
Hyde Park: ANZAC War Memorial und der "Lake Of Reflections"
| ANZAC War Memorial | Hyde Park |
11.11.2012 | New South Wales - Sydney 9: Rund um den Hyde Park
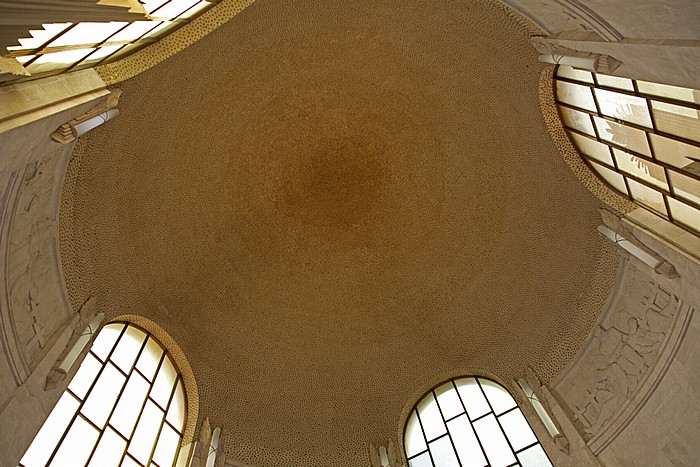
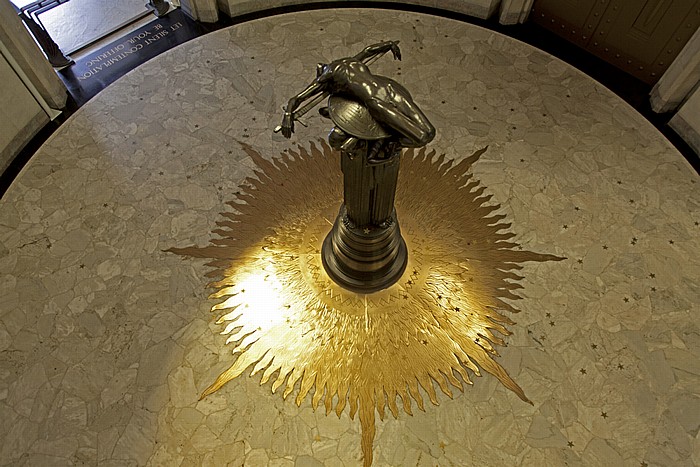
ANZAC War Memorial
11.11.2012 | New South Wales - Sydney 9: Rund um den Hyde Park
ANZAC War Memorial: "Sacrifice" (von Rayner Hoff)
01.12.2012 | New South Wales - Sydney 9: Rund um den Hyde Park
Hyde Park: ANZAC War Memorial
| ANZAC War Memorial | Hyde Park |
11.11.2012 | New South Wales - Sydney 9: Rund um den Hyde Park
Central Business District (CBD): Downing Centre
27.11.2012 | New South Wales - Sydney 9: Rund um den Hyde Park
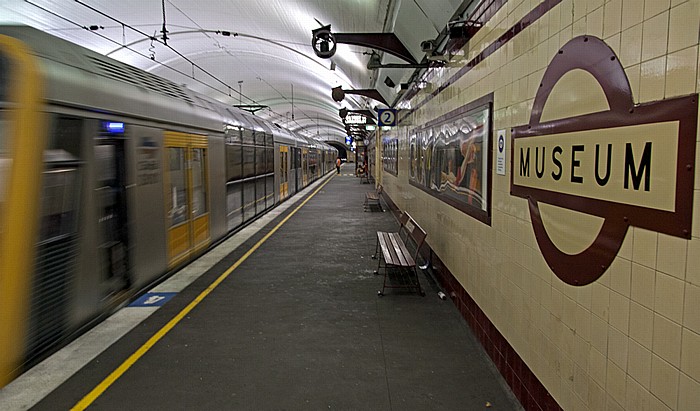
Central Business District (CBD): Museum Railway Station
27.11.2012 | New South Wales - Sydney 9: Rund um den Hyde Park
Central Business District (CBD): Museum Railway Station
01.12.2012 | New South Wales - Sydney 9: Rund um den Hyde Park
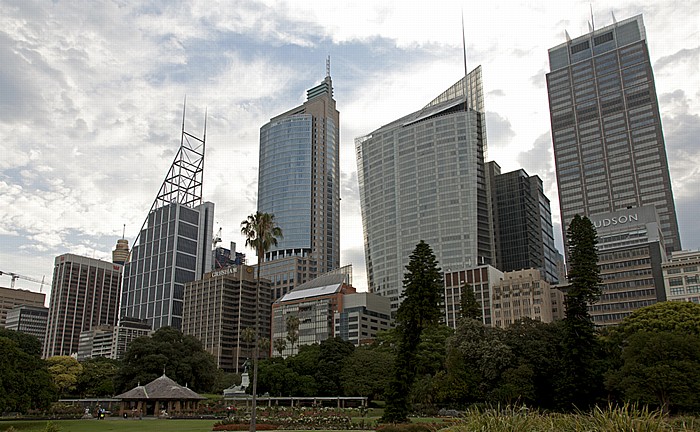
Hyde Park
Im Hintergrund der Central Business District (CBD) mit dem Sydney Tower.
01.12.2012 | New South Wales - Sydney 9: Rund um den Hyde Park
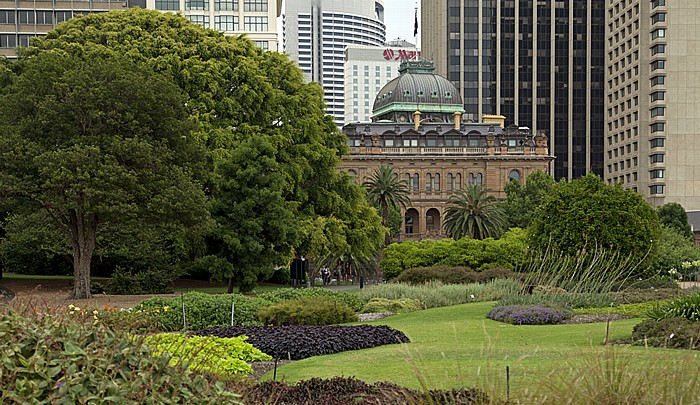
The Domain
Im Hintergrund die Saint Mary's Cathedral.
01.12.2012 | New South Wales - Sydney 9: Rund um den Hyde Park
Land Titles Office und Mayor John Hardie Memorial
Links im Hintergrund das MLC Centre.
| Land Titles Office | Mayor John Hardie Memorial | MLC Centre |
01.12.2012 | New South Wales - Sydney 9: Rund um den Hyde Park
Saint Mary's Cathedral
01.12.2012 | New South Wales - Sydney 9: Rund um den Hyde Park
Hyde Park: Archibald Fountain
Im Hintergrund die Saint Mary's Cathedral.
29.11.2012 | New South Wales - Sydney 8: Darling Harbour
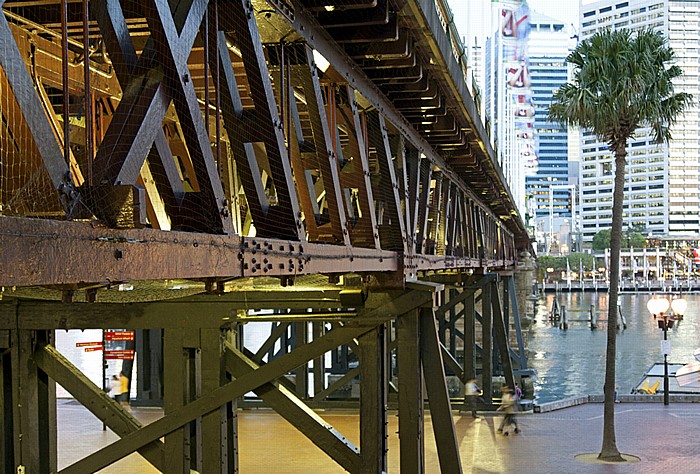
Darling Harbour: Hickson Road
| Darling Harbour | Hickson Road |
29.11.2012 | New South Wales - Sydney 8: Darling Harbour
Darling Harbour: Hickson Road
Im Hintergrund die Maritime Trade Towers.
29.11.2012 | New South Wales - Sydney 8: Darling Harbour
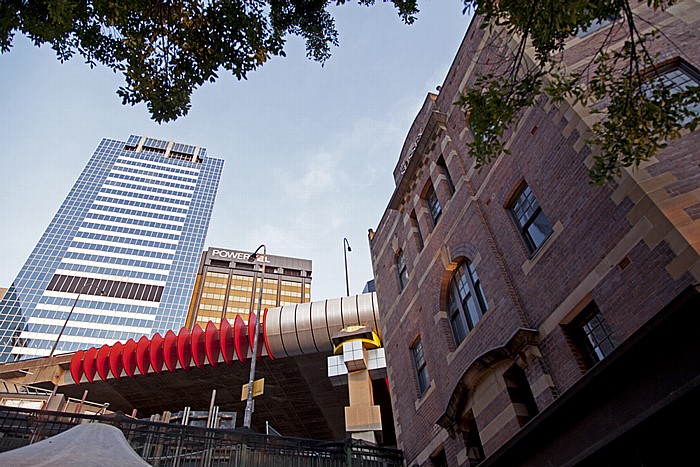
Darling Harbour: Sussex Street
Rechts The Sussex Hotel.
29.11.2012 | New South Wales - Sydney 8: Darling Harbour
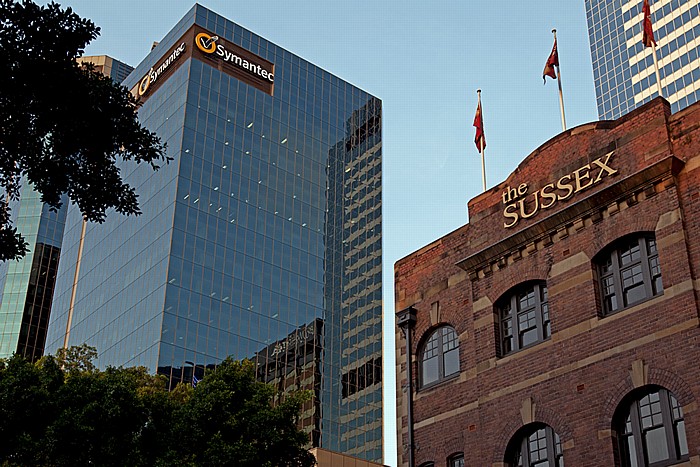
Darling Harbour: Sussex Street - The Sussex Hotel
Links die Maritime Trade Towers.
| Darling Harbour | Maritime Trade Towers | Sussex Street | The Sussex Hotel |
29.11.2012 | New South Wales - Sydney 8: Darling Harbour
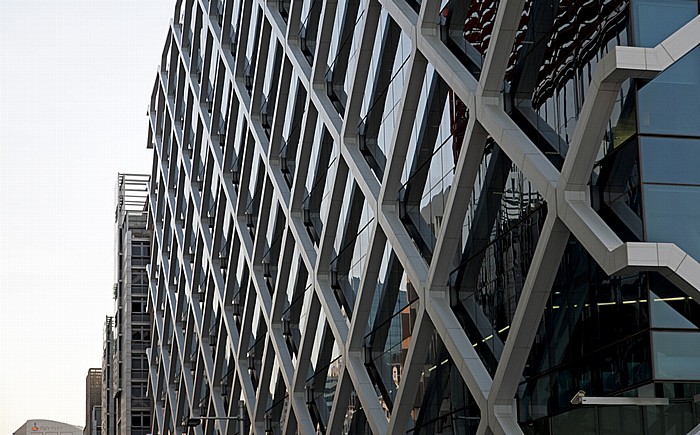
Darling Harbour: One Shelley Street
29.11.2012 | New South Wales - Sydney 8: Darling Harbour
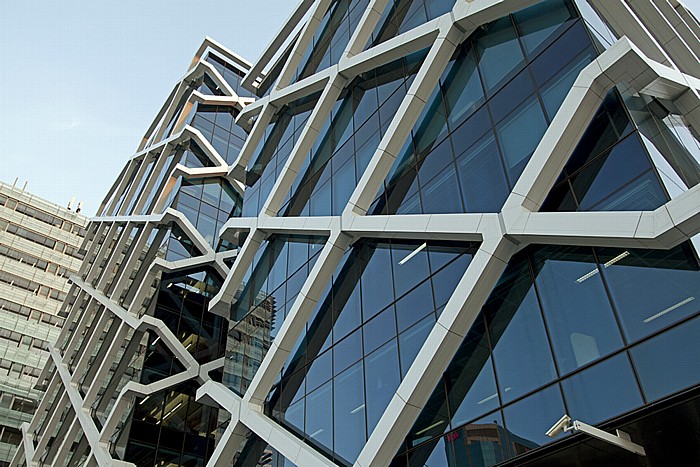
Darling Harbour: One Shelley Street
29.11.2012 | New South Wales - Sydney 8: Darling Harbour
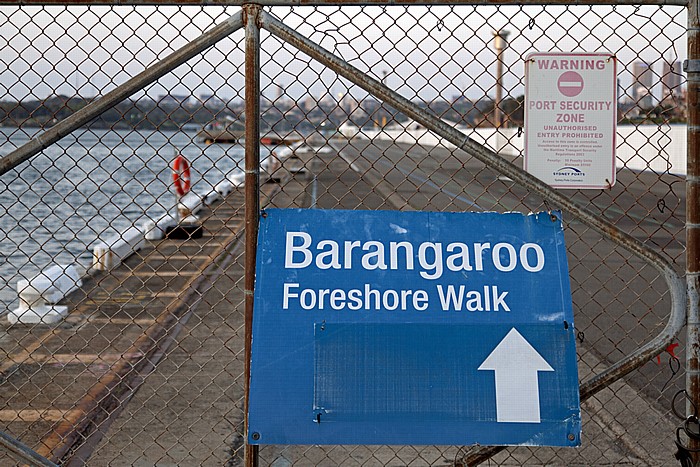
Darling Harbour: Barangaroo (Darling Harbour Whaves)
| Barangaroo | Darling Harbour |
29.11.2012 | New South Wales - Sydney 8: Darling Harbour
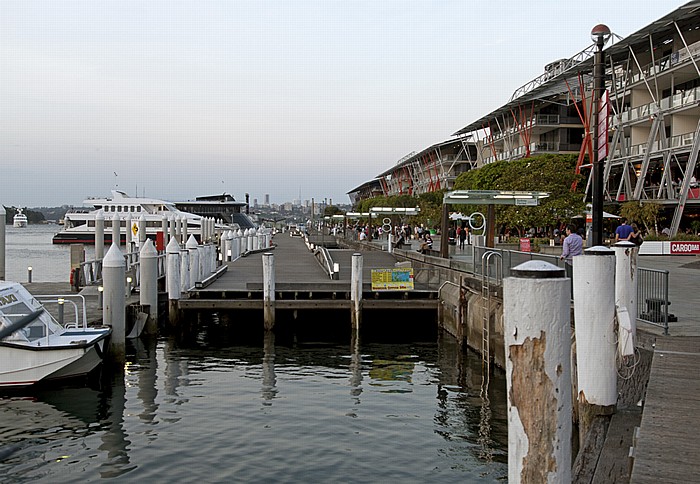
Darling Harbour: King Street Wharf

29.11.2012 | New South Wales - Sydney 8: Darling Harbour
Darling Harbour: King Street Wharf
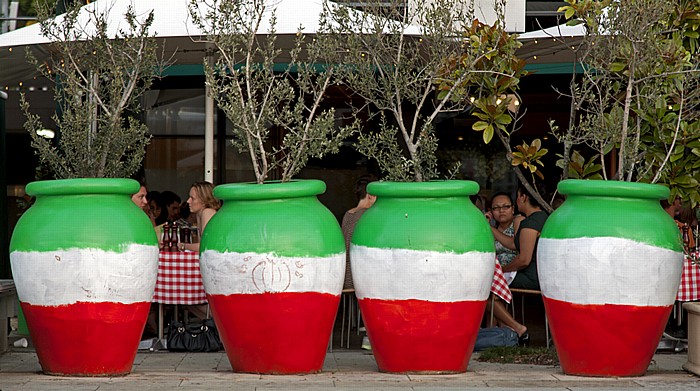
29.11.2012 | New South Wales - Sydney 8: Darling Harbour
Darling Harbour: King Street Wharf - Italienisches Restaurant
29.11.2012 | New South Wales - Sydney 8: Darling Harbour
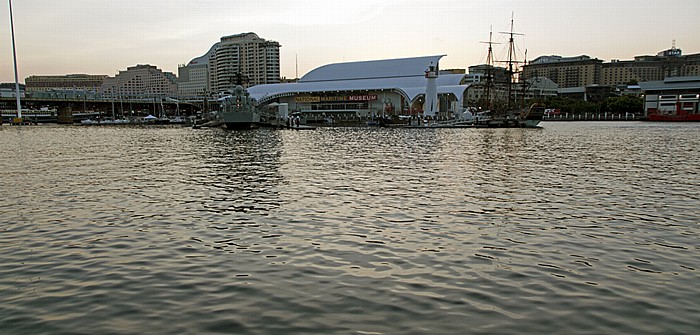
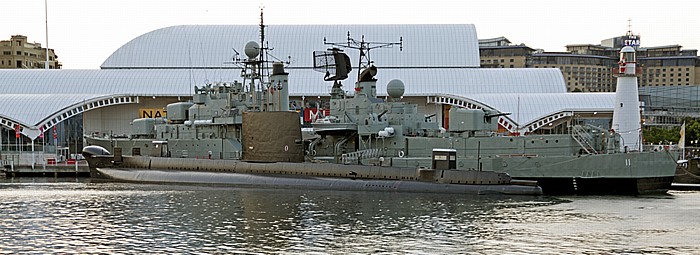
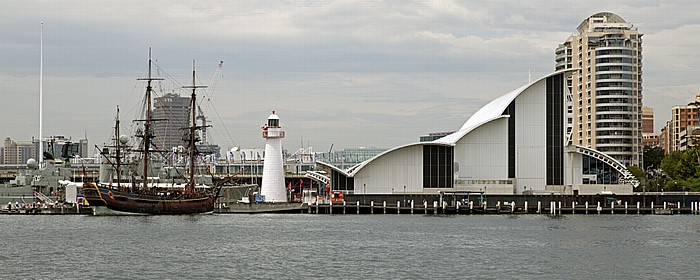
Darling Harbour: Cockle Bay, Australian National Maritime Museum
Links der Zerstörer "HMAS Vampire", rechts der Nachbau des Segelschiffes "HM Bark Endeavour".
| Australian National Maritime Museum | Cockle Bay | Darling Harbour |
29.11.2012 | New South Wales - Sydney 8: Darling Harbour
Darling Harbour: Cockle Bay, Australian National Maritime Museum
Links das "HMAS Onslow", rechts der Zerstörer "HMAS Vampire".
| Australian National Maritime Museum | Cockle Bay | Darling Harbour |
29.11.2012 | New South Wales - Sydney 8: Darling Harbour
Darling Harbour: Cockle Bay, Darling Park
Oben die Pyrmont Bridge.
| Cockle Bay | Darling Harbour | Darling Park | Pyrmont Bridge |
29.11.2012 | New South Wales - Sydney 8: Darling Harbour
Darling Harbour: Darling Park
In der Bildmitte das IMAX Theatre.
| Darling Harbour | Darling Park | IMAX Theatre |
29.11.2012 | New South Wales - Sydney 8: Darling Harbour
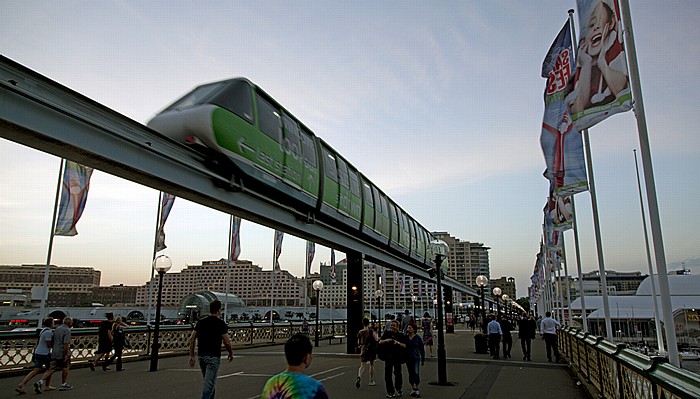
Darling Harbour: Pyrmont Bridge mit der Metro Monorail
29.11.2012 | New South Wales - Sydney 8: Darling Harbour
Darling Harbour: Pyrmont Bridge, Cockle Bay
Rechts im Hintergrund Darling Park.
| Cockle Bay | Darling Harbour | Darling Park | Pyrmont Bridge |
29.11.2012 | New South Wales - Sydney 8: Darling Harbour
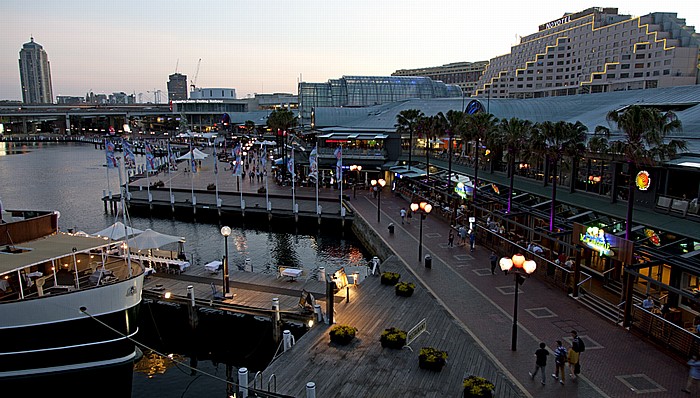
Darling Harbour: Cockle Bay, Harbourside Shopping Centre
Rechts oben das Novotel on Darling Harbour.
| Cockle Bay | Darling Harbour | Harbourside Shopping Centre | Novotel on Darling Harbour |
29.11.2012 | New South Wales - Sydney 8: Darling Harbour
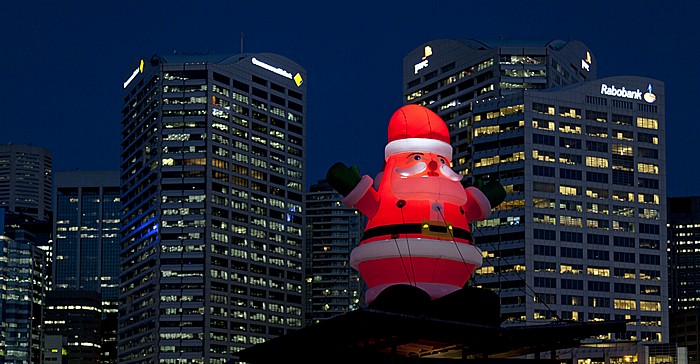
Darling Harbour: Weihnachtsmann
Im Hintergrund Darling Park.
| Darling Harbour | Darling Park |
29.11.2012 | New South Wales - Sydney 8: Darling Harbour
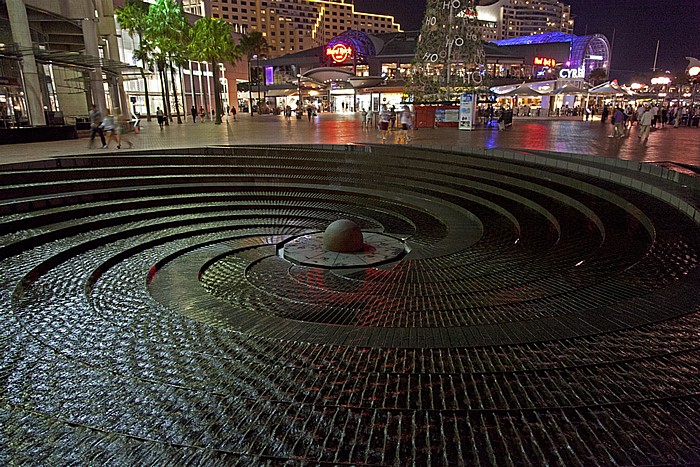
Darling Harbour: Spiral Fountain (Spiralbrunnen)
Im Hintergrund das Harbourside Shopping Centre (mit dem Hard Rock Cafe).
| Darling Harbour | Harbourside Shopping Centre | Hard Rock Cafe | Spiral Fountain |
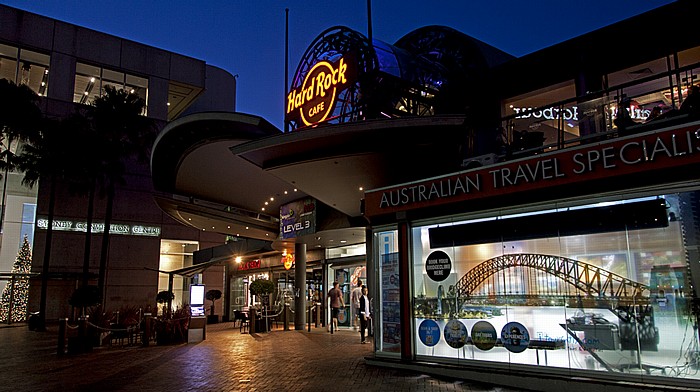
29.11.2012 | New South Wales - Sydney 8: Darling Harbour
Darling Harbour: Hard Rock Cafe (Harbourside Shopping Centre)
| Darling Harbour | Harbourside Shopping Centre | Hard Rock Cafe |
29.11.2012 | New South Wales - Sydney 8: Darling Harbour
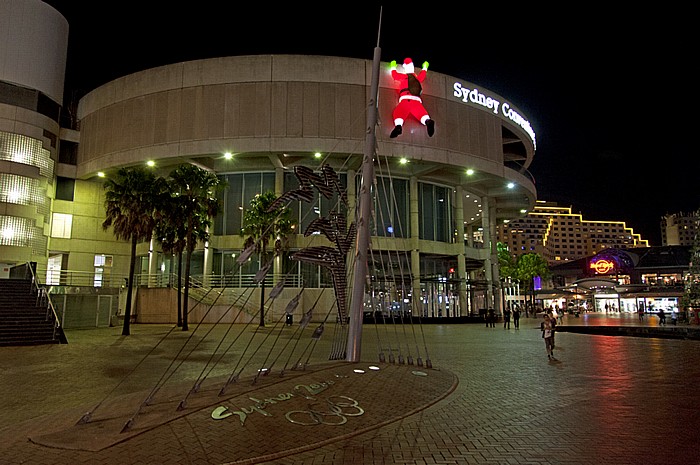
Darling Harbour: Sydney Convention and Exhibition Centre
Rechts im Hintergrund das Hard Rock Cafe (Harbourside Shopping Centre).
| Darling Harbour | Harbourside Shopping Centre | Hard Rock Cafe | Sydney Convention and Exhibition Centre |
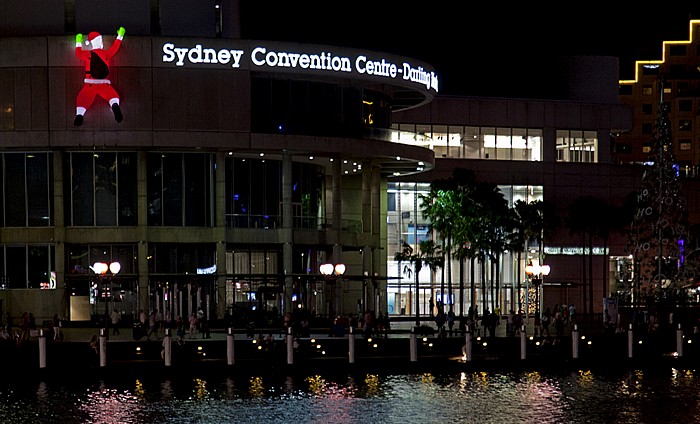
29.11.2012 | New South Wales - Sydney 8: Darling Harbour
Darling Harbour: Sydney Convention and Exhibition Centre
Unten die Cockle Bay.
| Cockle Bay | Darling Harbour | Sydney Convention and Exhibition Centre |
29.11.2012 | New South Wales - Sydney 8: Darling Harbour
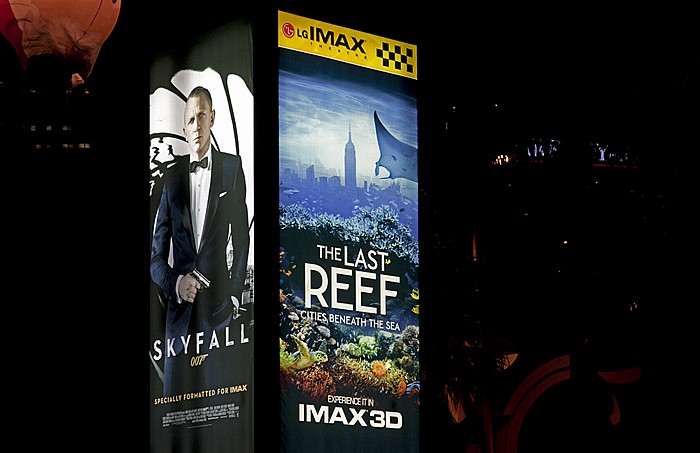
Darling Harbour: IMAX Theatre
Werbung für den James-Bond-Film "Skyfall" und den IMAX3D-Film "The Last Reef".
| Darling Harbour | IMAX Theatre |

29.11.2012 | New South Wales - Sydney 8: Darling Harbour
Darling Harbour: IMAX Theatre
Werbung für den James-Bond-Film "Skyfall".
| Darling Harbour | IMAX Theatre |
29.11.2012 | New South Wales - Sydney 8: Darling Harbour
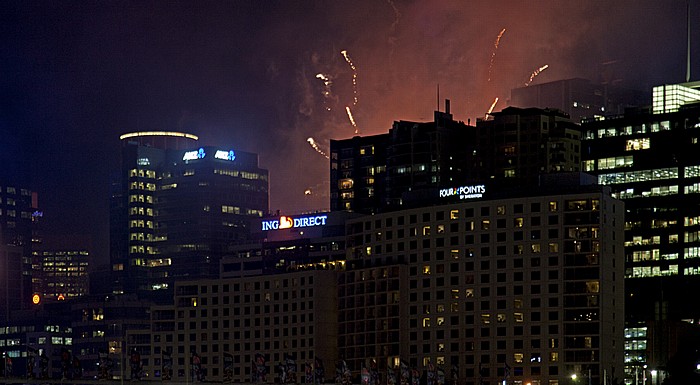
Darling Harbour: Darling Park
Im Hintergrund ein Feuerwerk.
| Darling Harbour | Darling Park |
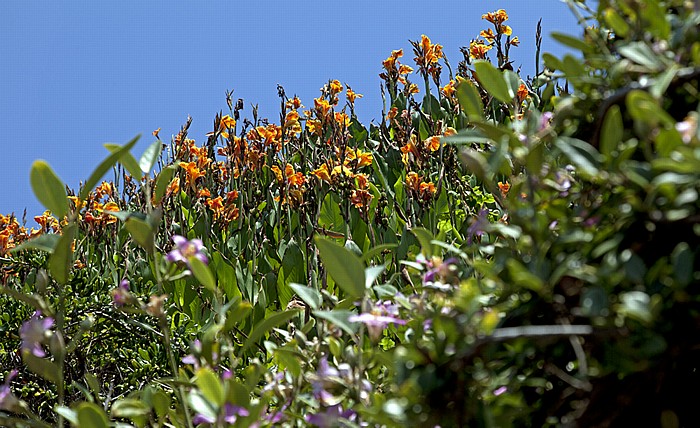
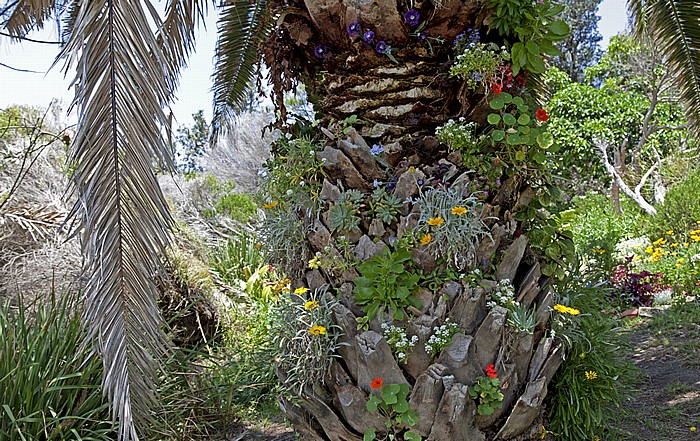
01.12.2012 | New South Wales - Sydney 10: Royal Botanic Gardens
Royal Botanic Gardens
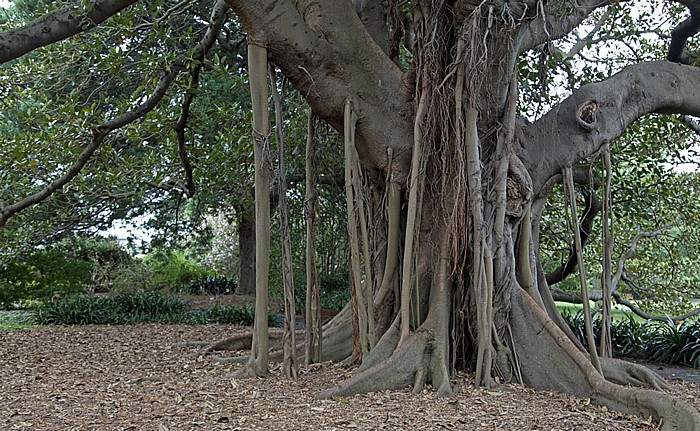
01.12.2012 | New South Wales - Sydney 10: Royal Botanic Gardens
Royal Botanic Gardens: Großblättrige Feige (Ficus macrophylla)
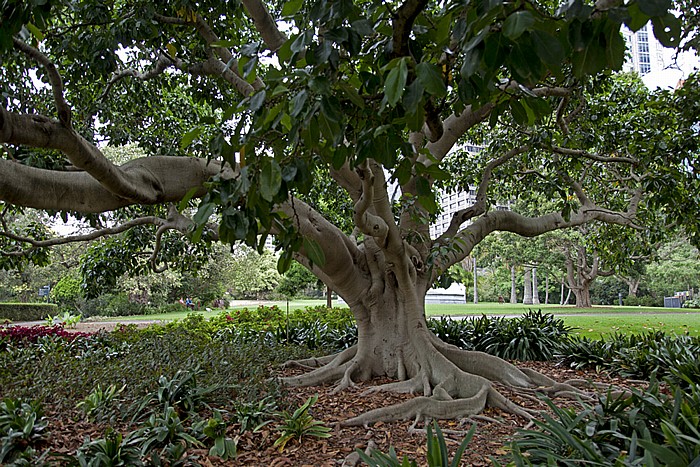
01.12.2012 | New South Wales - Sydney 10: Royal Botanic Gardens
Royal Botanic Gardens
01.12.2012 | New South Wales - Sydney 10: Royal Botanic Gardens
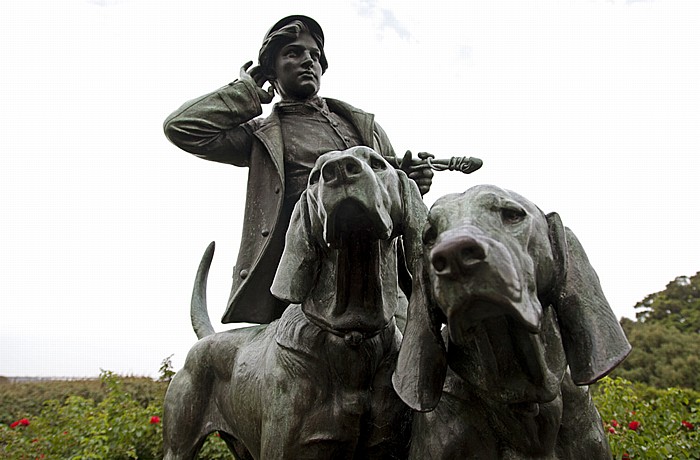
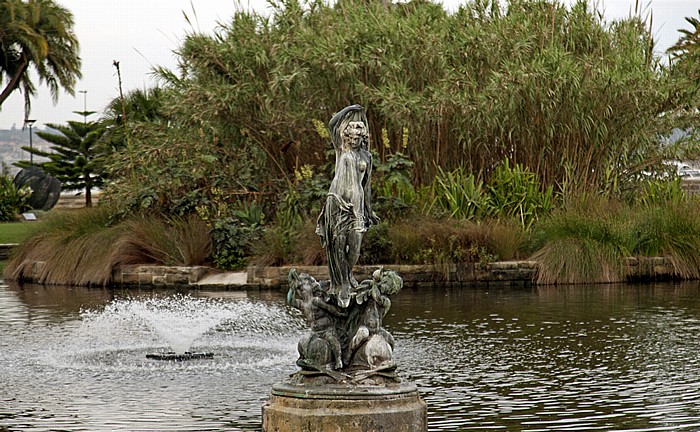
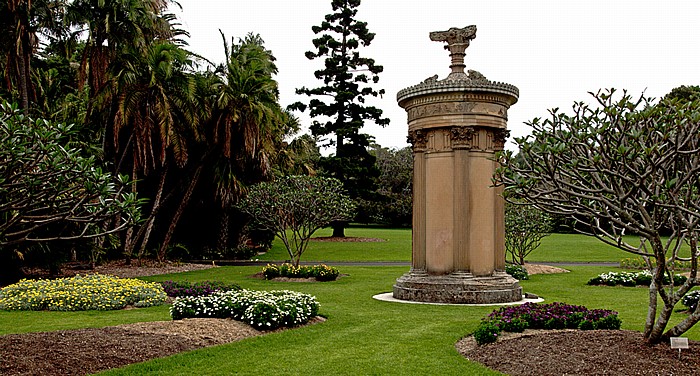
Royal Botanic Gardens: Arthur-Phillip-Denkmal
Im Hintergrund der Central Business District (CBD).
| Arthur-Phillip-Denkmal | Central Business District | Royal Botanic Gardens |
01.12.2012 | New South Wales - Sydney 10: Royal Botanic Gardens
Royal Botanic Gardens, Central Business District (CBD)
Links unten der Rose Garden.
01.12.2012 | New South Wales - Sydney 10: Royal Botanic Gardens
Royal Botanic Gardens, Central Business District (CBD)
01.12.2012 | New South Wales - Sydney 10: Royal Botanic Gardens
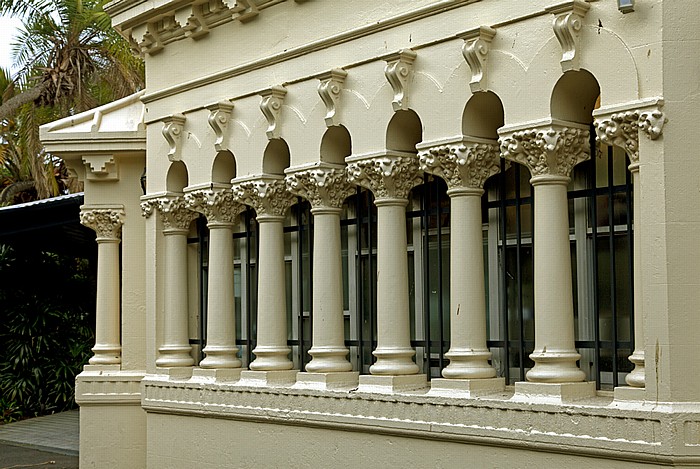
Royal Botanic Gardens: Sydney Conservatorium of Music (Greenway Building)
01.12.2012 | New South Wales - Sydney 10: Royal Botanic Gardens
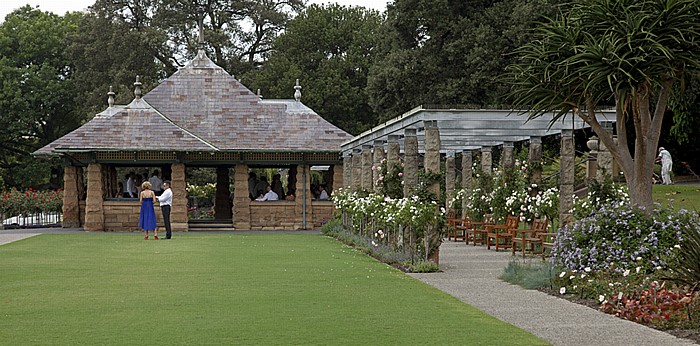
Royal Botanic Gardens: Rose Garden
01.12.2012 | New South Wales - Sydney 10: Royal Botanic Gardens
Royal Botanic Gardens
01.12.2012 | New South Wales - Sydney 10: Royal Botanic Gardens
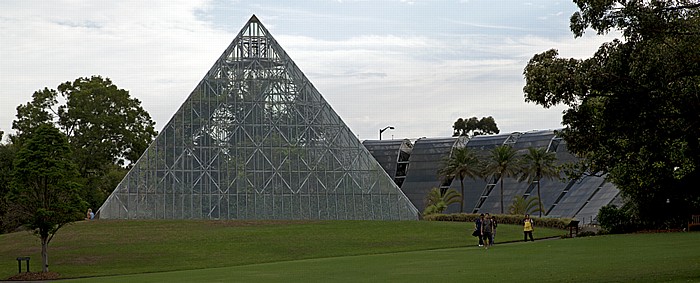
Royal Botanic Gardens: Tropical Centre Glasshouses
01.12.2012 | New South Wales - Sydney 10: Royal Botanic Gardens
Royal Botanic Gardens
01.12.2012 | New South Wales - Sydney 10: Royal Botanic Gardens
Royal Botanic Gardens

01.12.2012 | New South Wales - Sydney 10: Royal Botanic Gardens
Royal Botanic Gardens
01.12.2012 | New South Wales - Sydney 10: Royal Botanic Gardens
Royal Botanic Gardens
01.12.2012 | New South Wales - Sydney 10: Royal Botanic Gardens
Royal Botanic Gardens
01.12.2012 | New South Wales - Sydney 10: Royal Botanic Gardens
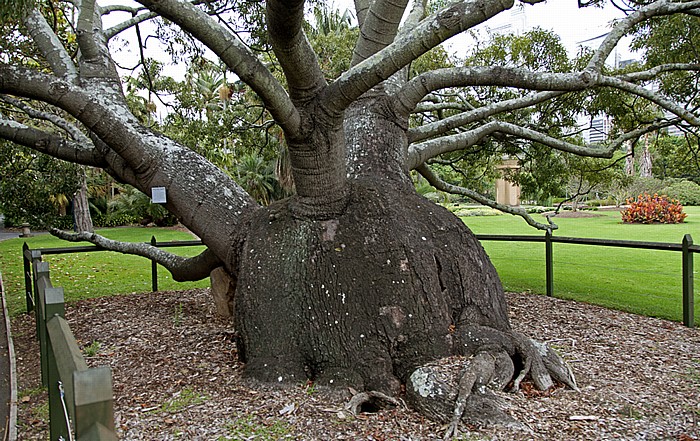
Royal Botanic Gardens: Brachychiton rupestris ("Flaschenbaum")
01.12.2012 | New South Wales - Sydney 10: Royal Botanic Gardens
Royal Botanic Gardens
Im Hintergrund Farm Cove, Sydney Opera House und Sydney Harbour Bridge.
| Farm Cove | Royal Botanic Gardens | Sydney Harbour Bridge | Sydney Opera House |
01.12.2012 | New South Wales - Sydney 10: Royal Botanic Gardens
Royal Botanic Gardens
Im Hintergrund Farm Cove und der Central Business District (CBD).
| Central Business District | Farm Cove | Royal Botanic Gardens |
01.12.2012 | New South Wales - Sydney 10: Royal Botanic Gardens
Blick vom Mrs Macquarie Point: Farm Cove, Central Business District (CBD)
| Central Business District | Farm Cove | Mrs Macquarie Point |
01.12.2012 | New South Wales - Sydney 10: Royal Botanic Gardens
Blick vom Mrs Macquarie Point: Farm Cove, Sydney Opera House, Port Jackson, Sydney Harbour Bridge
Rechts das Kreuzfahrschiff "Radiance of the Sea".
| Farm Cove | Mrs Macquarie Point | Port Jackson | Sydney Harbour Bridge | Sydney Opera House |
01.12.2012 | New South Wales - Sydney 10: Royal Botanic Gardens
Mrs Macquarie Point, Farm Cove, Port Jackson mit dem Kreuzfahrschiff "Radiance of the Sea"
| Farm Cove | Mrs Macquarie Point | Port Jackson |
01.12.2012 | New South Wales - Sydney 10: Royal Botanic Gardens
Blick vom Mrs Macquarie Point: Port Jackson, Fort Denison (mit einem Martello-Turm), North Shore
| Fort Denison | Mrs Macquarie Point | North Shore | Port Jackson |
01.12.2012 | New South Wales - Sydney 10: Royal Botanic Gardens
Mrs Macquarie Point: Mrs Macquarie Chair
Links im Hintergrund die Woolloomooloo Bay.
| Mrs Macquarie Chair | Mrs Macquarie Point | Woolloomooloo | Woolloomooloo Bay |
01.12.2012 | New South Wales - Sydney 10: Royal Botanic Gardens
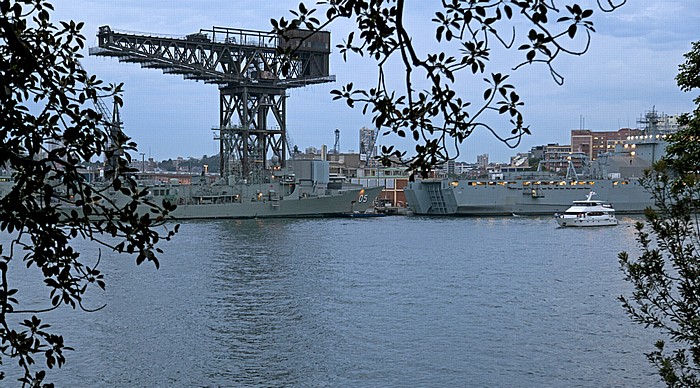
Blick vom Mrs Macquarie Point: Woolloomooloo Bay mit dem Marinestützpunkt Garden Island
01.12.2012 | New South Wales - Sydney 10: Royal Botanic Gardens
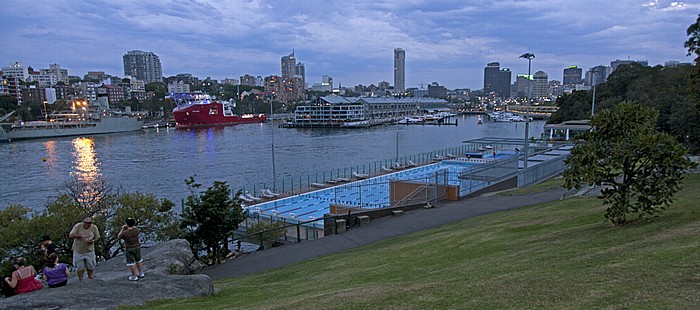
Blick vom Mrs Macquarie Point: Woolloomooloo Bay
Links der Marinestützpunkt Garden Island. In der Bildmitte die Finger Wharf darunter der Andrew "Boy" Charlton Pool.
| Andrew "Boy" Charlton Pool | Finger Wharf | Garden Island | Mrs Macquarie Point | Woolloomooloo Bay |
01.12.2012 | New South Wales - Sydney 10: Royal Botanic Gardens
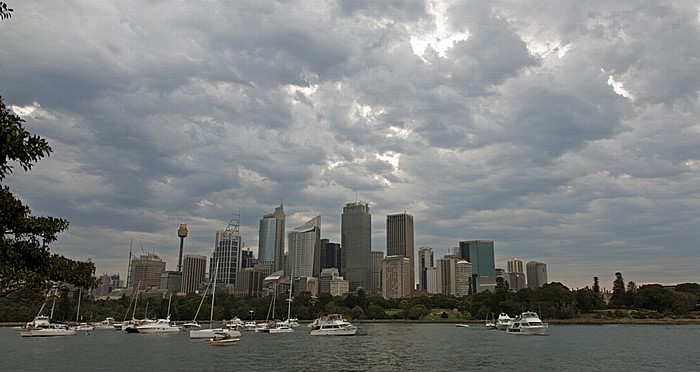
Blick vom Mrs Macquarie Point: Farm Cove, Central Business District (CBD)
| Central Business District | Farm Cove | Mrs Macquarie Point |
01.12.2012 | New South Wales - Sydney 10: Royal Botanic Gardens
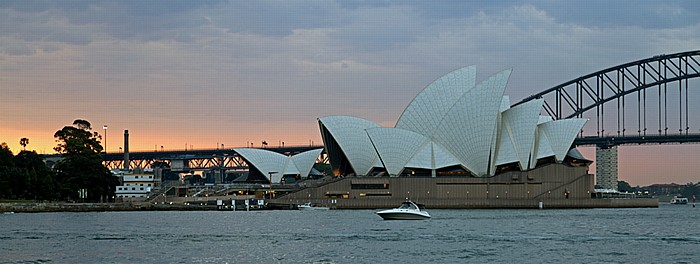
Blick vom Mrs Macquarie Point: Farm Cove, Sydney Opera House
Links The Rocks, rechts die Sydney Harbour Bridge.
| Farm Cove | Mrs Macquarie Point | Sydney Harbour Bridge | Sydney Opera House | The Rocks |
01.12.2012 | New South Wales - Sydney 10: Royal Botanic Gardens
Blick vom Mrs Macquarie Point
Farm Cove, The Rocks, Sydney Opera House, Sydney Harbour Bridge, Port Jackson und North Shore.
| Farm Cove | Mrs Macquarie Point | North Shore | Port Jackson | Sydney Harbour Bridge | Sydney Opera House | The Rocks |
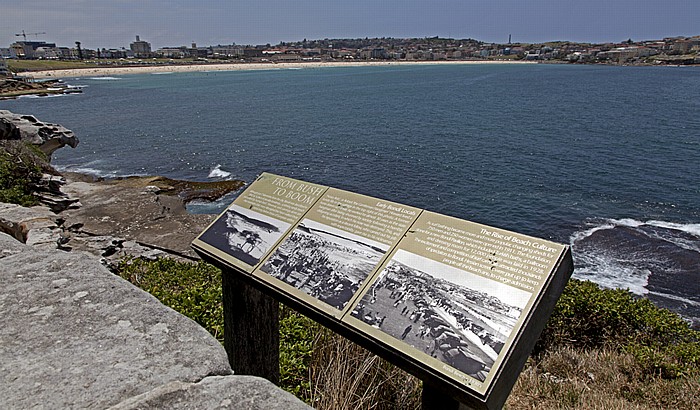
29.11.2012 | New South Wales - Sydney 11: Strände und Buchten
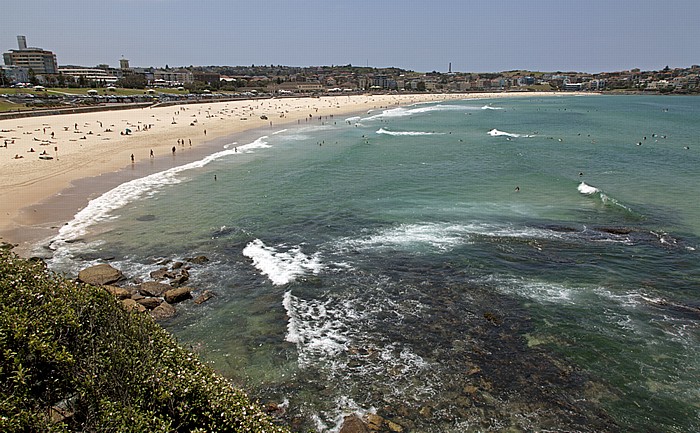
Bondi: Bondi Beach
| Bondi | Bondi Beach |
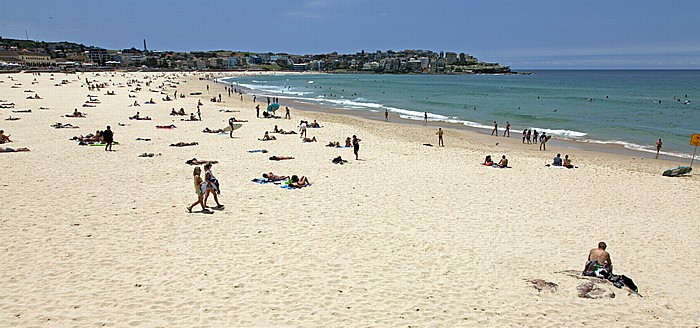
29.11.2012 | New South Wales - Sydney 11: Strände und Buchten
Bondi: Bondi Beach, Pazifischer Ozean
| Bondi | Bondi Beach |
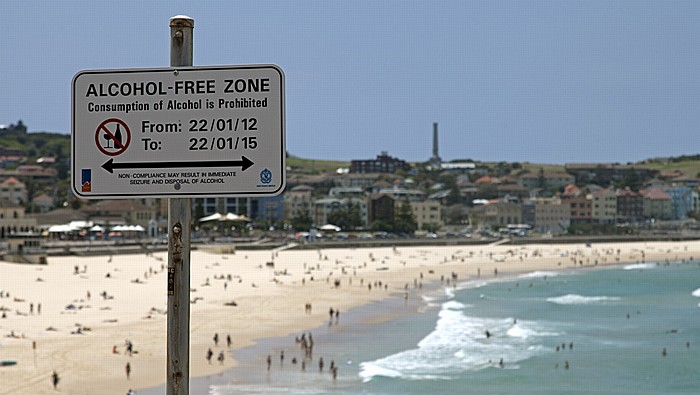
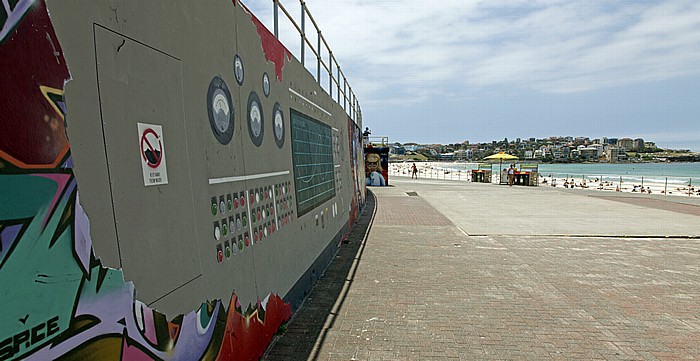
29.11.2012 | New South Wales - Sydney 11: Strände und Buchten
Bondi: Bondi Beach, Pazifischer Ozean - "Alkoholfreie Zone"
| Bondi | Bondi Beach |
29.11.2012 | New South Wales - Sydney 11: Strände und Buchten
Bondi: Bondi Beach, Pazifischer Ozean
| Bondi | Bondi Beach |
29.11.2012 | New South Wales - Sydney 11: Strände und Buchten
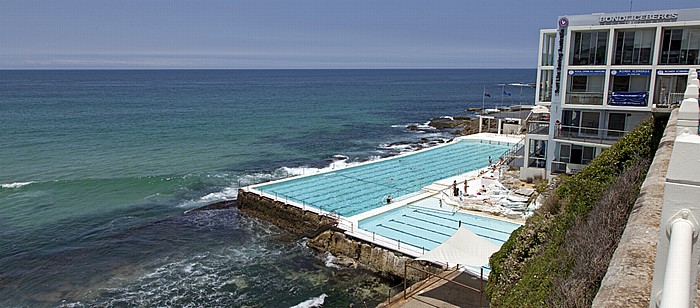
Bondi: Bondi Icebergs Pool, Pazifischer Ozean
| Bondi | Bondi Icebergs Pool |
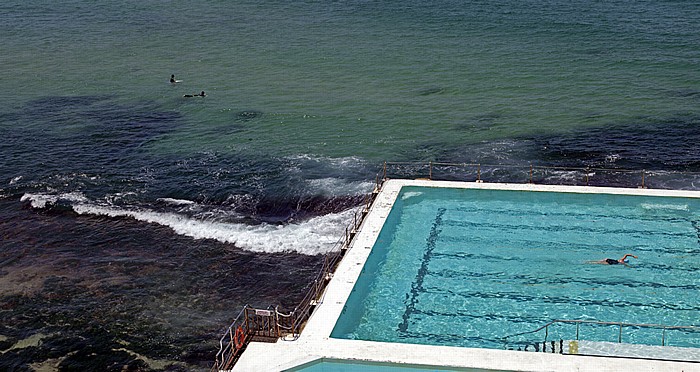
29.11.2012 | New South Wales - Sydney 11: Strände und Buchten
Bondi: Bondi Icebergs Pool, Pazifischer Ozean
| Bondi | Bondi Icebergs Pool |
29.11.2012 | New South Wales - Sydney 11: Strände und Buchten
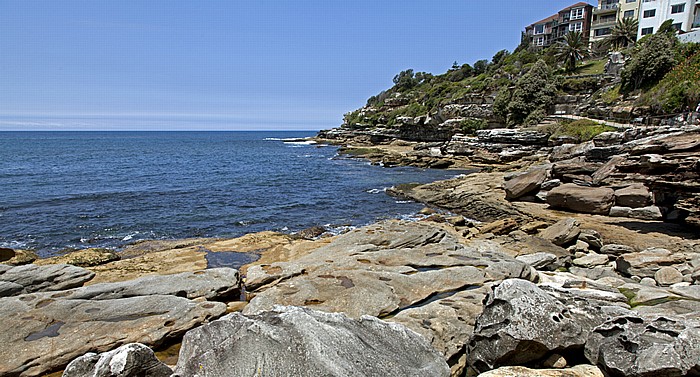
Bondi: Pazifischer Ozean, Hunter Park
| Bondi | Hunter Park |
29.11.2012 | New South Wales - Sydney 11: Strände und Buchten
Bondi: Hunter Park
| Bondi | Hunter Park |
29.11.2012 | New South Wales - Sydney 11: Strände und Buchten
Bondi: Hunter Park
| Bondi | Hunter Park |

29.11.2012 | New South Wales - Sydney 11: Strände und Buchten
Bondi: Hunter Park, Pazifischer Ozean, Bondi Beach
| Bondi | Bondi Beach | Hunter Park |
29.11.2012 | New South Wales - Sydney 11: Strände und Buchten
Bondi: Pazifischer Ozean, Bondi Beach
| Bondi | Bondi Beach |
29.11.2012 | New South Wales - Sydney 11: Strände und Buchten
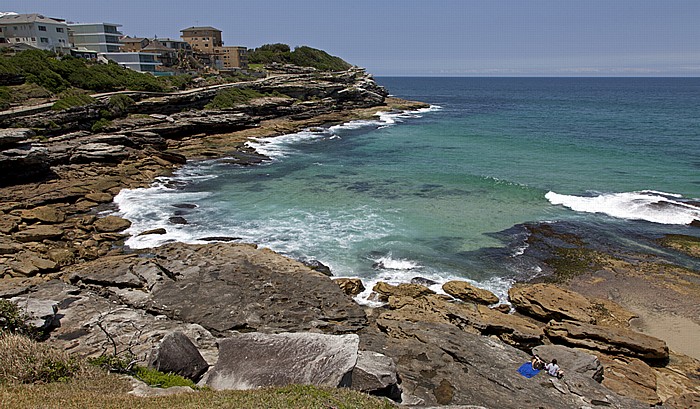
Tamarama: Marks Park, Pazifischer Ozean
In der Bildmitte oben der Waverley Cemetery in Bronte.
| Bronte | Marks Park | Tamarama | Waverley Cemetery |
29.11.2012 | New South Wales - Sydney 11: Strände und Buchten
Tamarama: Mackenzies Bay
| Mackenzies Bay | Tamarama |
29.11.2012 | New South Wales - Sydney 11: Strände und Buchten
Tamarama: Tamarama Beach, Pazifischer Ozean
| Tamarama | Tamarama Beach |
29.11.2012 | New South Wales - Sydney 11: Strände und Buchten
Tamarama: Tamarama Beach, Pazifischer Ozean
| Tamarama | Tamarama Beach |
29.11.2012 | New South Wales - Sydney 11: Strände und Buchten
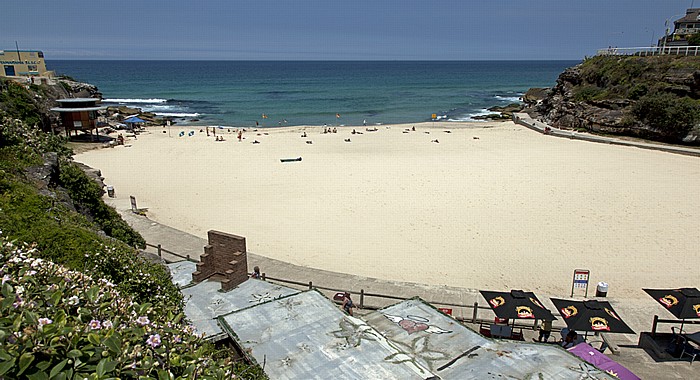
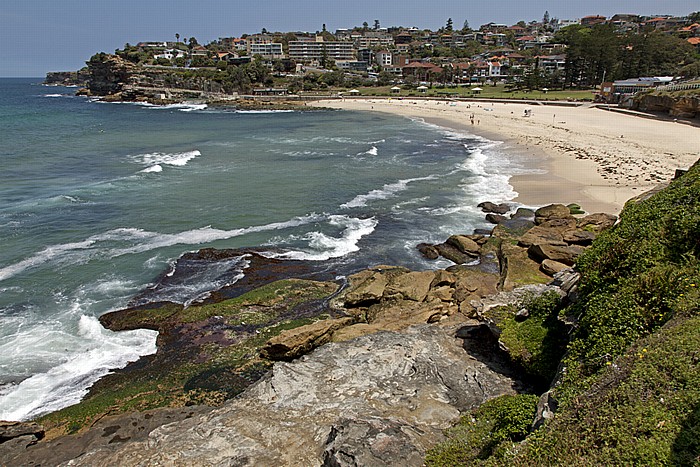
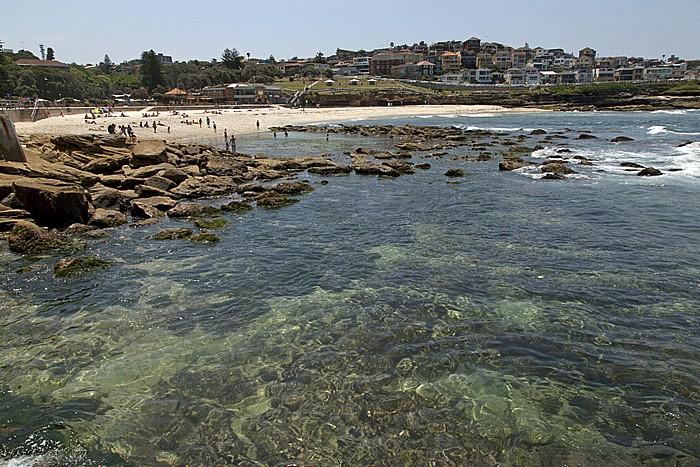
Bronte: Pazifischer Ozean, Bronte Beach
| Bronte | Bronte Beach |
29.11.2012 | New South Wales - Sydney 11: Strände und Buchten
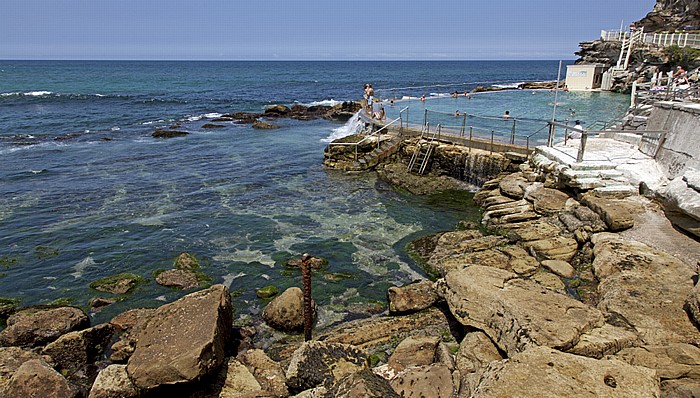
Bronte: Pazifischer Ozean, Rock Pool
29.11.2012 | New South Wales - Sydney 11: Strände und Buchten
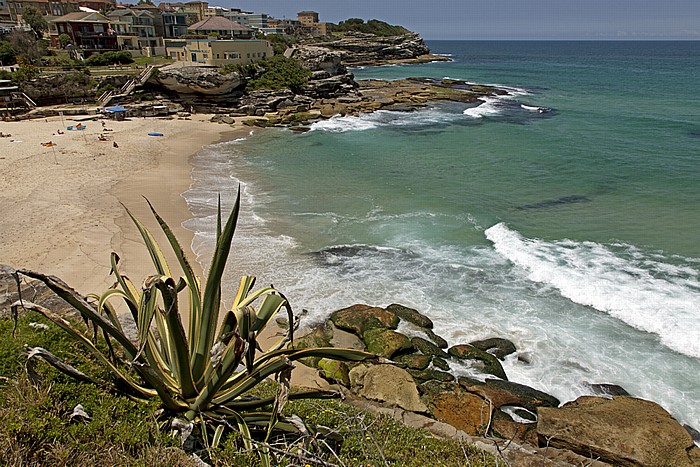
Bronte: Bronte Beach, Pazifischer Ozean
| Bronte | Bronte Beach |
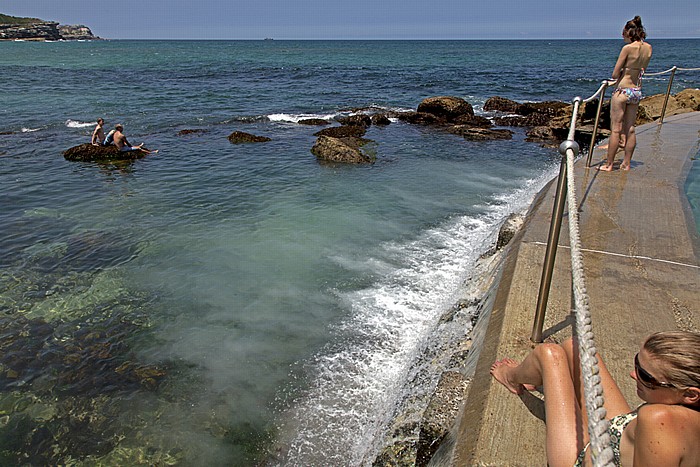
29.11.2012 | New South Wales - Sydney 11: Strände und Buchten
Bronte: Pazifischer Ozean, Rock Pool

29.11.2012 | New South Wales - Sydney 11: Strände und Buchten
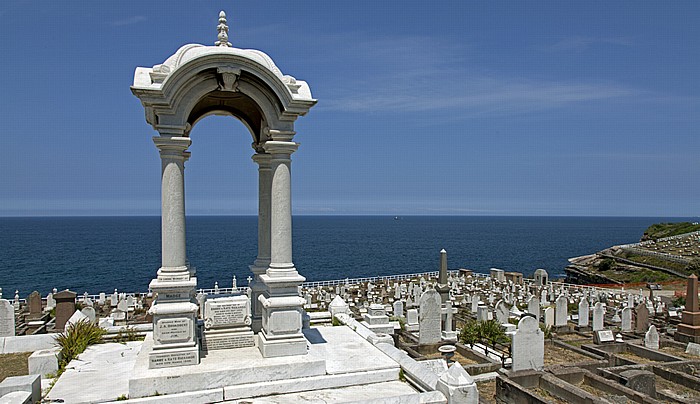
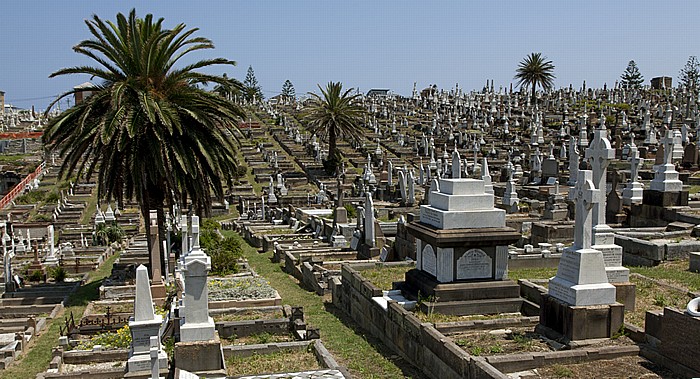
Bronte: Waverley Cemetery
Im Hintergrund der Pazifische Ozean.
| Bronte | Waverley Cemetery |
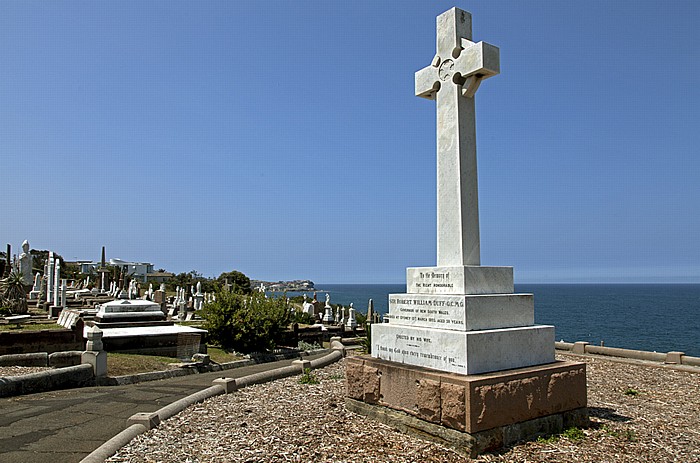
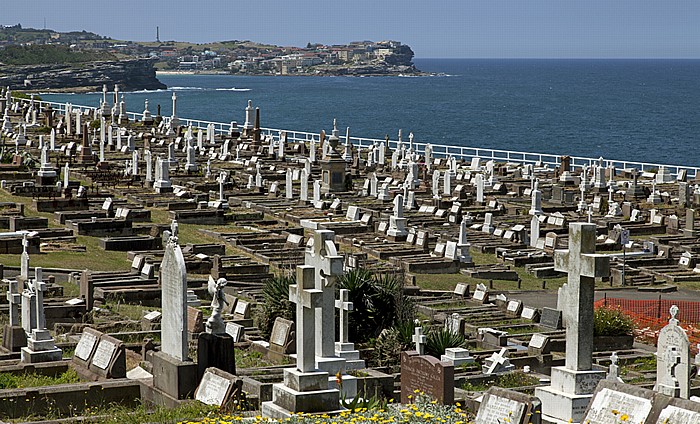
29.11.2012 | New South Wales - Sydney 11: Strände und Buchten
Bronte: Waverley Cemetery
Im Hintergrund der Pazifische Ozean.
| Bronte | Waverley Cemetery |
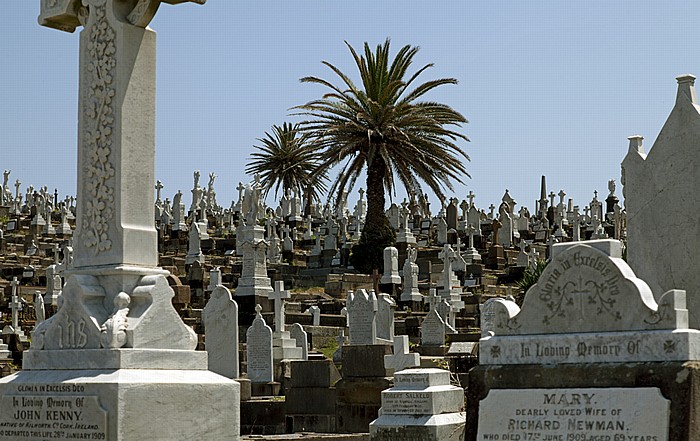
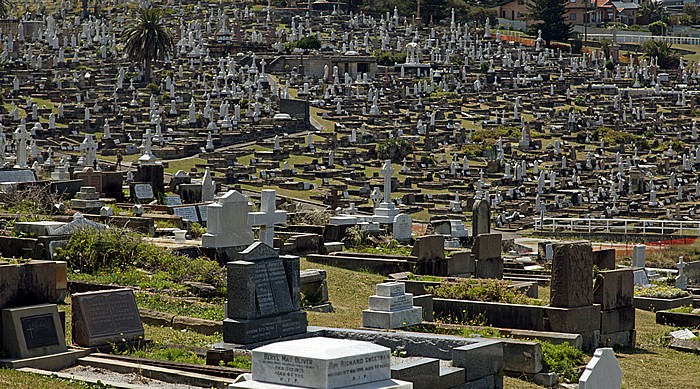
29.11.2012 | New South Wales - Sydney 11: Strände und Buchten
Bronte: Waverley Cemetery
Im Hintergrund der Pazifische Ozean.
| Bronte | Waverley Cemetery |
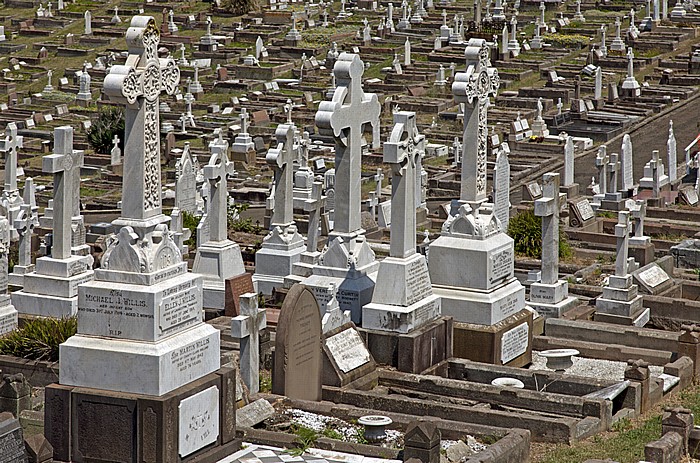
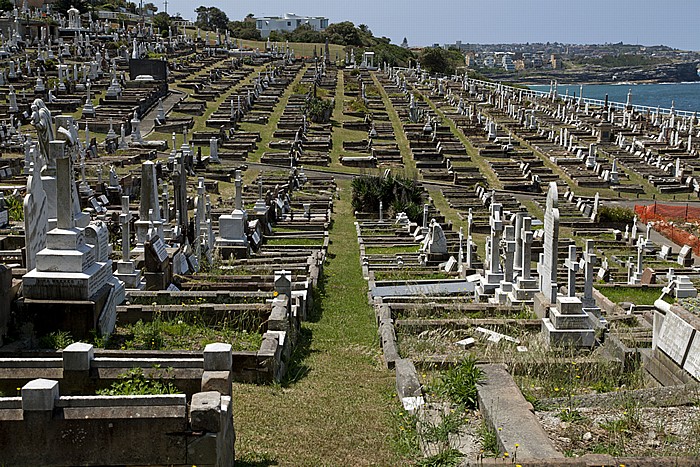
29.11.2012 | New South Wales - Sydney 11: Strände und Buchten
Bronte: Waverley Cemetery
| Bronte | Waverley Cemetery |
29.11.2012 | New South Wales - Sydney 11: Strände und Buchten
Bronte: Waverley Cemetery
| Bronte | Waverley Cemetery |
29.11.2012 | New South Wales - Sydney 11: Strände und Buchten
Bronte: Waverley Cemetery
| Bronte | Waverley Cemetery |
29.11.2012 | New South Wales - Sydney 11: Strände und Buchten
Bronte: Waverley Cemetery, Pazifischer Ozean
| Bronte | Waverley Cemetery |
29.11.2012 | New South Wales - Sydney 11: Strände und Buchten
Bronte: Waverley Cemetery
| Bronte | Waverley Cemetery |
29.11.2012 | New South Wales - Sydney 11: Strände und Buchten
Bronte: Waverley Cemetery
| Bronte | Waverley Cemetery |
29.11.2012 | New South Wales - Sydney 11: Strände und Buchten
Bronte: Pazifischer Ozean
Links oben Tamarama (links) und Bondi.
29.11.2012 | New South Wales - Sydney 11: Strände und Buchten
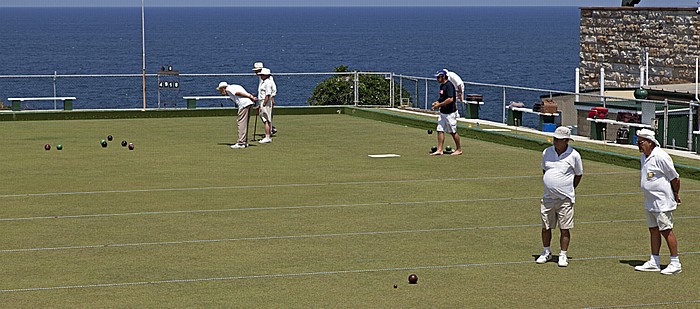
Clovelly: Clovelly Bowling Club
Im Hintergrund der Pazifische Ozean.
| Clovelly |
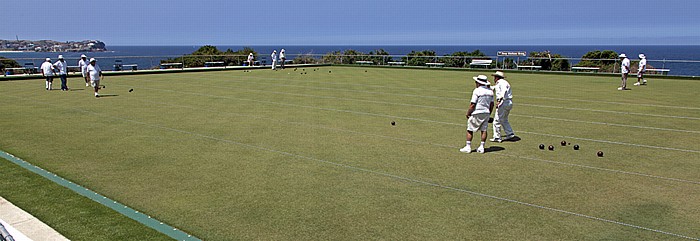
29.11.2012 | New South Wales - Sydney 11: Strände und Buchten
Clovelly: Clovelly Bowling Club
Im Hintergrund der Pazifische Ozean.
| Clovelly |
29.11.2012 | New South Wales - Sydney 11: Strände und Buchten
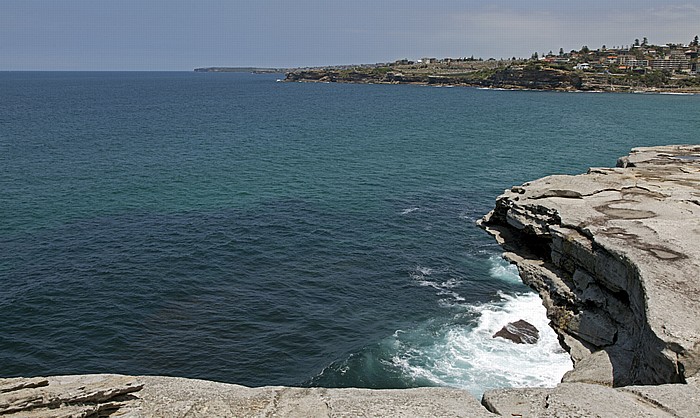
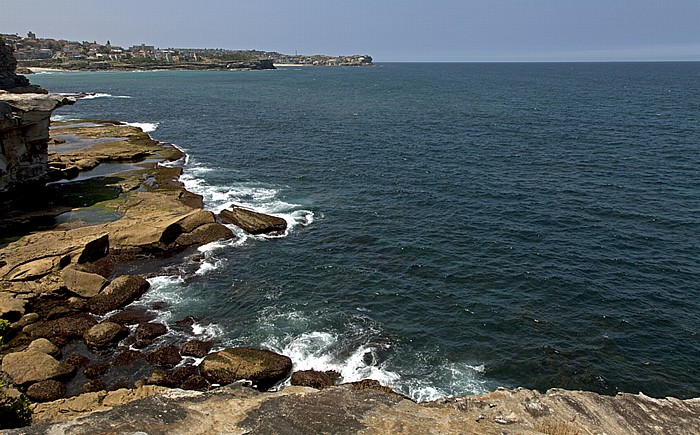
Clovelly (v.u.): Burrows Park, Clovelly Bay, Pazifischer Ozean, Gordons Bay, Coogee
| Burrows Park | Clovelly | Clovelly Bay | Coogee | Gordons Bay |
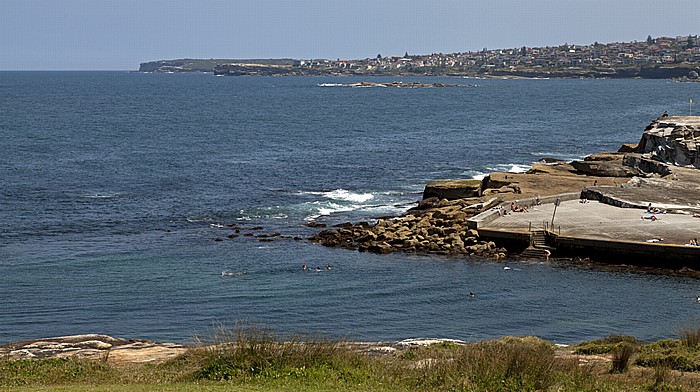
29.11.2012 | New South Wales - Sydney 11: Strände und Buchten
Clovelly (v.u.): Clovelly Beach, Clovelly Bay, Pazifischer Ozean
| Clovelly | Clovelly Bay | Clovelly Beach |
29.11.2012 | New South Wales - Sydney 11: Strände und Buchten
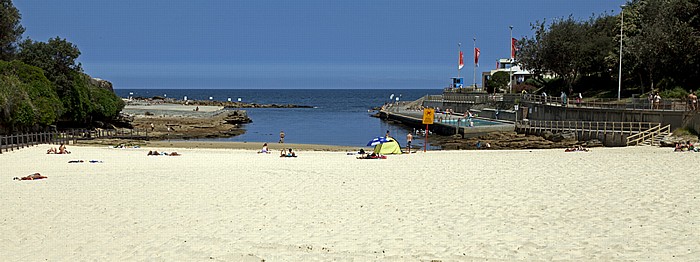
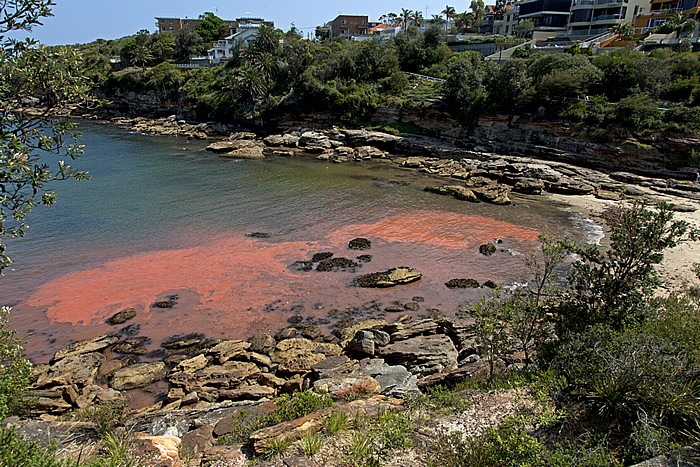
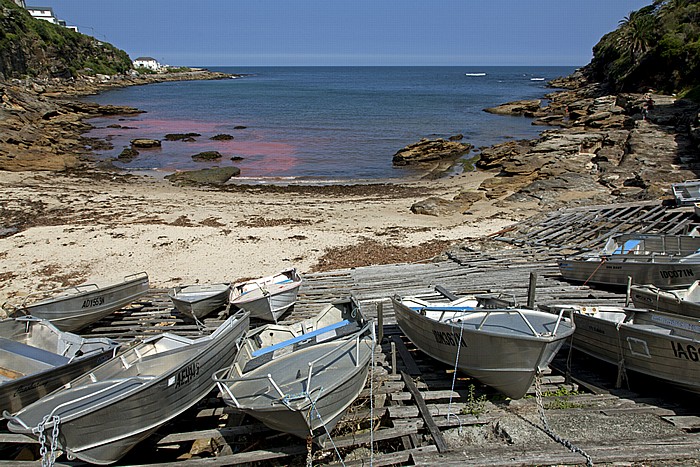
Coogee: Gordons Bay, Pazifischer Ozean
| Coogee | Gordons Bay |
29.11.2012 | New South Wales - Sydney 11: Strände und Buchten
Coogee: Gordons Bay, Pazifischer Ozean
| Coogee | Gordons Bay |
29.11.2012 | New South Wales - Sydney 11: Strände und Buchten
Coogee
Im Hintergrund der Pazifische Ozean mit der Wedding Cake Island.
| Coogee | Wedding Cake Island |
29.11.2012 | New South Wales - Sydney 11: Strände und Buchten
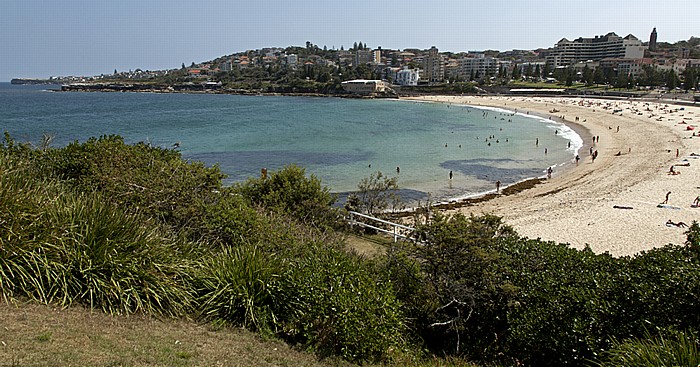
Coogee: Coogee Beach
| Coogee | Coogee Beach |

28.11.2012 | New South Wales - Sydney 12: Port Jackson (Sydney Harbour)
Blick von der Sydney Harbour Bridge: Port Jackson, Sydney Opera House, Sydney Cove
28.11.2012 | New South Wales - Sydney 12: Port Jackson (Sydney Harbour)
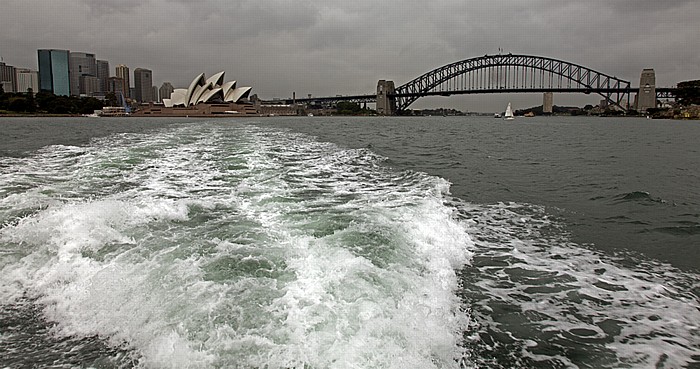
Port Jackson
V.l.: Central Business District (CBD), Sydney Cove, Sydney Opera House, Sydney Harbour Bridge.
28.11.2012 | New South Wales - Sydney 12: Port Jackson (Sydney Harbour)
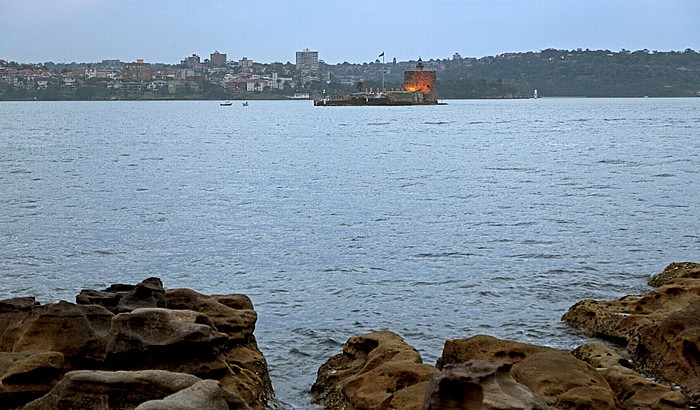
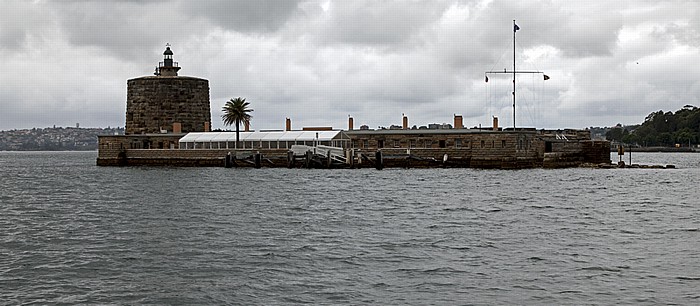
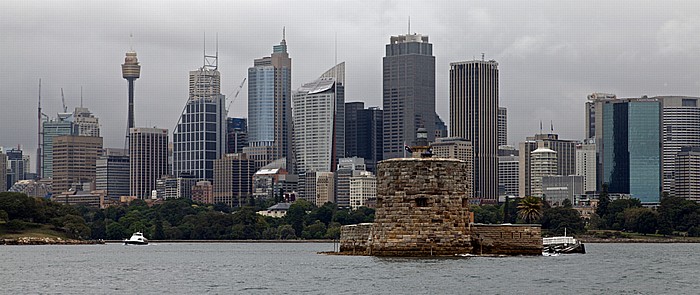
Port Jackson: Fort Denison (mit einem Martello-Turm)
28.11.2012 | New South Wales - Sydney 12: Port Jackson (Sydney Harbour)
Port Jackson, Garden Island mit dem Marinestützpunkt Garden Island, Woolloomooloo Bay
Rechts der Mrs Macquarie Point.
28.11.2012 | New South Wales - Sydney 12: Port Jackson (Sydney Harbour)
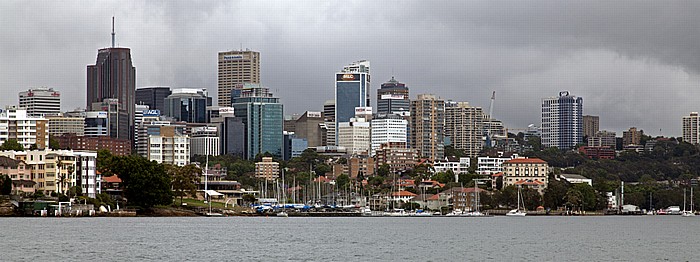
Port Jackson, North Shore
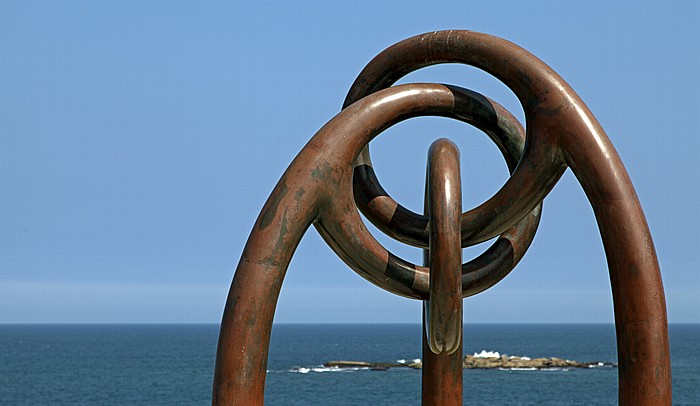
28.11.2012 | New South Wales - Sydney 12: Port Jackson (Sydney Harbour)
Port Jackson: Fort Denison (mit einem Martello-Turm)
Im Hintergrund Farm Cove, die Royal Botanic Gardens und der Central Business District (CBD) mit dem Sydney Tower.
28.11.2012 | New South Wales - Sydney 12: Port Jackson (Sydney Harbour)
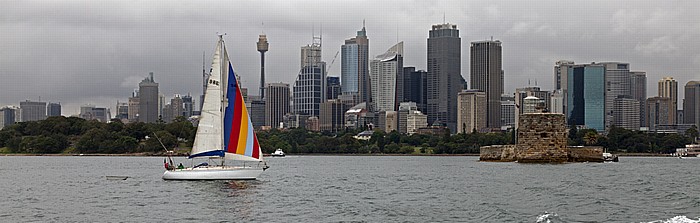
Port Jackson: Segelschiff und Fort Denison (mit einem Martello-Turm)
Im Hintergrund Farm Cove, die Royal Botanic Gardens und der Central Business District (CBD) mit dem Sydney Tower.
28.11.2012 | New South Wales - Sydney 12: Port Jackson (Sydney Harbour)
Port Jackson, North Shore
28.11.2012 | New South Wales - Sydney 12: Port Jackson (Sydney Harbour)
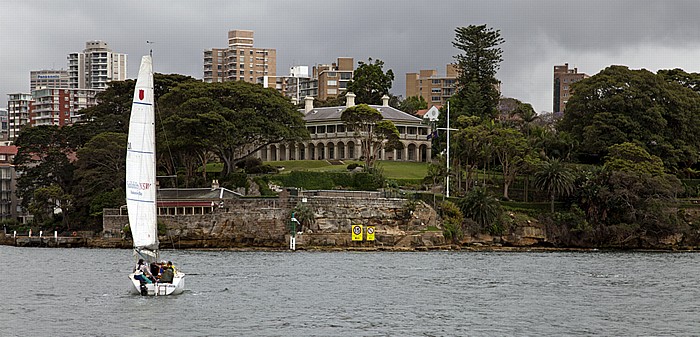
Port Jackson, North Shore
In der Bildmitte das Admiralty House in Kirribilli Point.
| Admiralty House | Kirribilli | Kirribilli Point | North Shore | Port Jackson |

01.12.2012 | New South Wales - Sydney 12: Port Jackson (Sydney Harbour)
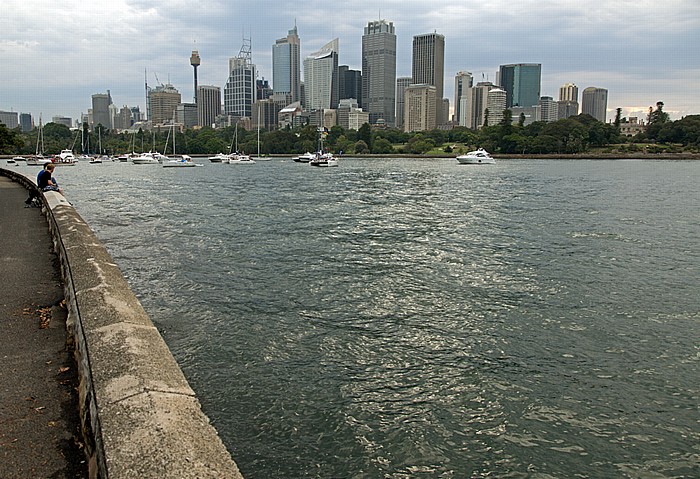
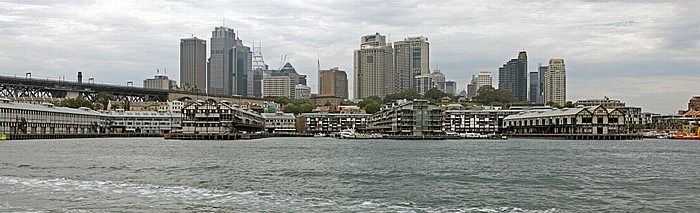
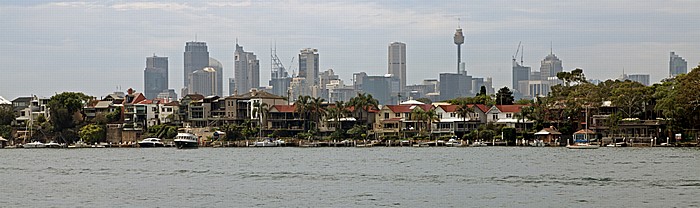
Port Jackson, Millers Point
Im Hintergrund der Central Business District (CBD).
| Central Business District | Millers Point | Port Jackson |
01.12.2012 | New South Wales - Sydney 12: Port Jackson (Sydney Harbour)
Port Jackson, Millers Point
Im Hintergrund der Central Business District (CBD).
| Central Business District | Millers Point | Port Jackson |
01.12.2012 | New South Wales - Sydney 12: Port Jackson (Sydney Harbour)
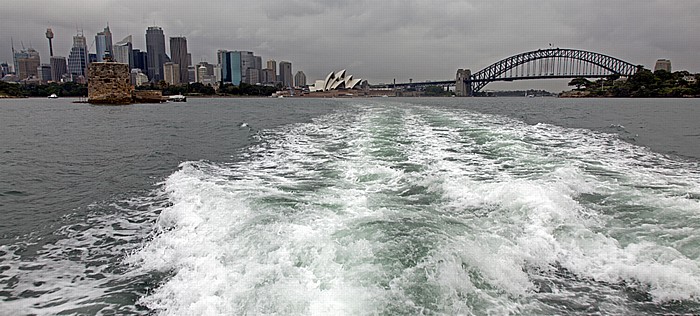
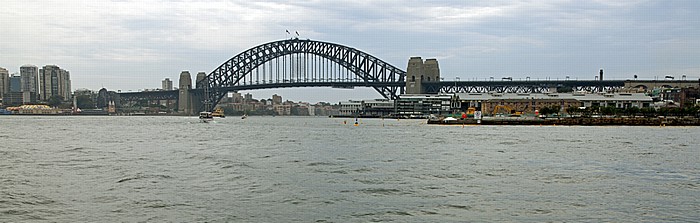
Port Jackson
V.l.: North Shore (Milsons Point mit dem Luna Park), Sydney Harbour Bridge, Millers Point.
| Luna Park | Millers Point | Milsons Point | North Shore | Port Jackson | Sydney Harbour Bridge |
01.12.2012 | New South Wales - Sydney 12: Port Jackson (Sydney Harbour)
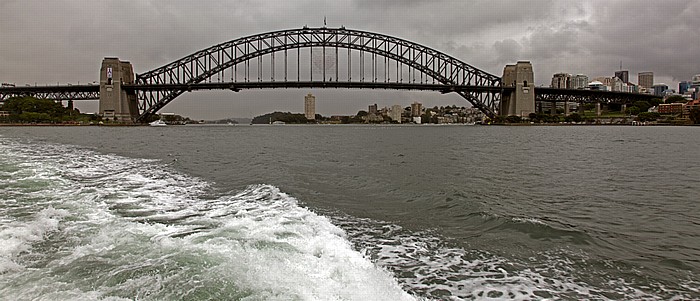
Port Jackson: Johnstons Bay, ANZAC Bridge
| ANZAC Bridge | Johnstons Bay | Port Jackson |
01.12.2012 | New South Wales - Sydney 12: Port Jackson (Sydney Harbour)
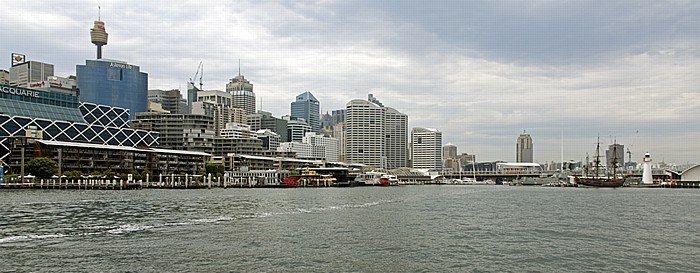
Port Jackson
V.l.: King Street Wharf, Darling Park, Cockle Bay, Darling Harbour, Australian National Maritime Museum. Im Hintergrund der Central Business District (CBD).
| Australian National Maritime Museum | Central Business District | Cockle Bay | Darling Harbour | Darling Park | King Street Wharf | Port Jackson |
01.12.2012 | New South Wales - Sydney 12: Port Jackson (Sydney Harbour)
Port Jackson: Cockle Bay, Darling Harbour, Australian National Maritime Museum
| Australian National Maritime Museum | Cockle Bay | Darling Harbour | Port Jackson |
01.12.2012 | New South Wales - Sydney 12: Port Jackson (Sydney Harbour)
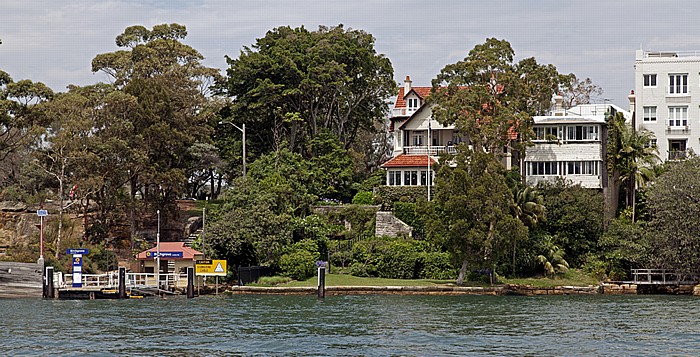
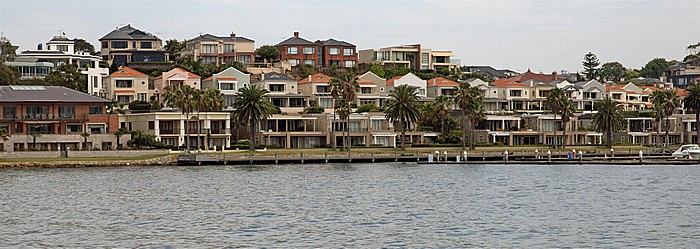
Port Jackson, Balmain
| Balmain | Port Jackson |
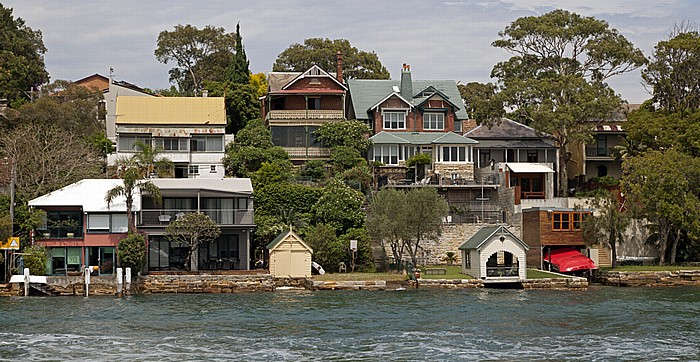
01.12.2012 | New South Wales - Sydney 12: Port Jackson (Sydney Harbour)
Port Jackson, Balmain
| Balmain | Port Jackson |
01.12.2012 | New South Wales - Sydney 12: Port Jackson (Sydney Harbour)
Port Jackson (Parramatta River), Birchgrove
| Birchgrove | Parramatta River | Port Jackson |
01.12.2012 | New South Wales - Sydney 12: Port Jackson (Sydney Harbour)
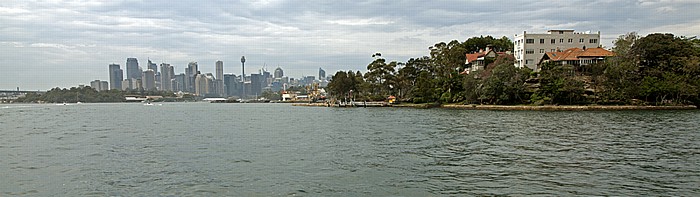
Port Jackson (Parramatta River)
Rechts Birchgrove. Im Hintergrund der Central Business District (CBD).
| Birchgrove | Central Business District | Parramatta River | Port Jackson |
01.12.2012 | New South Wales - Sydney 12: Port Jackson (Sydney Harbour)
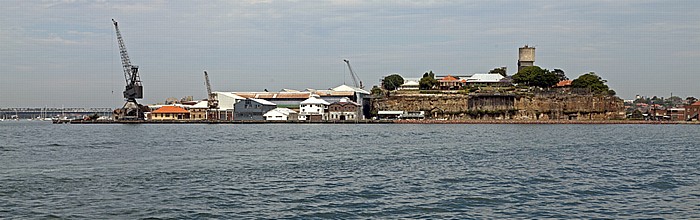
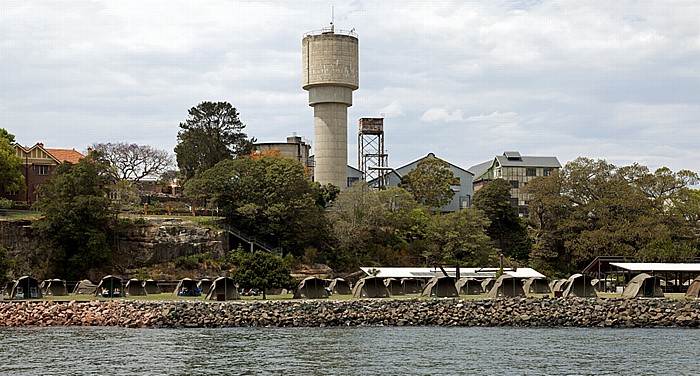
Port Jackson (Parramatta River), Cockatoo Island
01.12.2012 | New South Wales - Sydney 12: Port Jackson (Sydney Harbour)
Port Jackson (Parramatta River), Birchgrove
Im Hintergrund der Central Business District (CBD).
| Birchgrove | Central Business District | Parramatta River | Port Jackson |
01.12.2012 | New South Wales - Sydney 12: Port Jackson (Sydney Harbour)
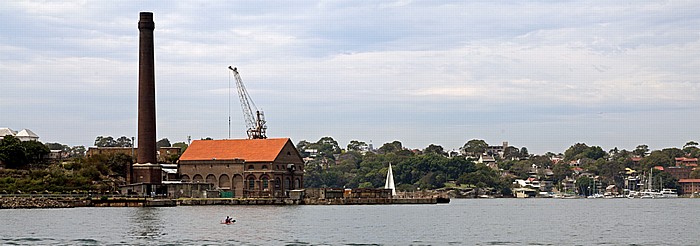
Port Jackson (Parramatta River), Cockatoo Island
01.12.2012 | New South Wales - Sydney 12: Port Jackson (Sydney Harbour)
Port Jackson (Parramatta River), Cockatoo Island
Im Hintergrund rechts Birchgrove.
| Birchgrove | Cockatoo Island | Parramatta River | Port Jackson |
01.12.2012 | New South Wales - Sydney 12: Port Jackson (Sydney Harbour)
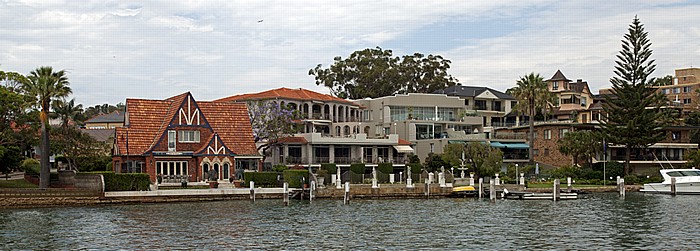
Port Jackson (Parramatta River), Drummoyne
| Drummoyne | Parramatta River | Port Jackson |
01.12.2012 | New South Wales - Sydney 12: Port Jackson (Sydney Harbour)
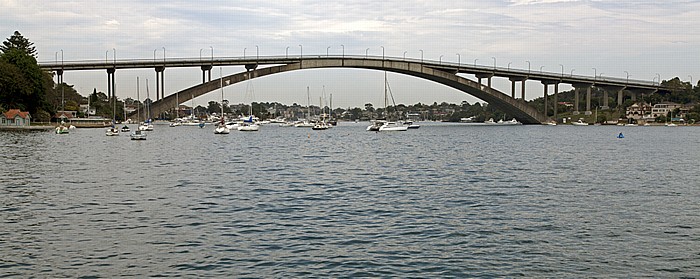
Port Jackson (Parramatta River), Drummoyne
Im Hintergrund die Gladesville Bridge.
| Drummoyne | Gladesville Bridge | Parramatta River | Port Jackson |
01.12.2012 | New South Wales - Sydney 12: Port Jackson (Sydney Harbour)
Port Jackson (Parramatta River)
| Parramatta River | Port Jackson |
01.12.2012 | New South Wales - Sydney 12: Port Jackson (Sydney Harbour)
Port Jackson (Parramatta River)
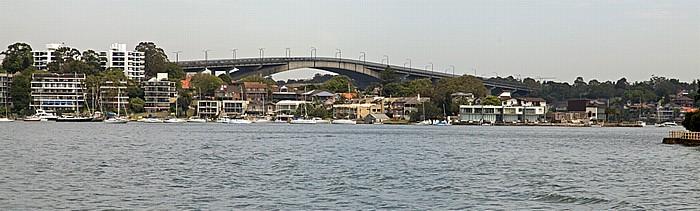
Gladesville Bridge zwischen Drummoyne (links) und Huntleys Point (Hunter's Hill).
| Drummoyne | Gladesville Bridge | Huntleys Point | Parramatta River | Port Jackson |

01.12.2012 | New South Wales - Sydney 12: Port Jackson (Sydney Harbour)
Port Jackson (Parramatta River)
| Parramatta River | Port Jackson |
01.12.2012 | New South Wales - Sydney 12: Port Jackson (Sydney Harbour)
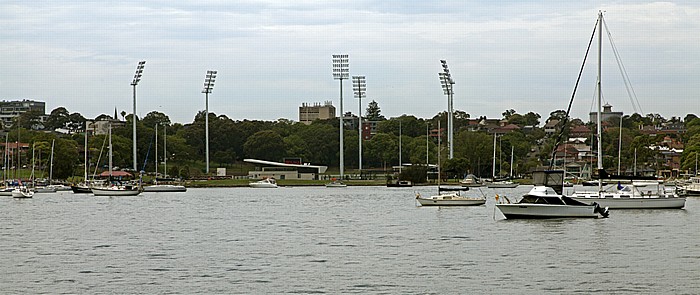
Port Jackson (Parramatta River), Five Dock Bay, Drummoyne
In der Bildmitte das Drummoyne Oval.
| Drummoyne | Drummoyne Oval | Five Dock Bay | Parramatta River | Port Jackson |
01.12.2012 | New South Wales - Sydney 12: Port Jackson (Sydney Harbour)
Port Jackson (Parramatta River), Abbotsford Bay, Abbotsford
In der Bildmitte der Abbotsford Cove Foreshore Park und Abbotsford House.
| Abbotsford | Abbotsford Bay | Abbotsford Cove Foreshore Park | Abbotsford House | Parramatta River | Port Jackson |
01.12.2012 | New South Wales - Sydney 12: Port Jackson (Sydney Harbour)
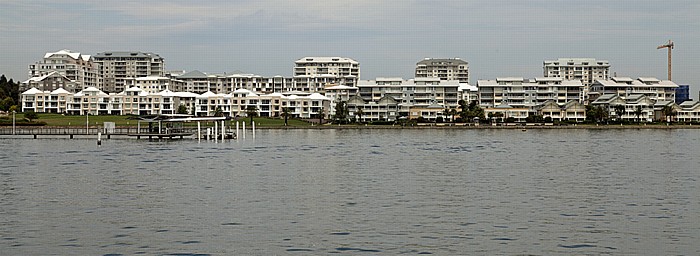
Port Jackson (Parramatta River), Kendall Bay, Breakfast Point
| Breakfast Point | Kendall Bay | Parramatta River | Port Jackson |
01.12.2012 | New South Wales - Sydney 12: Port Jackson (Sydney Harbour)
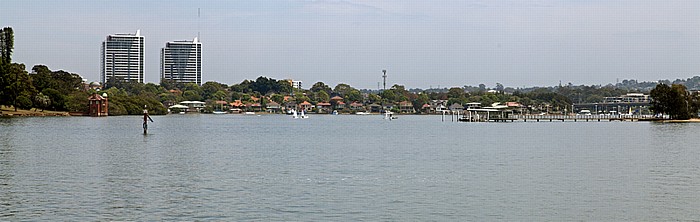
Port Jackson (Parramatta River)
| Parramatta River | Port Jackson |
01.12.2012 | New South Wales - Sydney 12: Port Jackson (Sydney Harbour)
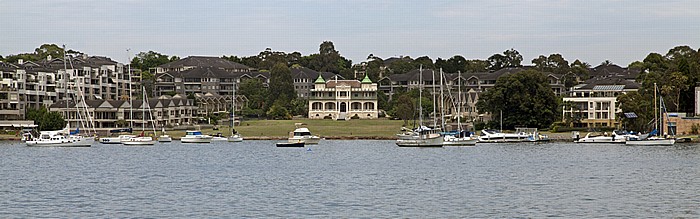
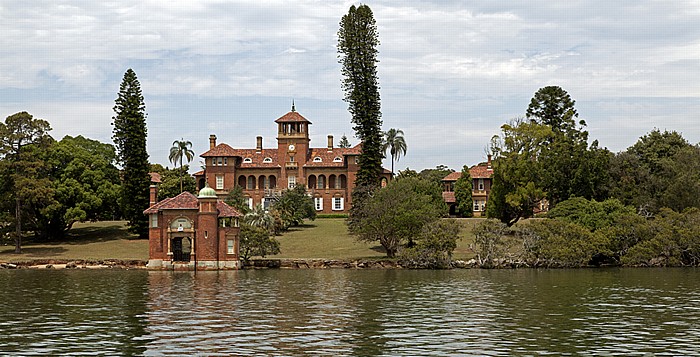
Port Jackson (Parramatta River), Thomas Walker Convalescent Hospital (Rivendell)
| Parramatta River | Port Jackson | Thomas Walker Convalescent Hospital |
01.12.2012 | New South Wales - Sydney 12: Port Jackson (Sydney Harbour)
Port Jackson (Parramatta River)
Ryde Bridge zwischen Rhodes (links) und Ryde.
| Parramatta River | Port Jackson | Rhodes | Ryde | Ryde Bridge |

01.12.2012 | New South Wales - Sydney 12: Port Jackson (Sydney Harbour)
Port Jackson (Parramatta River)
John Whitton Bridge (Eisenbahnbrücke) zwischen Rhodes (links) und Ryde.
| John Whitton Bridge | Parramatta River | Port Jackson | Rhodes | Ryde |

28.11.2012 | New South Wales - Sydney 13: Taronga Zoo 1
Blick vom Taronga Zoo auf Port Jackson und Central Business District (CBD)
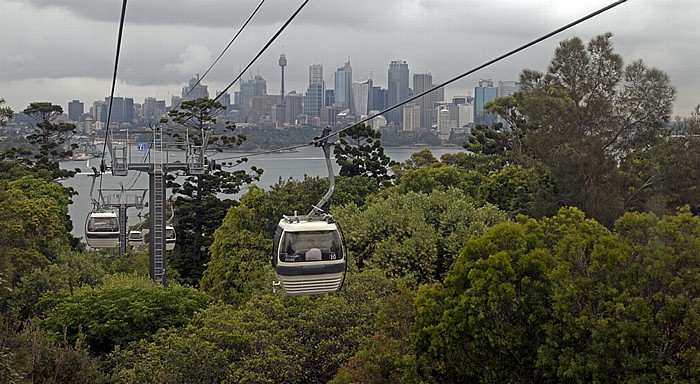
28.11.2012 | New South Wales - Sydney 13: Taronga Zoo 1
Blick vom Taronga Zoo auf Port Jackson und Central Business District (CBD)
28.11.2012 | New South Wales - Sydney 13: Taronga Zoo 1
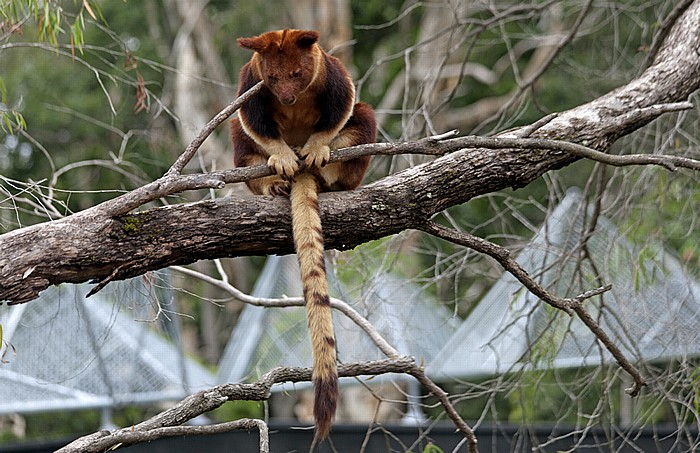
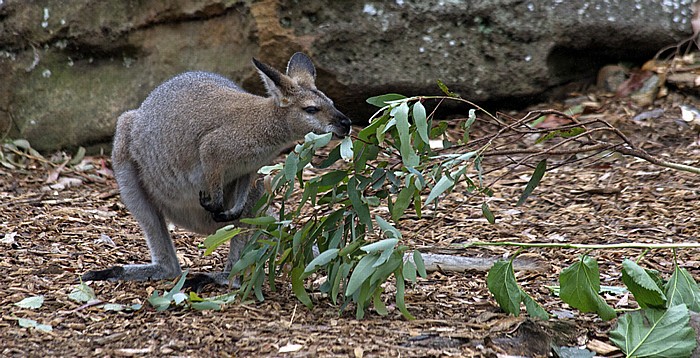
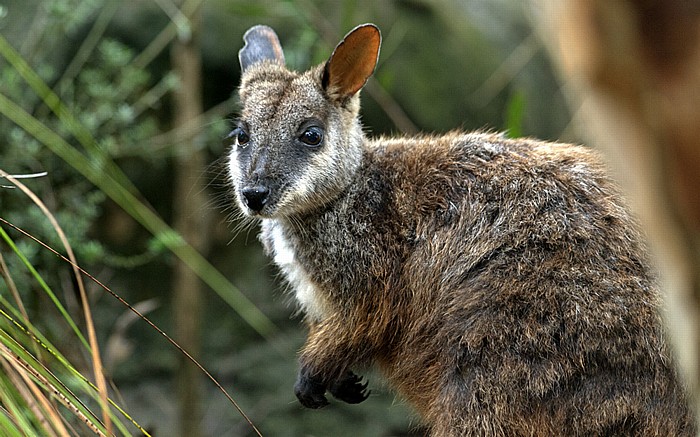
Taronga Zoo: Goodfellow-Baumkänguru (Dendrolagus goodfellowi)
| Taronga Zoo |

28.11.2012 | New South Wales - Sydney 13: Taronga Zoo 1
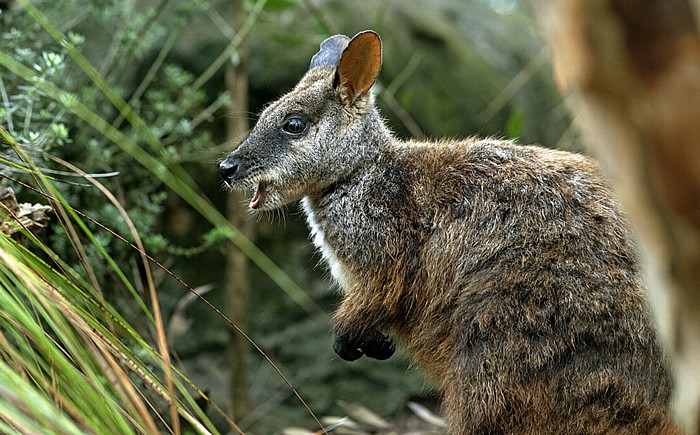
Taronga Zoo: Goodfellow-Baumkänguru (Dendrolagus goodfellowi)
| Taronga Zoo |
28.11.2012 | New South Wales - Sydney 13: Taronga Zoo 1
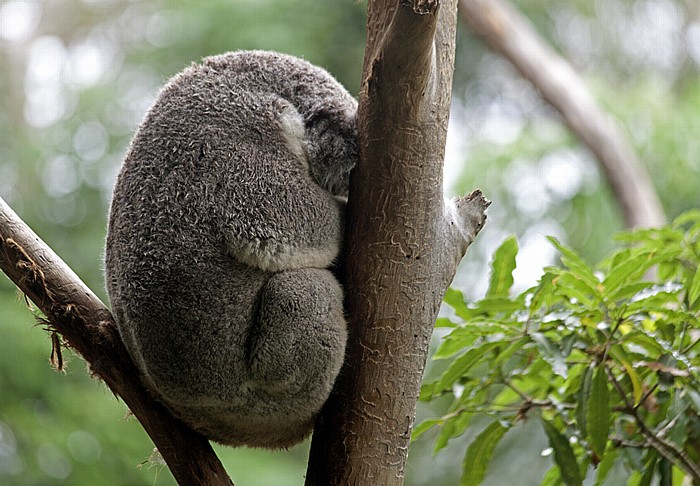
Taronga Zoo: Koala (Aschgrauer Beutelbär, Phascolarctos cinereus)
| Taronga Zoo |
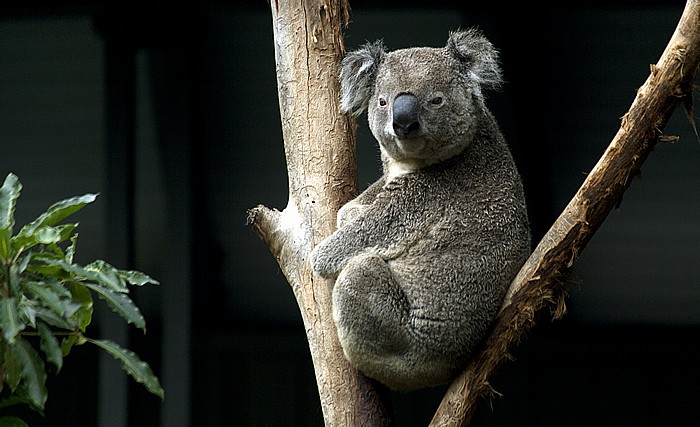
28.11.2012 | New South Wales - Sydney 13: Taronga Zoo 1
Taronga Zoo: Koala (Aschgrauer Beutelbär, Phascolarctos cinereus)
| Taronga Zoo |

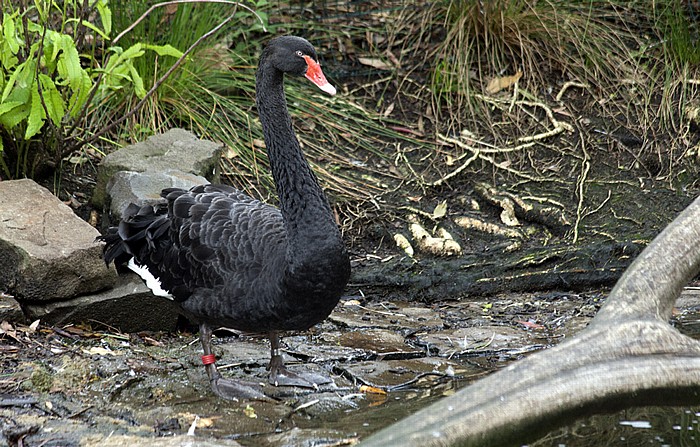
28.11.2012 | New South Wales - Sydney 13: Taronga Zoo 1
Taronga Zoo: Trauerschwan (Cygnus atratus)
| Taronga Zoo |
28.11.2012 | New South Wales - Sydney 13: Taronga Zoo 1
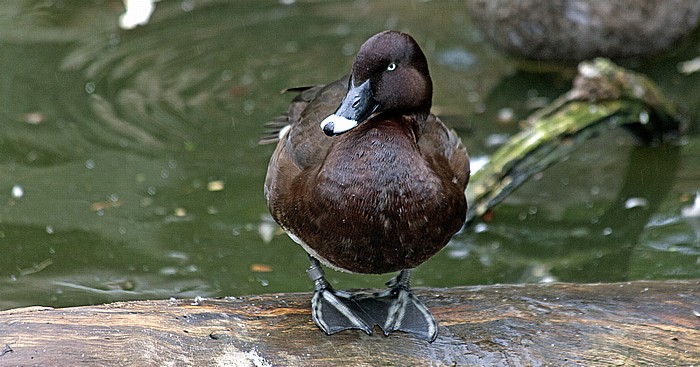
Taronga Zoo: Schnabeltier (Ornithorhynchus anatinus)
| Taronga Zoo |
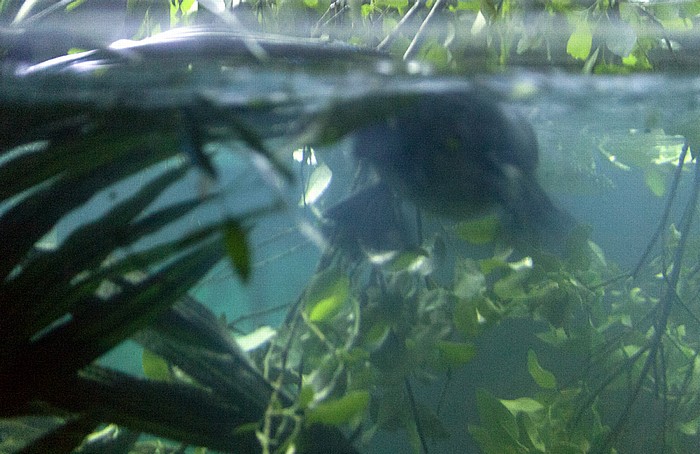
28.11.2012 | New South Wales - Sydney 13: Taronga Zoo 1
Taronga Zoo: Schnabeltier (Ornithorhynchus anatinus)
| Taronga Zoo |
28.11.2012 | New South Wales - Sydney 13: Taronga Zoo 1
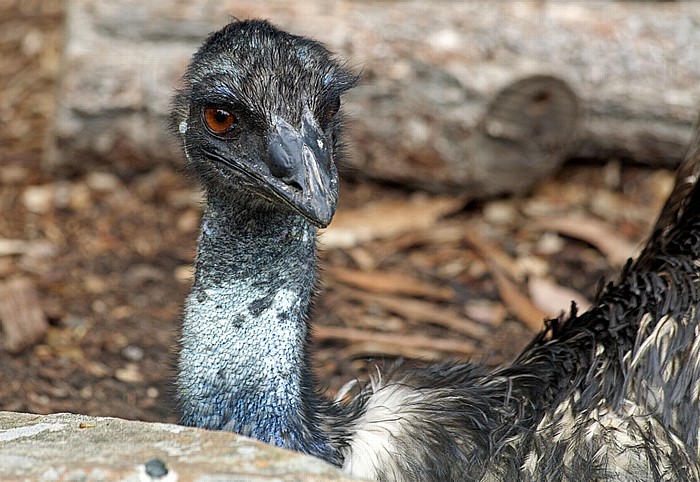
Taronga Zoo: Großer Emu (Dromaius novaehollandiae)
| Taronga Zoo |
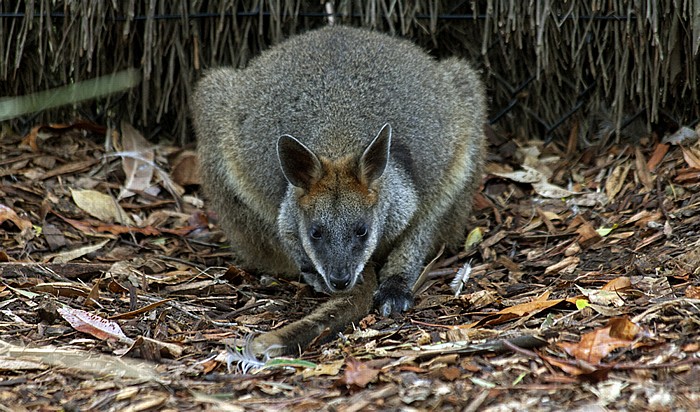
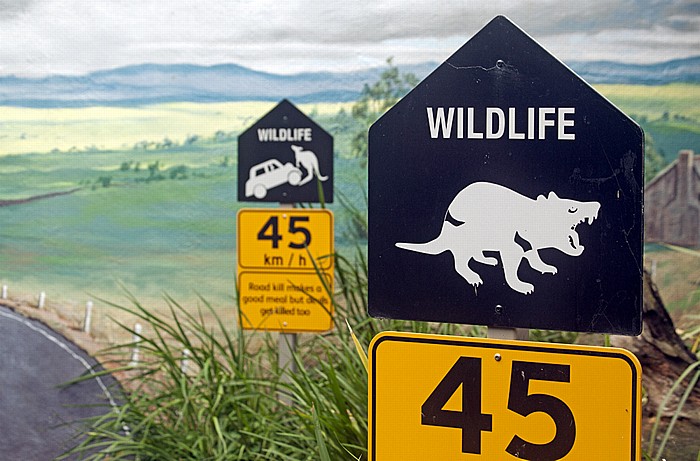
28.11.2012 | New South Wales - Sydney 14: Taronga Zoo 2
Taronga Zoo
Hinweis auf die häufigste Todesart des Beutelteufels (Tasmanischer Teufel, Sarcophilus harrisii).
| Taronga Zoo |
28.11.2012 | New South Wales - Sydney 13: Taronga Zoo 1
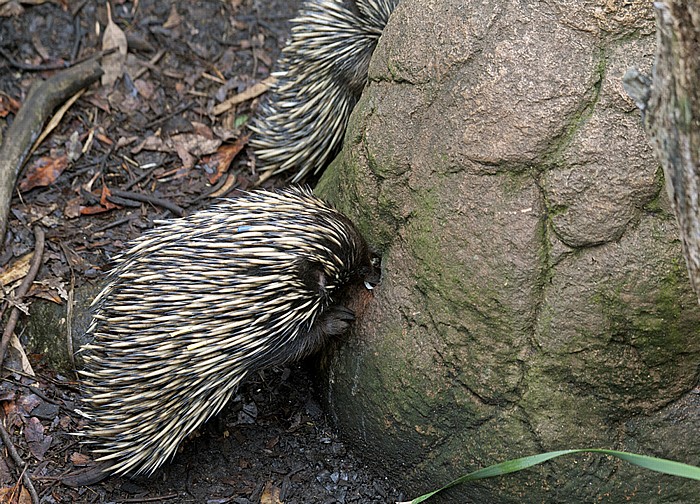
Taronga Zoo: Ameisenigel (Schnabeligel, Echidna, Tachyglossidae)
| Taronga Zoo |
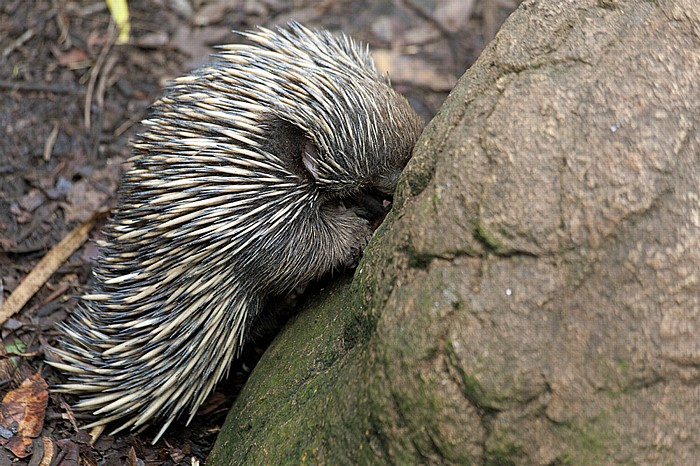
28.11.2012 | New South Wales - Sydney 13: Taronga Zoo 1
Taronga Zoo: Ameisenigel (Schnabeligel, Echidna, Tachyglossidae)
| Taronga Zoo |
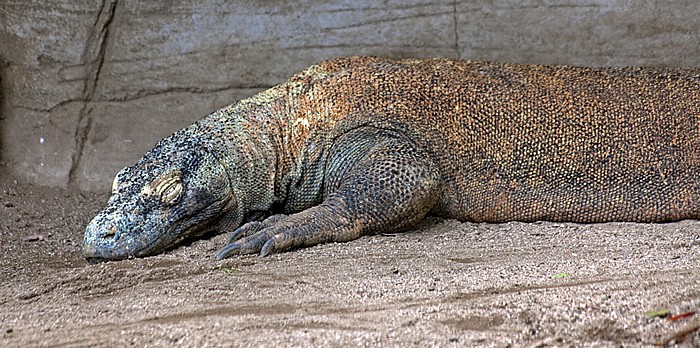
28.11.2012 | New South Wales - Sydney 13: Taronga Zoo 1
Taronga Zoo: Komodowaran (Komododrache, Varanus komodoensis)
| Taronga Zoo |
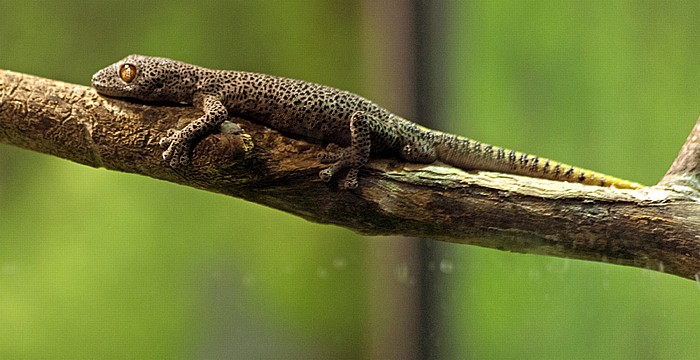
28.11.2012 | New South Wales - Sydney 13: Taronga Zoo 1
Taronga Zoo: Golden-tailed Gecko (Strophurus taenicauda)
| Taronga Zoo |
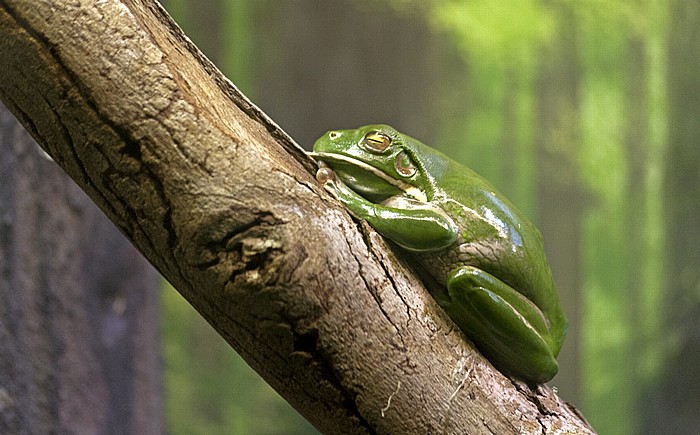
28.11.2012 | New South Wales - Sydney 13: Taronga Zoo 1
Taronga Zoo: Riesenlaubfrosch (Litoria infrafrenata)
| Taronga Zoo |
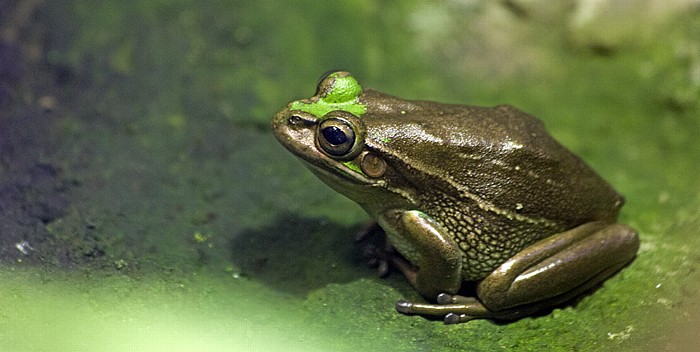
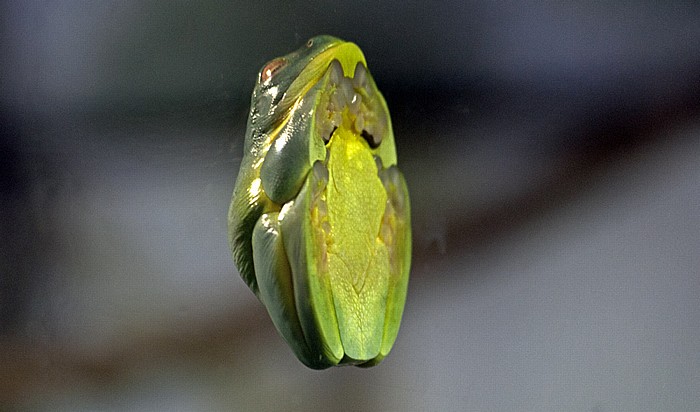
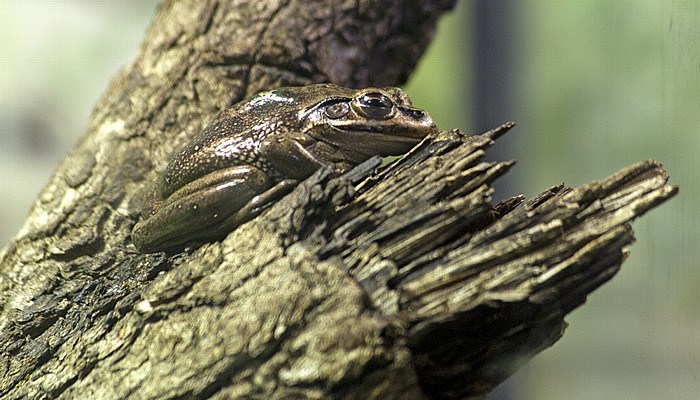
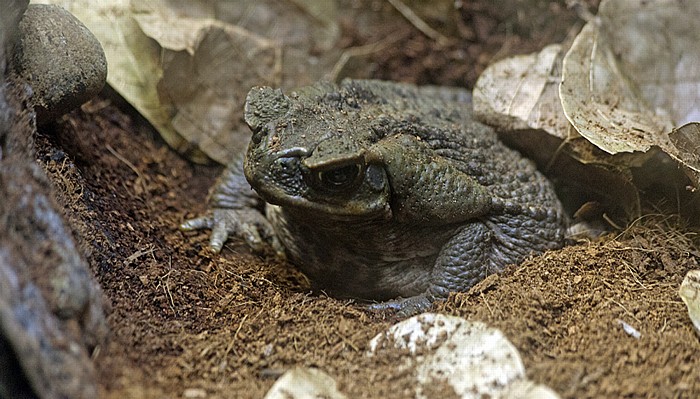
28.11.2012 | New South Wales - Sydney 13: Taronga Zoo 1
Taronga Zoo: Aga-Kröte (Riesenkröte, Bufo marinus)
| Taronga Zoo |
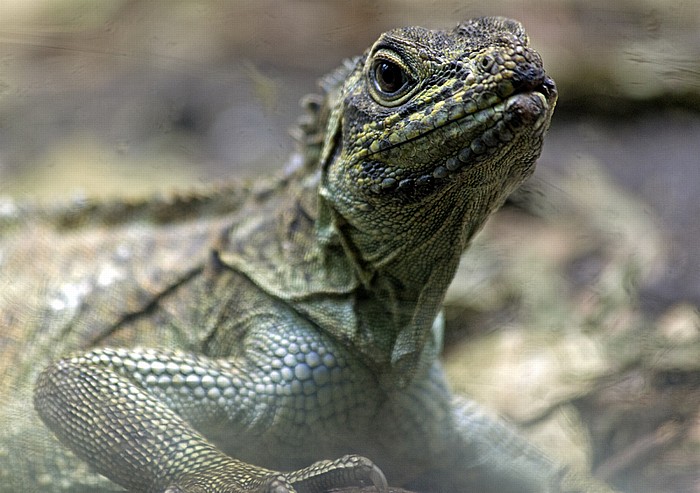
28.11.2012 | New South Wales - Sydney 13: Taronga Zoo 1
Taronga Zoo: Philippinische Segelechse (Hydrosaurus pustulatus)
| Taronga Zoo |
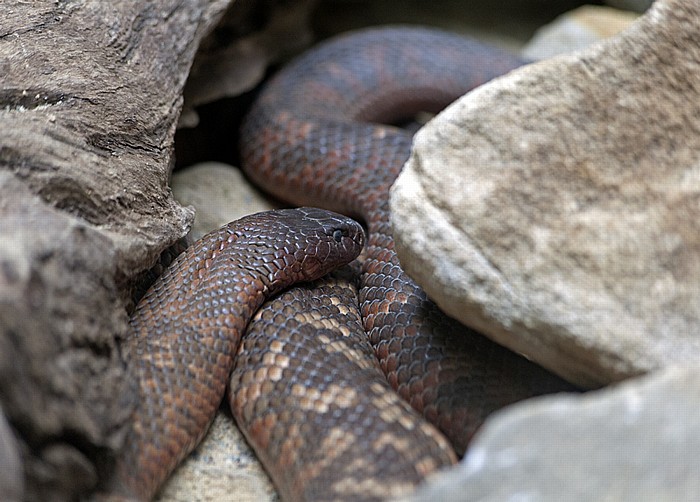
28.11.2012 | New South Wales - Sydney 13: Taronga Zoo 1
Taronga Zoo: Collett-Schwarzotter (Pseudechis colletti)
| Taronga Zoo |
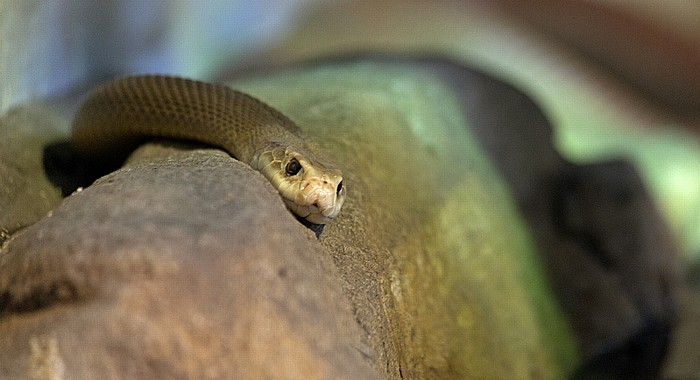
28.11.2012 | New South Wales - Sydney 13: Taronga Zoo 1
Taronga Zoo: Taipan (Oxyuranus scutellatus)
| Taronga Zoo |
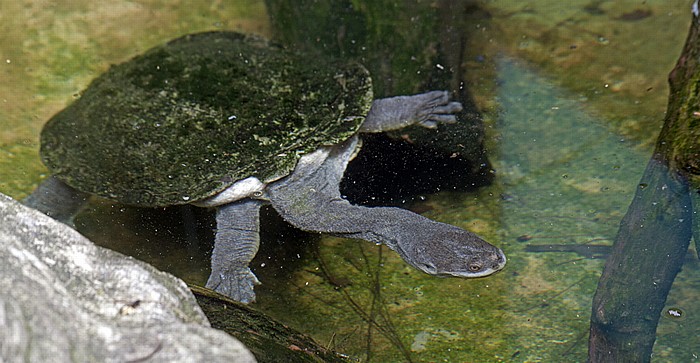
28.11.2012 | New South Wales - Sydney 13: Taronga Zoo 1
Taronga Zoo: Australische Schlangenhalsschildkröte (Chelodina longicollis)
| Taronga Zoo |
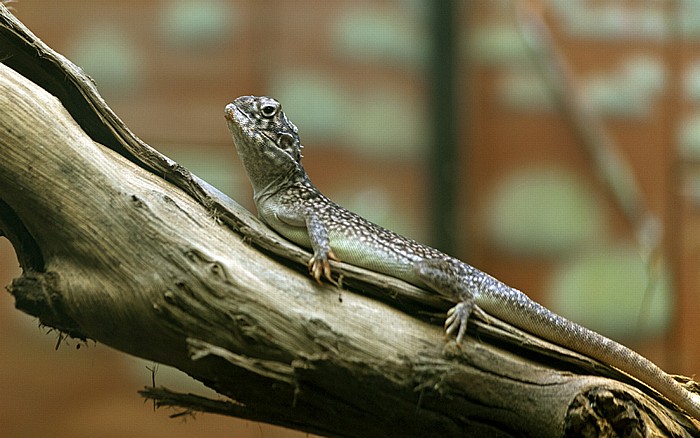
28.11.2012 | New South Wales - Sydney 13: Taronga Zoo 1
Taronga Zoo: Ctenophorus nuchalis
| Taronga Zoo |
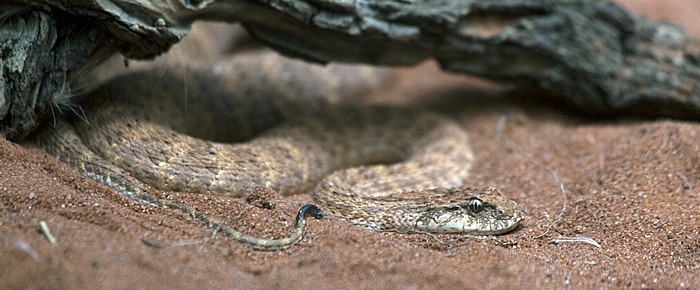
28.11.2012 | New South Wales - Sydney 13: Taronga Zoo 1
Taronga Zoo: Todesotter (Acanthophis pyrrhus)
| Taronga Zoo |

28.11.2012 | New South Wales - Sydney 13: Taronga Zoo 1
Taronga Zoo: Inlandtaipan (Oxyuranus microlepidotus)
| Taronga Zoo |
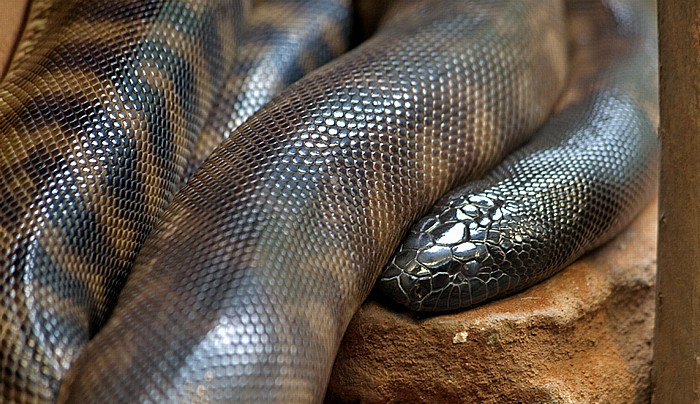
28.11.2012 | New South Wales - Sydney 13: Taronga Zoo 1
Taronga Zoo: Schwarzkopfpython (Aspidites melanocephalus)
| Taronga Zoo |
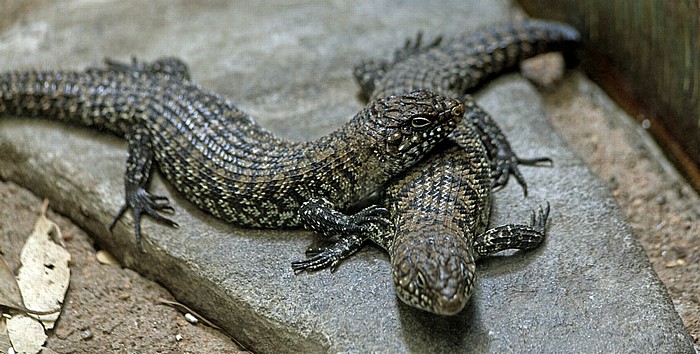
28.11.2012 | New South Wales - Sydney 13: Taronga Zoo 1
Taronga Zoo: Cunningham's Skinke (Egernia cunninghami)
| Taronga Zoo |

28.11.2012 | New South Wales - Sydney 13: Taronga Zoo 1
Taronga Zoo: Riesen-Stachelskink (Bellatorias major)
| Taronga Zoo |
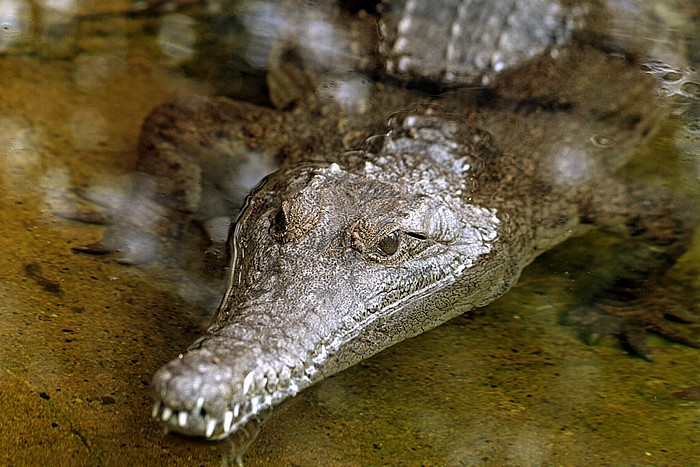
28.11.2012 | New South Wales - Sydney 13: Taronga Zoo 1
Taronga Zoo: Australien-Krokodil (Crocodylus johnsoni)
| Taronga Zoo |
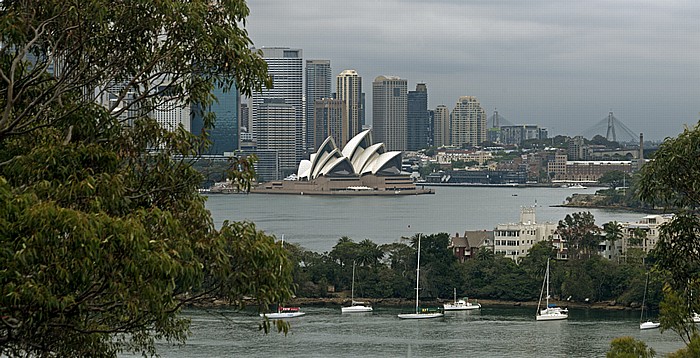
28.11.2012 | New South Wales - Sydney 14: Taronga Zoo 2
Blick vom Taronga Zoo auf Port Jackson, Sydney Opera House und Central Business District (CBD)
| Central Business District | Port Jackson | Sydney Opera House | Taronga Zoo |
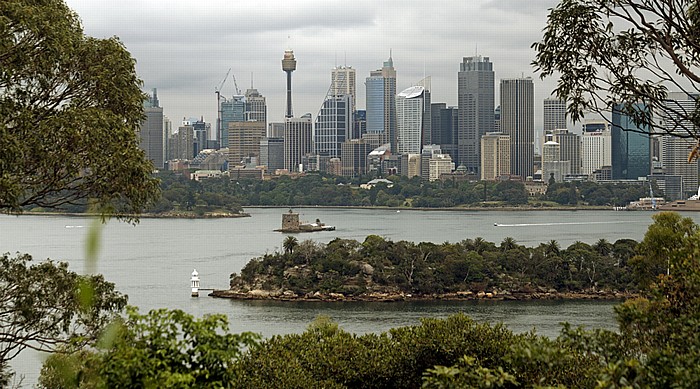
28.11.2012 | New South Wales - Sydney 14: Taronga Zoo 2
Blick vom Taronga Zoo auf Port Jackson und Central Business District (CBD)
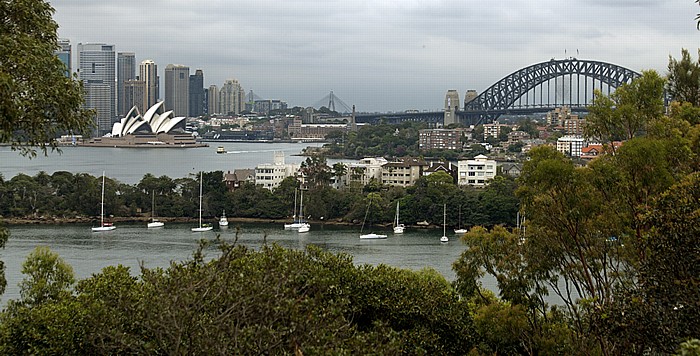
28.11.2012 | New South Wales - Sydney 14: Taronga Zoo 2
Blick vom Taronga Zoo auf Port Jackson, Central Business District (CBD), Sydney Opera House und Sydney Harbour Bridge
| Central Business District | Port Jackson | Sydney Harbour Bridge | Sydney Opera House | Taronga Zoo |
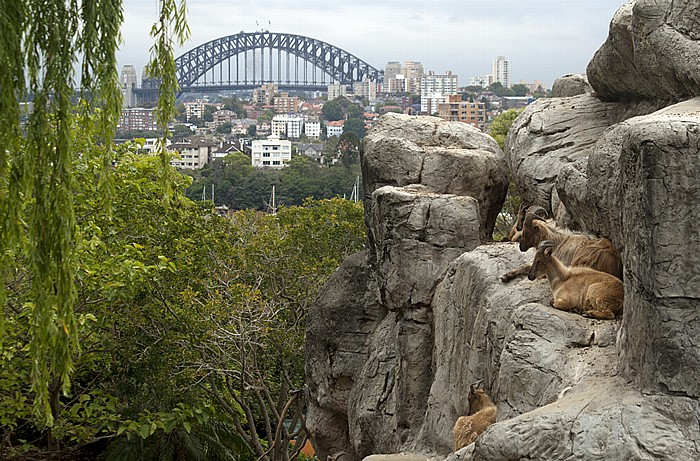
28.11.2012 | New South Wales - Sydney 14: Taronga Zoo 2
Taronga Zoo: Steinböcke
Im Hintergrund die Sydney Harbour Bridge.
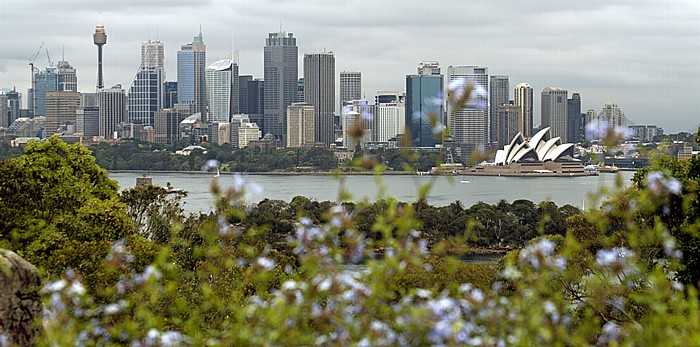
28.11.2012 | New South Wales - Sydney 14: Taronga Zoo 2
Blick vom Taronga Zoo auf Port Jackson und Central Business District (CBD)
Rechts das Sydney Opera House.
| Central Business District | Port Jackson | Sydney Opera House | Taronga Zoo |

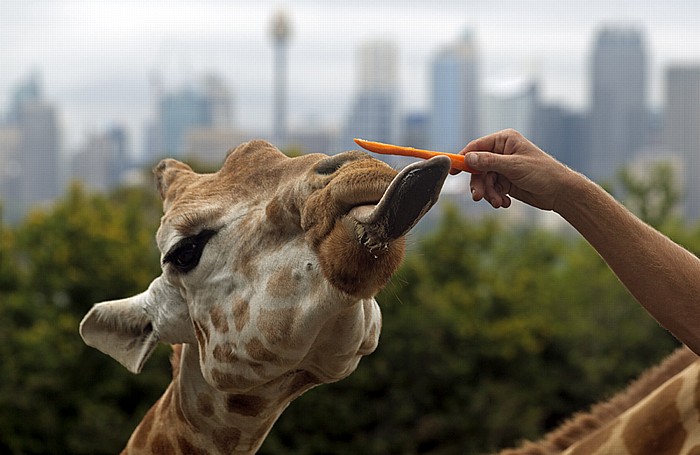


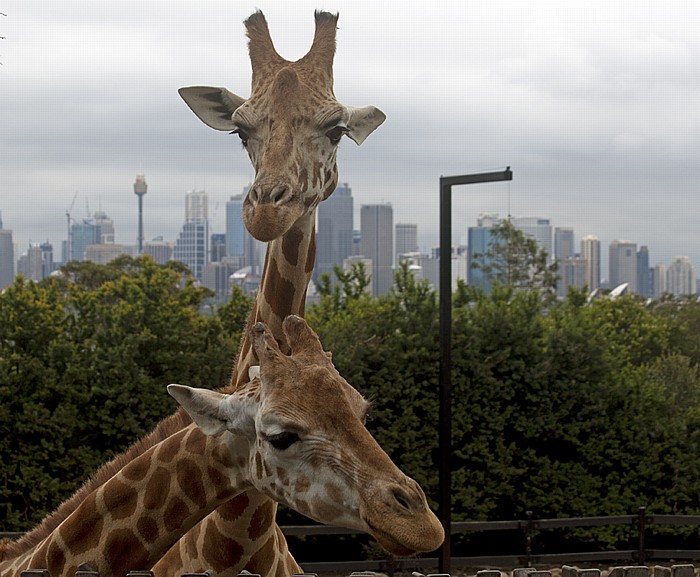
28.11.2012 | New South Wales - Sydney 14: Taronga Zoo 2
Taronga Zoo: Giraffen
Im Hintergrund der Central Business District (CBD).
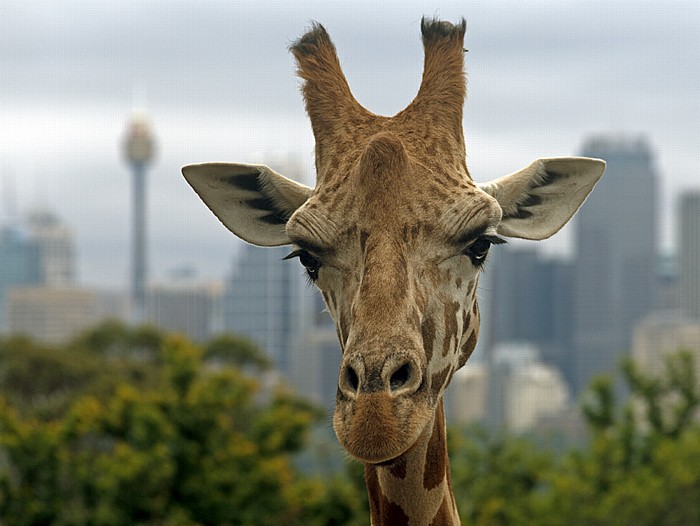
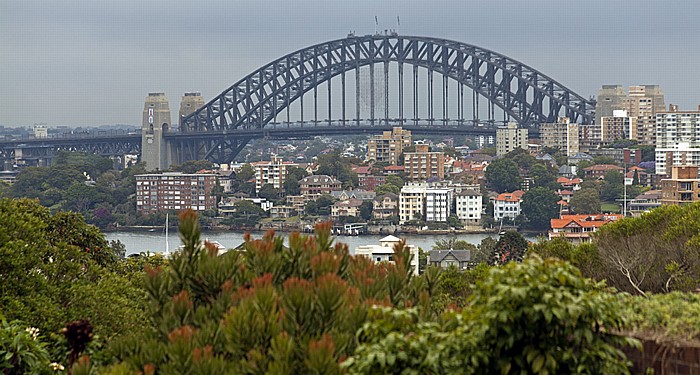
28.11.2012 | New South Wales - Sydney 14: Taronga Zoo 2
Blick vom Taronga Zoo auf die Sydney Harbour Bridge.
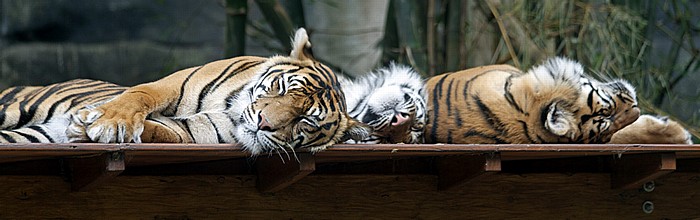

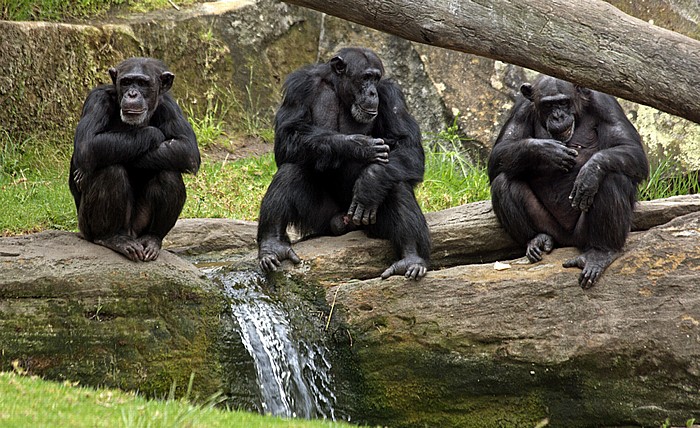
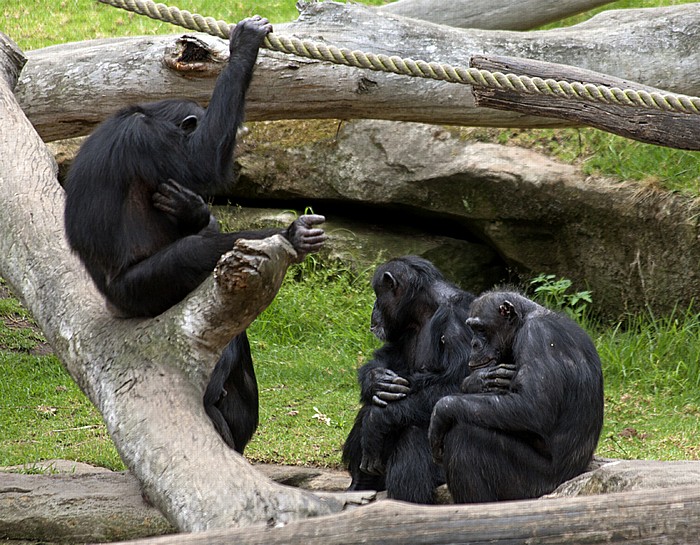
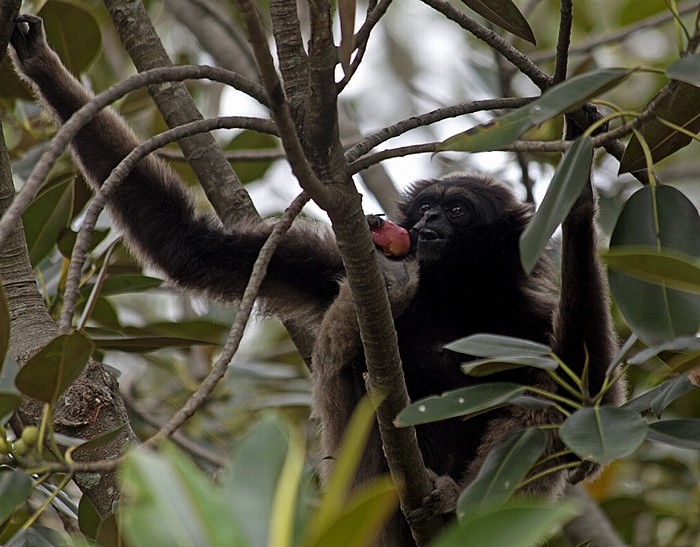
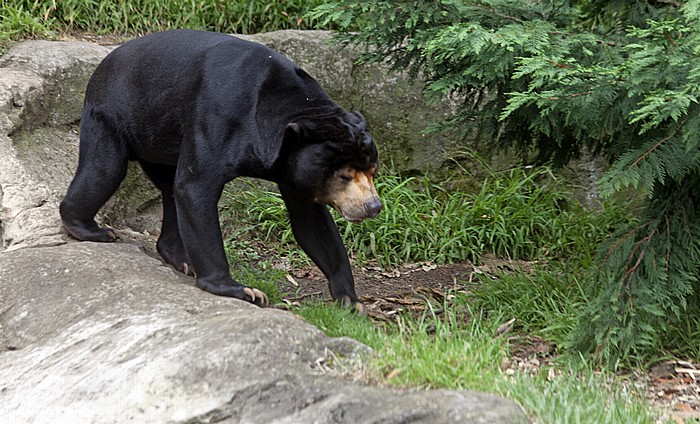
28.11.2012 | New South Wales - Sydney 14: Taronga Zoo 2
Taronga Zoo: Malaienbär (Sonnenbär, Helarctos malayanus)
| Taronga Zoo |
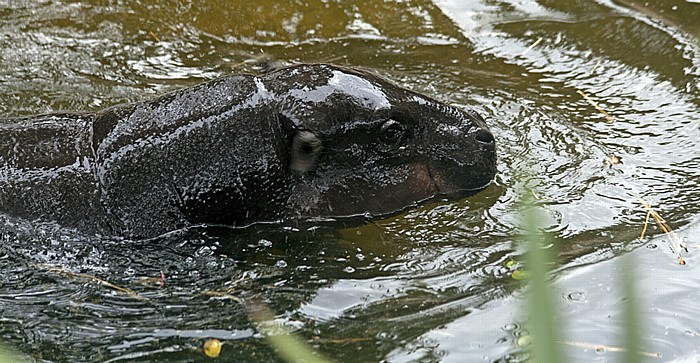
28.11.2012 | New South Wales - Sydney 14: Taronga Zoo 2
Taronga Zoo: Flusspferd (Hippopotamus amphibius)
| Taronga Zoo |
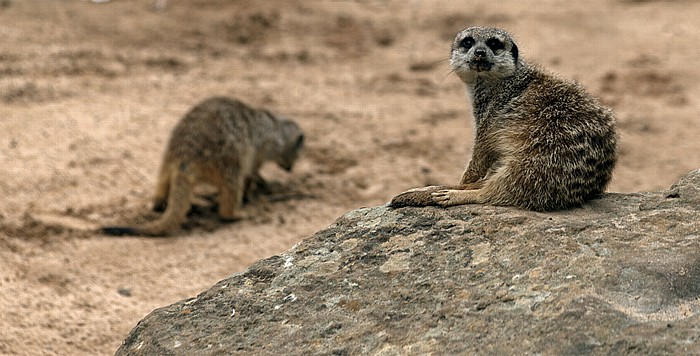
28.11.2012 | New South Wales - Sydney 14: Taronga Zoo 2
Taronga Zoo: Erdmännchen (Suricata suricatta)
| Taronga Zoo |
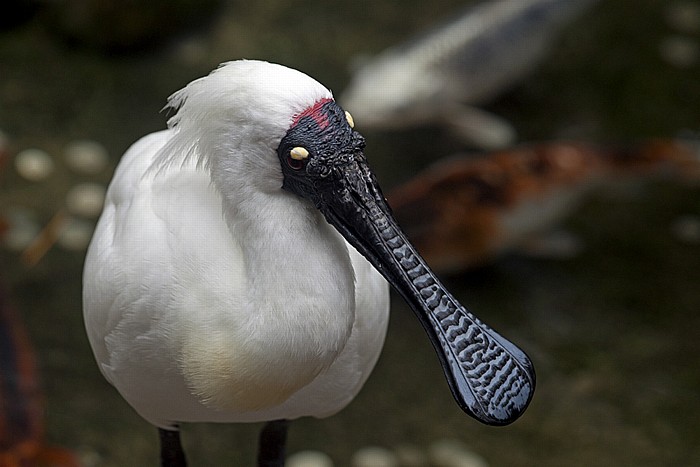
28.11.2012 | New South Wales - Sydney 14: Taronga Zoo 2
Taronga Zoo: Löffler (Löffelreiher, Platalea leucorodia)
| Taronga Zoo |
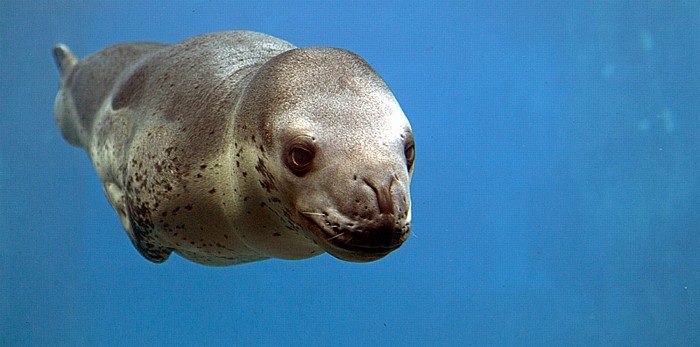
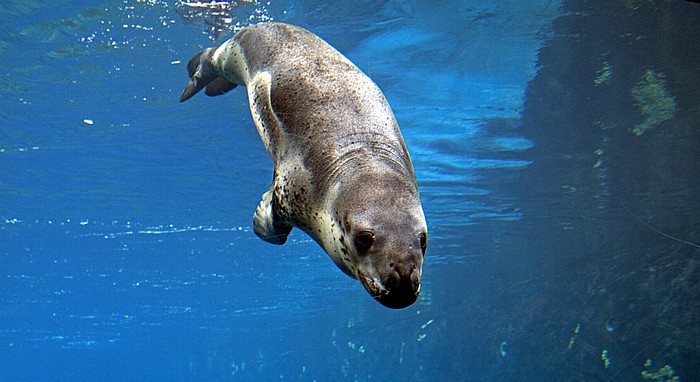
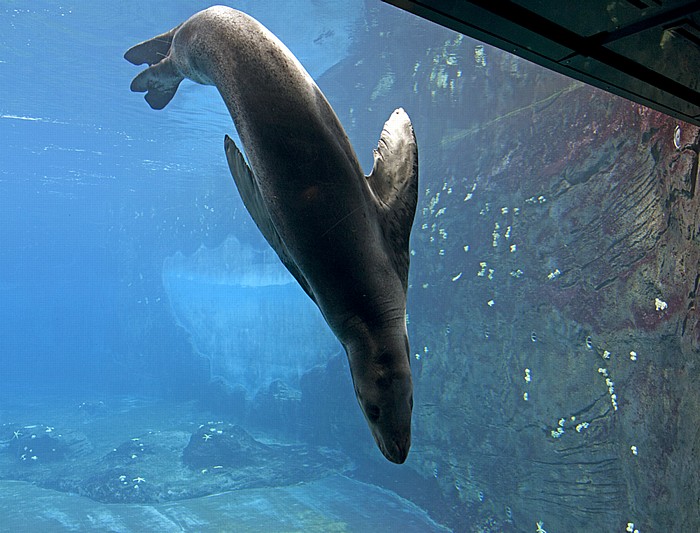
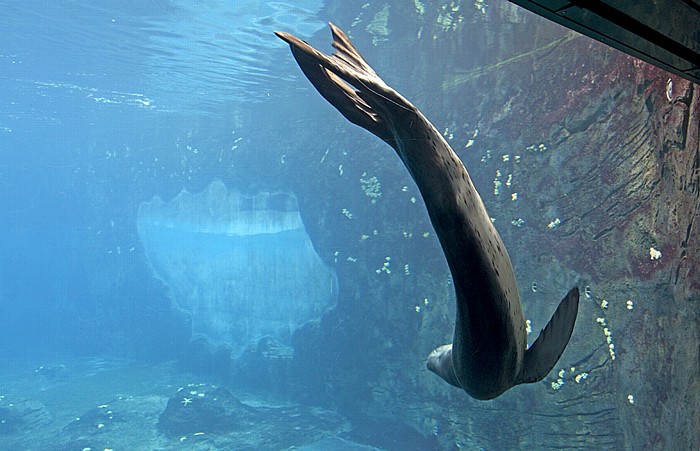
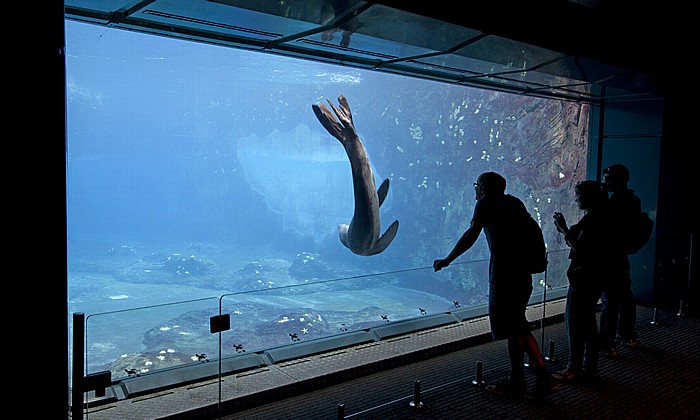

11.11.2012 | New South Wales - Sydney 1: Von oben
Blick vom Sydney Tower: Central Business District (CBD)
Panorama (bestehend aus 28 Einzelaufnahmen, 24632 x 3773 Pixel Originalgröße).

27.11.2012 | New South Wales - Sydney 2: Sydney Opera House
Rund um Sydney Cove
Circular Quay, Central Business District (CBD), Sydney Cove, The Rocks, Sydney Harbour Bridge, Port Jackson, North Shore, Sydney Opera House. Panorama (bestehend aus 10 Einzelaufnahmen, 18834 x 3309 Pixel Originalgröße).
| Central Business District | Circular Quay | North Shore | Port Jackson | Sydney Cove | Sydney Harbour Bridge | Sydney Opera House | The Rocks |

28.11.2012 | New South Wales - Sydney 12: Port Jackson (Sydney Harbour)
Port Jackson
In der Bildmitte der Central Business District (CBD), das Sydney Opera House und die Sydney Harbour Bridge. Panorama (bestehend aus 16 Einzelaufnahmen, 29058 x 2929 Pixel Originalgröße).
| Central Business District | Port Jackson | Sydney Harbour Bridge | Sydney Opera House |

28.11.2012 | New South Wales - Sydney 13: Taronga Zoo 1
Blick vom Taronga Zoo
Port Jackson, Central Business District (CBD), Sydney Opera House, Sydney Harbour Bridge und North Shore. Panorama (bestehend aus 9 Einzelaufnahmen, 21771 x 3510 Pixel Originalgröße).
| Central Business District | North Shore | Port Jackson | Sydney Harbour Bridge | Sydney Opera House | Taronga Zoo |
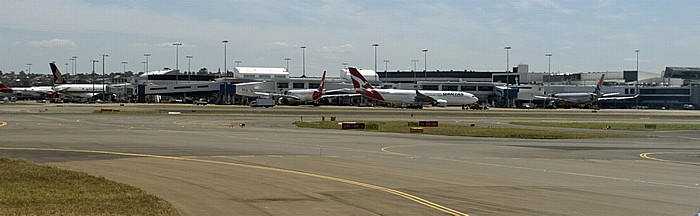
12.11.2012 | Flug Sydney - Cairns
Kingsford Smith International Airport: International Terminal
Flug Sydney - Cairns.
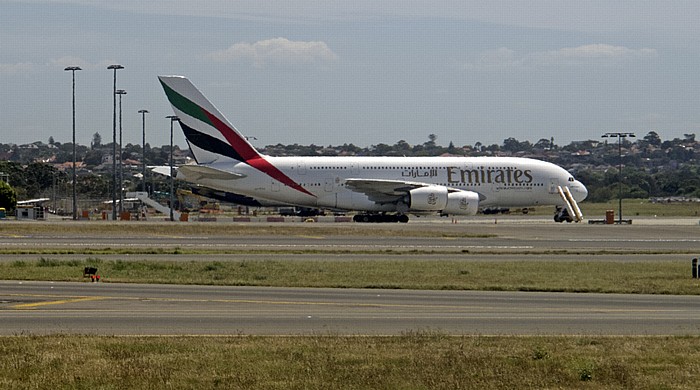
12.11.2012 | Flug Sydney - Cairns
Kingsford Smith International Airport: Airbus A380 von Emirates
Flug Sydney - Cairns.
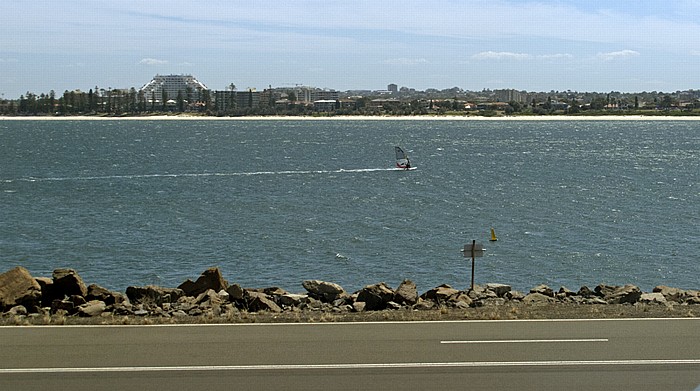
12.11.2012 | Flug Sydney - Cairns
Kingsford Smith International Airport / Botany Bay
Flug Sydney - Cairns.
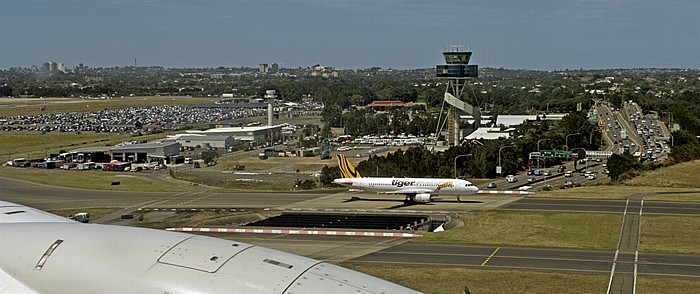
12.11.2012 | Flug Sydney - Cairns
Kingsford Smith International Airport
Luftbild. Flug Sydney - Cairns.
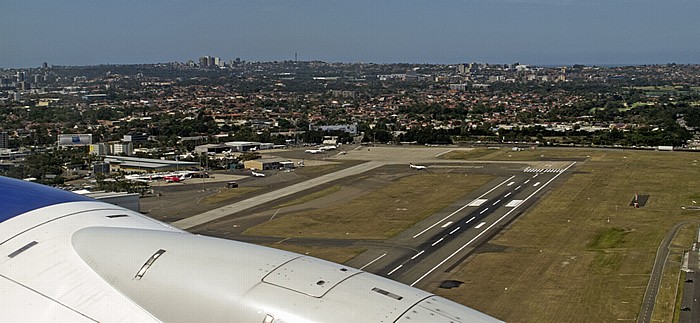
12.11.2012 | Flug Sydney - Cairns
Kingsford Smith International Airport, Mascot
Luftbild. Flug Sydney - Cairns.
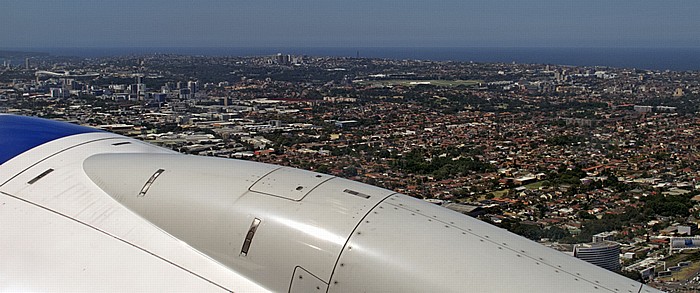
12.11.2012 | Flug Sydney - Cairns
Eastern Suburbs
Luftbild. Flug Sydney - Cairns.
| Eastern Suburbs |
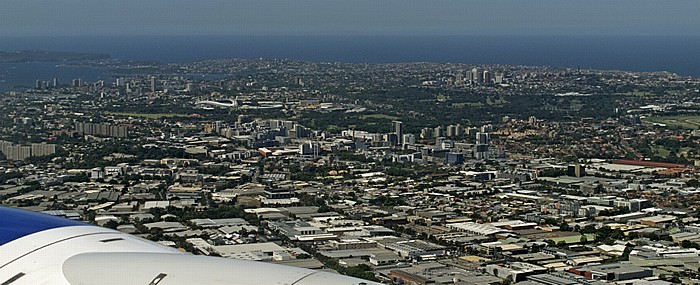
12.11.2012 | Flug Sydney - Cairns
Eastern Suburbs
Luftbild. Flug Sydney - Cairns. In der Bildmitte der Centennial Park, links davon Moore Park mit Sydney Football Stadium (Allianz Stadium, links) und Sydney Cricket Ground.
| Centennial Park | Eastern Suburbs | Moore Park | Sydney Cricket Ground | Sydney Football Stadium |
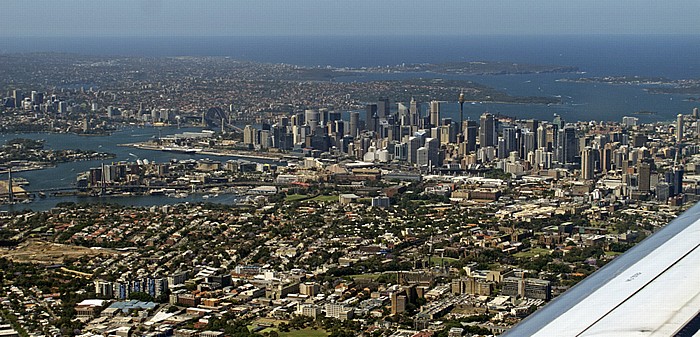
12.11.2012 | Flug Sydney - Cairns
Port Jackson (Sydney Harbour) und Central Business District (CBD)
Luftbild. Flug Sydney - Cairns. Oberhalb des CBD North Shore und Northern Beaches. Im Hintergrund der Pazifische Ozean.
| Central Business District | North Shore | Northern Beaches | Port Jackson |
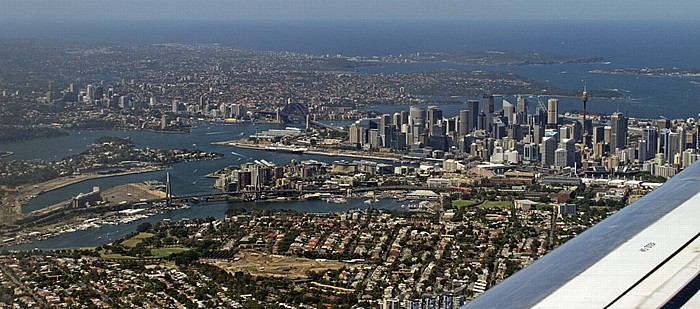
12.11.2012 | Flug Sydney - Cairns
Port Jackson (Sydney Harbour) und Central Business District (CBD)
Luftbild. Flug Sydney - Cairns. Oberhalb des CBD North Shore und Northern Beaches. Im Hintergrund der Pazifische Ozean.
| Central Business District | North Shore | Northern Beaches | Port Jackson |
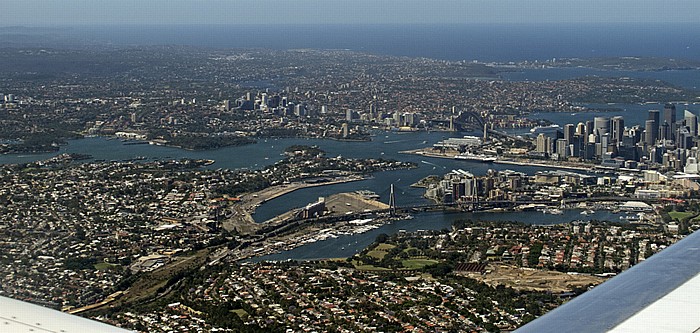
12.11.2012 | Flug Sydney - Cairns
Port Jackson (Sydney Harbour), Inner West
Luftbild. Flug Sydney - Cairns. Rechts der Central Business District (CBD). Oberhalb von Port Jackson die Northern Suburbs und North Shore, darüber die Northern Beaches und der Pazifische Ozean.
| Central Business District | Inner West | North Shore | Northern Beaches | Northern Suburbs | Port Jackson |
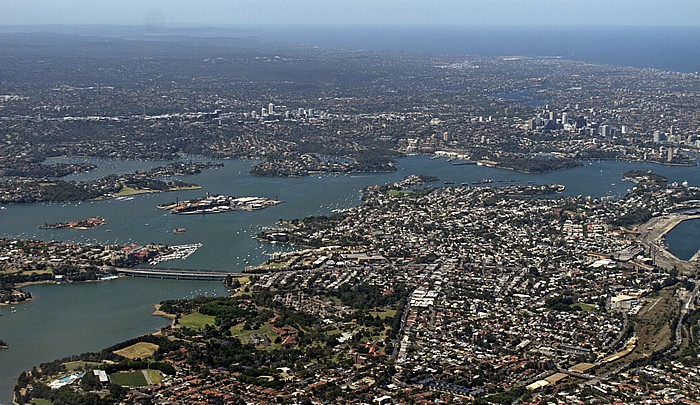
12.11.2012 | Flug Sydney - Cairns
Port Jackson (Sydney Harbour), Inner West
Luftbild. Flug Sydney - Cairns. Oberhalb von Port Jackson die Northern Suburbs und North Shore, darüber die Northern Beaches und der Pazifische Ozean.
| Inner West | North Shore | Northern Beaches | Northern Suburbs | Port Jackson |
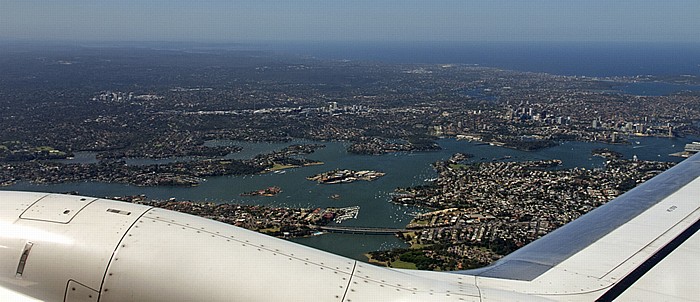
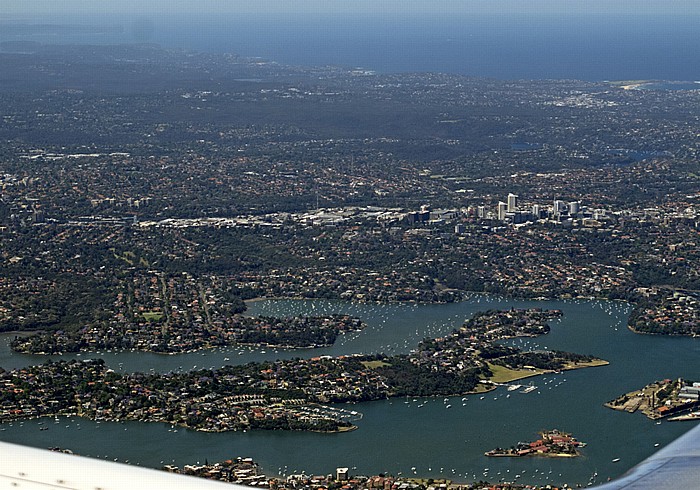
12.11.2012 | Flug Sydney - Cairns
Port Jackson (Sydney Harbour), Northern Suburbs
Luftbild. Flug Sydney - Cairns. Oben der Pazifische Ozean.
| Northern Suburbs | Port Jackson |
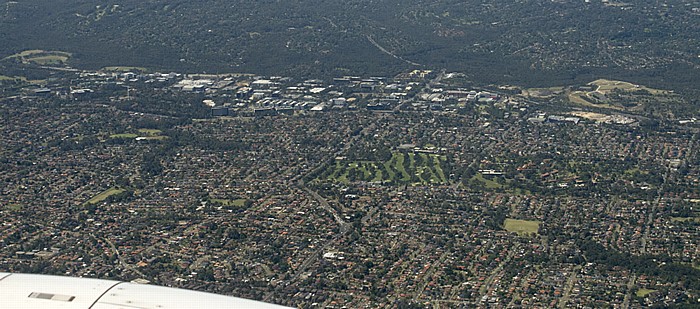
- Abbotsford
- Abbotsford Bay
- Abbotsford Cove Foreshore Park
- Abbotsford House
- Admiralty House
- Allphones Arena
- AMP Centre
- Andrew "Boy" Charlton Pool
- Angel Place
- ANZ Stadium
- ANZAC Bridge
- ANZAC War Memorial
- ANZAC-Kenotaph
- Archibald Fountain
- Argyle Cut
- Argyle Place
- Argyle Street
- Art Gallery of New South Wales
- Arthur-Phillip-Denkmal
- Athletic Centre
- Aurora Place
- Australia Square
- Australia Square Tower
- Australian Hotel
- Australian Museum
- Australian National Maritime Museum
- AWA Tower
- Balmain
- Barangaroo
- Bathurst Street
- Bennelong Apartments
- Bent Street
- Birchgrove
- BNP Paribas Centre
- Bondi
- Bondi Beach
- Bondi Icebergs Pool
- Botany Bay
- Bradfield Highway
- Breakfast Point
- Bridge Street
- Bronte
- Bronte Beach
- Burrows Park
- Captain-Cook-Denkmal
- Centennial Park
- Central Business District
- Central Railway Station
- Chifley Tower
- Circular Quay
- Circular Quay Ferry Wharf
- Circular Quay Railway Station
- Citigroup Centre
- Clark Island
- Clovelly
- Clovelly Bay
- Clovelly Beach
- Cockatoo Island
- Cockle Bay
- Colonial State Bank
- Commsec Tower
- Coogee
- Coogee Beach
- Cook and Phillip Park
- Customs House
- Darling Harbour
- Darling Park
- Dawes Point
- Department of Lands
- Deutsche Bank Place
- Downing Centre
- Drummoyne
- Drummoyne Oval
- Eastern Suburbs
- Elizabeth Bay
- Farm Cove
- Finger Wharf
- Five Dock Bay
- Fort Denison
- Garden Island
- Garrison Church
- Gateway Plaza
- General Post Office
- George Street
- Gladesville Bridge
- Glebe Island
- Goat Island
- Gordons Bay
- Governor Macquarie Tower
- Governor Phillip Tower
- Harbourside Shopping Centre
- Hard Rock Cafe
- Haslams Creek
- Haslams Creek Marker
- Hickson Road
- Hilton Sydney
- Homebush Bay
- Homebush Street Circuit
- Hunter Park
- Huntleys Point
- Hyde Park
- Hyde Park Barracks
- Hyde Park Obelisk
- ibis Hotel
- IMAX Theatre
- Inner West
- Irish Famine Memorial
- John Whitton Bridge
- Johnstons Bay
- Kendall Bay
- King Street Wharf
- Kingsford Smith International Airport
- Kirribilli
- Kirribilli Point
- Land Titles Office
- Lavender Bay
- Lumière Residences
- Luna Park
- Mackenzies Bay
- Macquarie Bank
- Macquarie Street
- Maritime Trade Towers
- Market Street
- Marks Park
- Martin Place
- Mascot
- Mayor John Hardie Memorial
- Metro Monorail
- Metro Monorail Galeries Victoria Station
- Millers Point
- Milsons Point
- MLC Centre
- Moore Park
- Mrs Macquarie Chair
- Mrs Macquarie Point
- Museum Railway Station
- National Australia Bank
- National Mutual Centre
- Newington
- North Shore
- North Sydney Council
- Northern Beaches
- Northern Suburbs
- Novotel on Darling Harbour
- Observatory Hill
- Old Supreme Court Building
- Olympic Park Railway Station
- One Shelley Street
- Opera Bar
- Overseas Passenger Terminal
- Parliament House
- Parramatta River
- Pitt Street
- Pitt Street Mall
- Pitt Street Uniting Church
- Port Jackson
- Pyrmont
- Pyrmont Bridge
- Queen Victoria Building
- Queen's Square
- Queen-Victoria-Denkmal
- Rhodes
- Rock Pool
- Ron Bennett Menswear
- Royal Botanic Gardens
- Ryde
- Ryde Bridge
- Saint Mary's Cathedral
- Sandringham Gardens
- Shark Island
- South Head Peninsula
- Spiral Fountain
- St Andrew's Cathedral
- St Andrew's Cathedral School
- St James' Church
- St Martins Tower
- St Stephen's Uniting Church
- State Library of New South Wales
- Suncorp Place
- Susannah Place Museum
- Sussex Street
- Sydney Conservatorium of Music
- Sydney Convention and Exhibition Centre
- Sydney Cove
- Sydney Cricket Ground
- Sydney Football Stadium
- Sydney Harbour Bridge
- Sydney Hospital
- Sydney International Aquatic Centre
- Sydney Mint
- Sydney Observatory
- Sydney Olympic Park
- Sydney Opera House
- Sydney Tower
- Sydney Town Hall
- Tamarama
- Tamarama Beach
- Taronga Zoo
- The Domain
- The Dome
- The Dymocks Building
- The Rocks
- The Sussex Hotel
- Thomas Walker Convalescent Hospital
- Vaucluse
- Waverley Cemetery
- Wedding Cake Island
- Western Distributor Freeway
- Westfield Sydney
- Westpac Bank Building
- Woolloomooloo
- Woolloomooloo Bay
- World Square
- World Tower